Death Dealer

by smathys84

My motivation

Ever since I bought this statue, I disliked the painting and some parts of the sculpting/decision making.

For example, why is his head so much angled, like he says: oh look, a penny! And the spike on his helmet is very crooked. The holes for the eyes in the helmet are so tiny and uneven. Why does he have a kind of mini skirt in the front that would barely cover his private parts?

And the paint of the base looks like its all the same dark color. 

Original Statue

Before Starting a project, I always write down a todo list. This list will likely get longer as you find more and more stuff you want to do/change.

  • Put LEDs into his eyes
    On/Off switch in the base with a power plug
  • Reshape the eyes
  • New spike on helmet
  • More material on the skirt part in the front
  • LED cover on backside of the helmet?
  • Repaint the whole thing
  • Redo some stuff on the base

To start things off, I beheaded him and played around to find the new pose for the head. I wanted him to look more forward, but still a little down, since he stands on a rock.

Beheaded...
Finding the new position
Tiny eyes and crooked spike

To make wiring and painting easier, I took off the robe. Always remember, there is almost nothing that can’t get fixed. Right when I said that to myself, I broke a piece off of the robe. 🙂

But I kind of expected this to happen, so no big deal. This will be an easy fix.

Broken robe

I drilled holes from the front to the back with a 2mm drill, then with a 4.5mm from the back to the front (not all the waythrough), so the LED would sit snug and the eye wouldn’t look like a giant hole.

Oh and I cut off the abomination (spike).

2mm holes from the front
4.5mm holes from the back

Testfitting the LED was important. Not just to find the depth of the LEDs, but the needed cable length for later. I didn’t want the LED to show, when the light was off. 

Testfitting the LEDs

And the first glow test…

Pretty nice for the first try. But in real, they looked a lot weaker. I needed better LEDs/resistor. 

LED test
LED test

I was powering the LEDs with a 6V power adapter (adjustable from 3 up to 12V). I was not sure if I should go to 12V and upgrade the resistor. At the beginning I wanted to have a plug, but thats kinda annoying to have when displayed somewhere.

Further I was thinking about what to do when one or both LEDs break. So instead of closing the head completely, I planned creating a kind of cover with a magnet in it, so in case of a LED failure, I would be able to pop it off and replace the LEDs. 

To do so, I cut off a big junk of the back of the head and drilled a hole for the magnet. I use very strong magnets, so this should be no problem with just one. To cut off, I used a dremel.

To make sure the cables would stay in place, I dremeled a guide for them. This way the cables wont get bent or pinched. 

Space for the Head Cap
magnet and cable guide

Next up was the Cap itself. To get a good fit, I woud need to put Apoxie Sculpt all over the open space. To prevent the apoxie to get into all the guides and holes, I filled it with not hardening clay.

After that I put clingfilm over it. The Apoxie Sculpt won’t stick to it. 

Now I could remodel the back of the helmet and adding details. While sculpting, I reshaped the eyes and sanded everything down as soon as the apoxie dried. 

Making of Head Cap and eyes

I decided to go with more powerful LEDs. With those you are able to see the red eyes even in daylight. Not like a flashlight, but a very nice and demonic glow.

New LEDs

Always make sure your customizations are strong and can take a small beating. You never know…

I drilled a hole and but a steel rod into the torso and Head to help holding the head. 

I glued the head to the rod in the desired position. This way I was making sure to keep the position when resculpting the details on the neck. 

Steel rod for stabilization
Head glued onto the torso

For the next step I dremeled out the path for the wires and cut out a hole of the base to access the battery. I chose to go with a 9V battery.

I remodeled the cover for the battery with 4 magnets. I had to increase the size of the tree (handle for the cover), because of the strength of the magnets.

Mistakes happen. Don’t deny them, learn from them. 

I always planed to prime the head and painting the inside of the eyes before installing the wires, but when I was working on the soldering I completely forgot everything and glued it in place…with super strong glue…

Guides for the wires dremeled
Base transformation
Check to see if everything still works. Better safe than sorry

After multiple testfittings, I glued in the wires, filled the guide with apoxie sculpt and resculpted the details. 

Wires in place

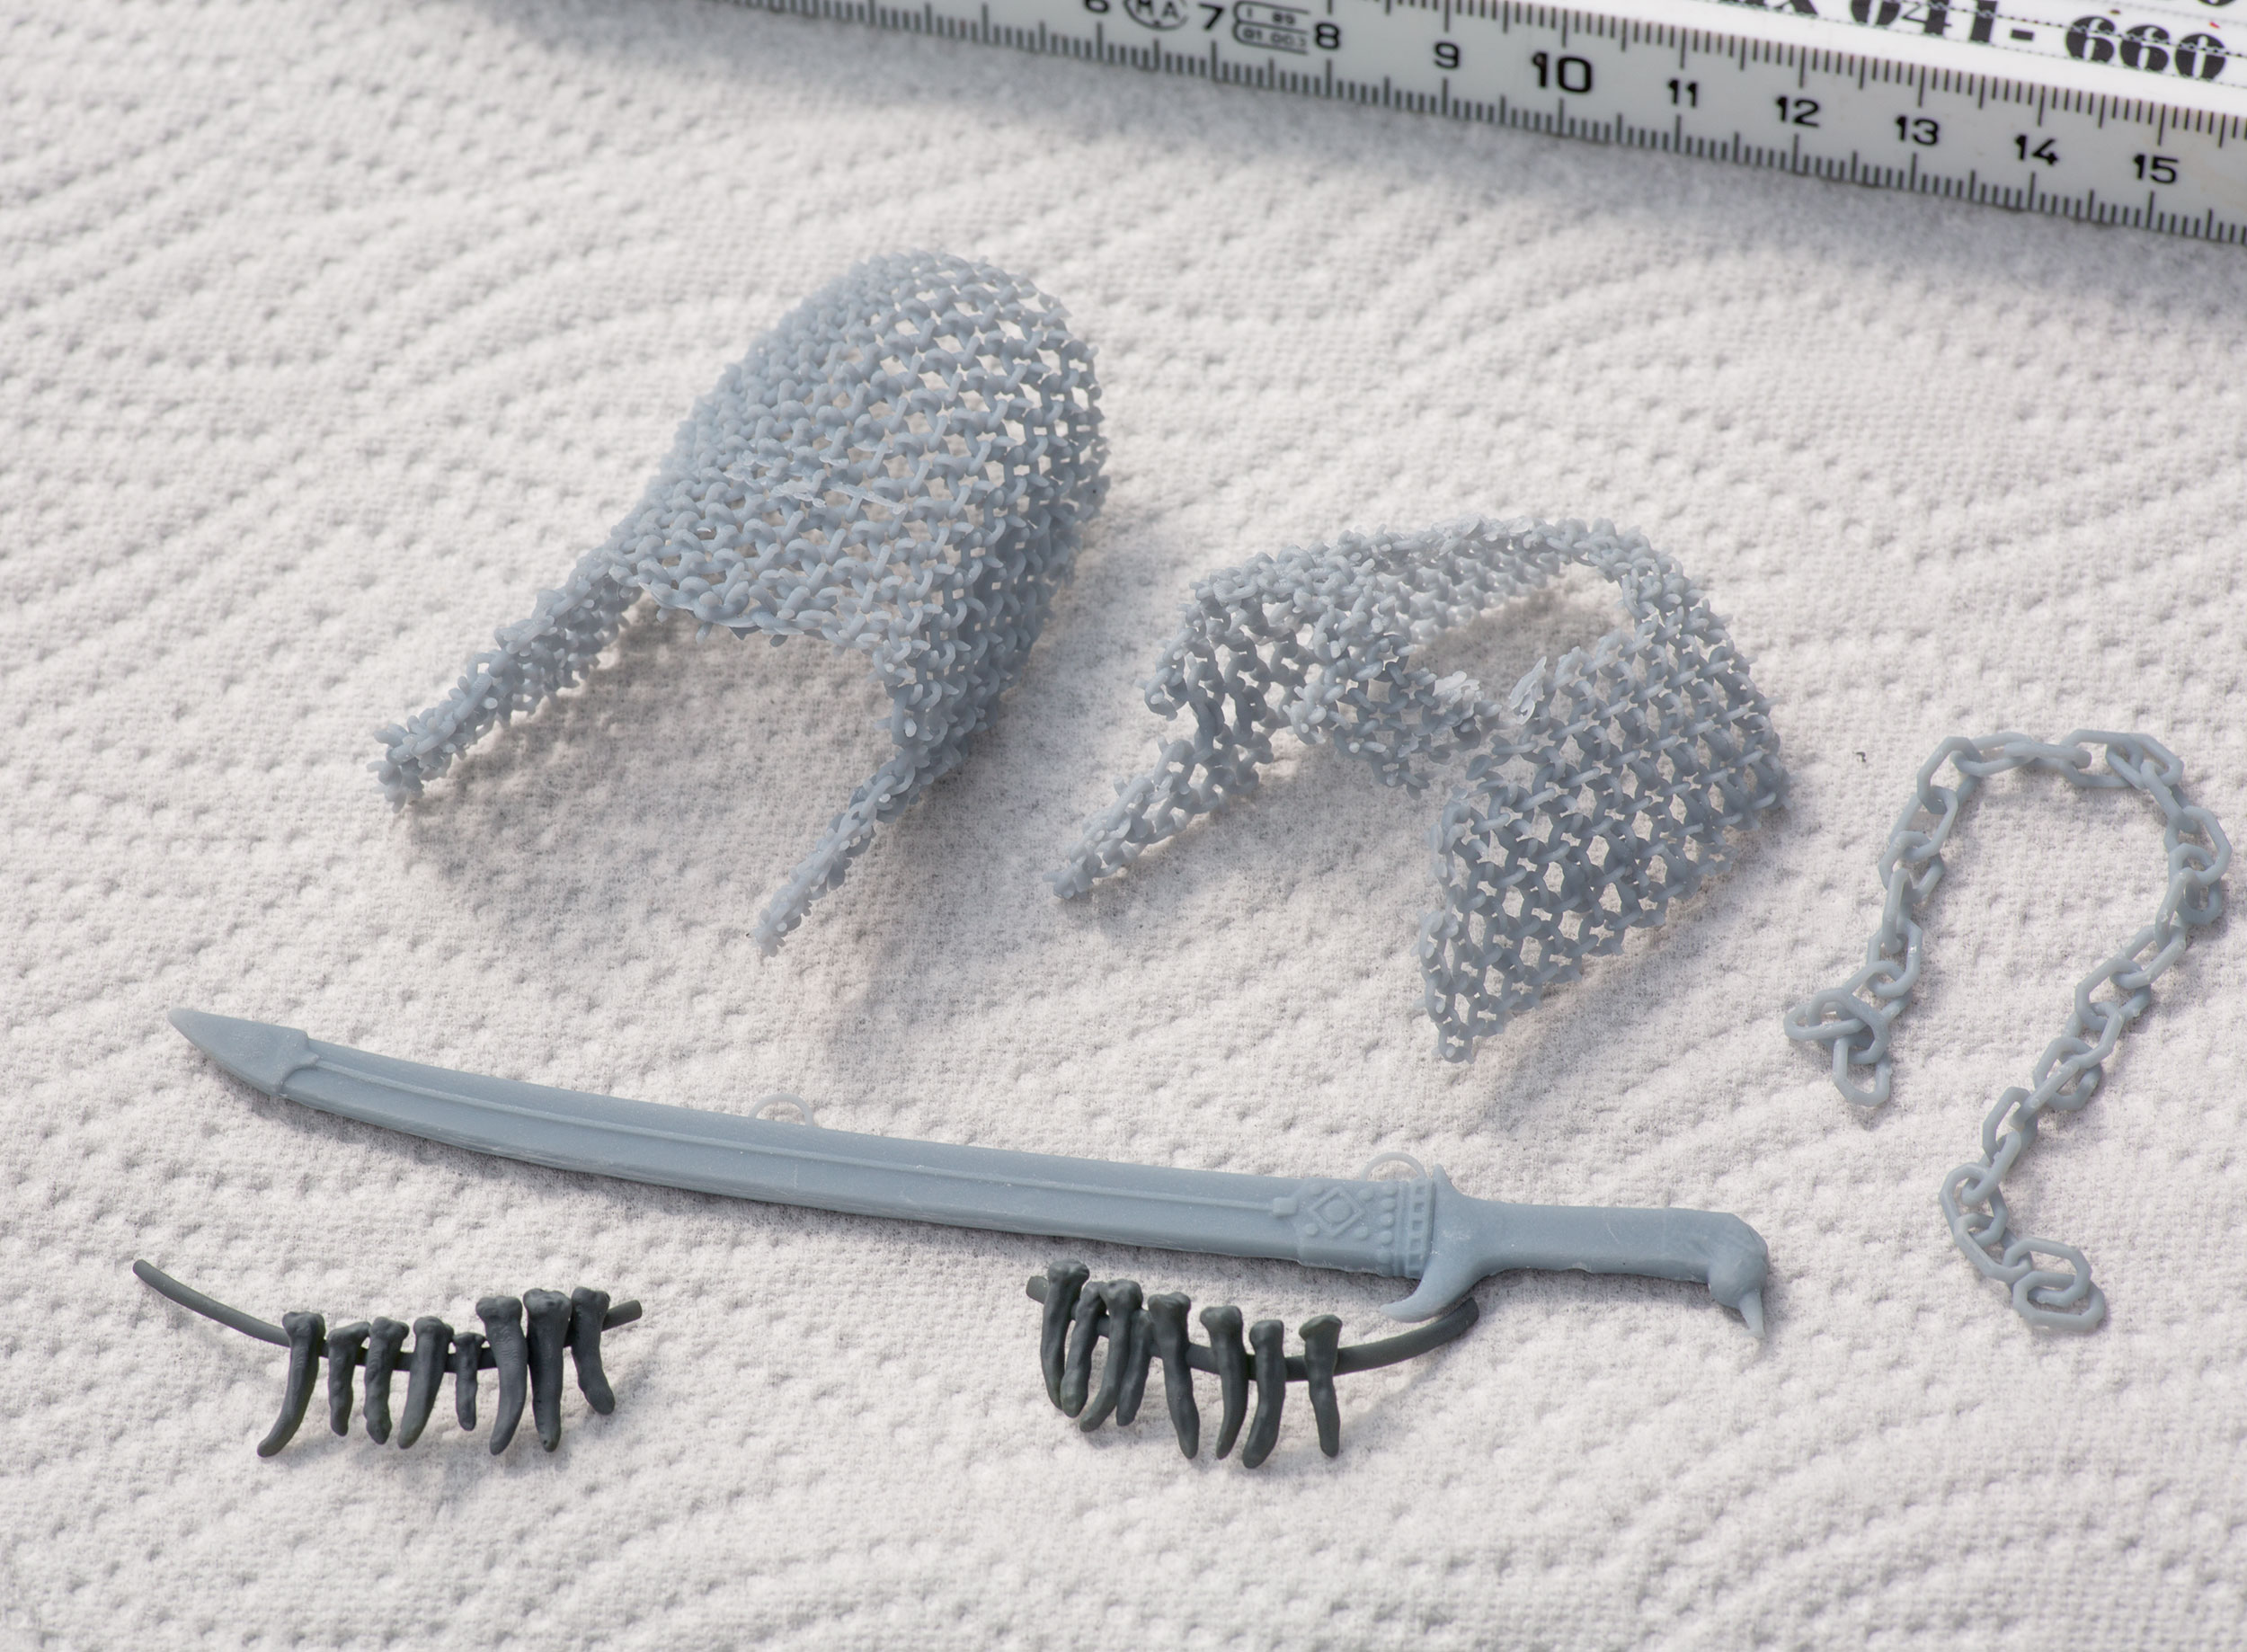
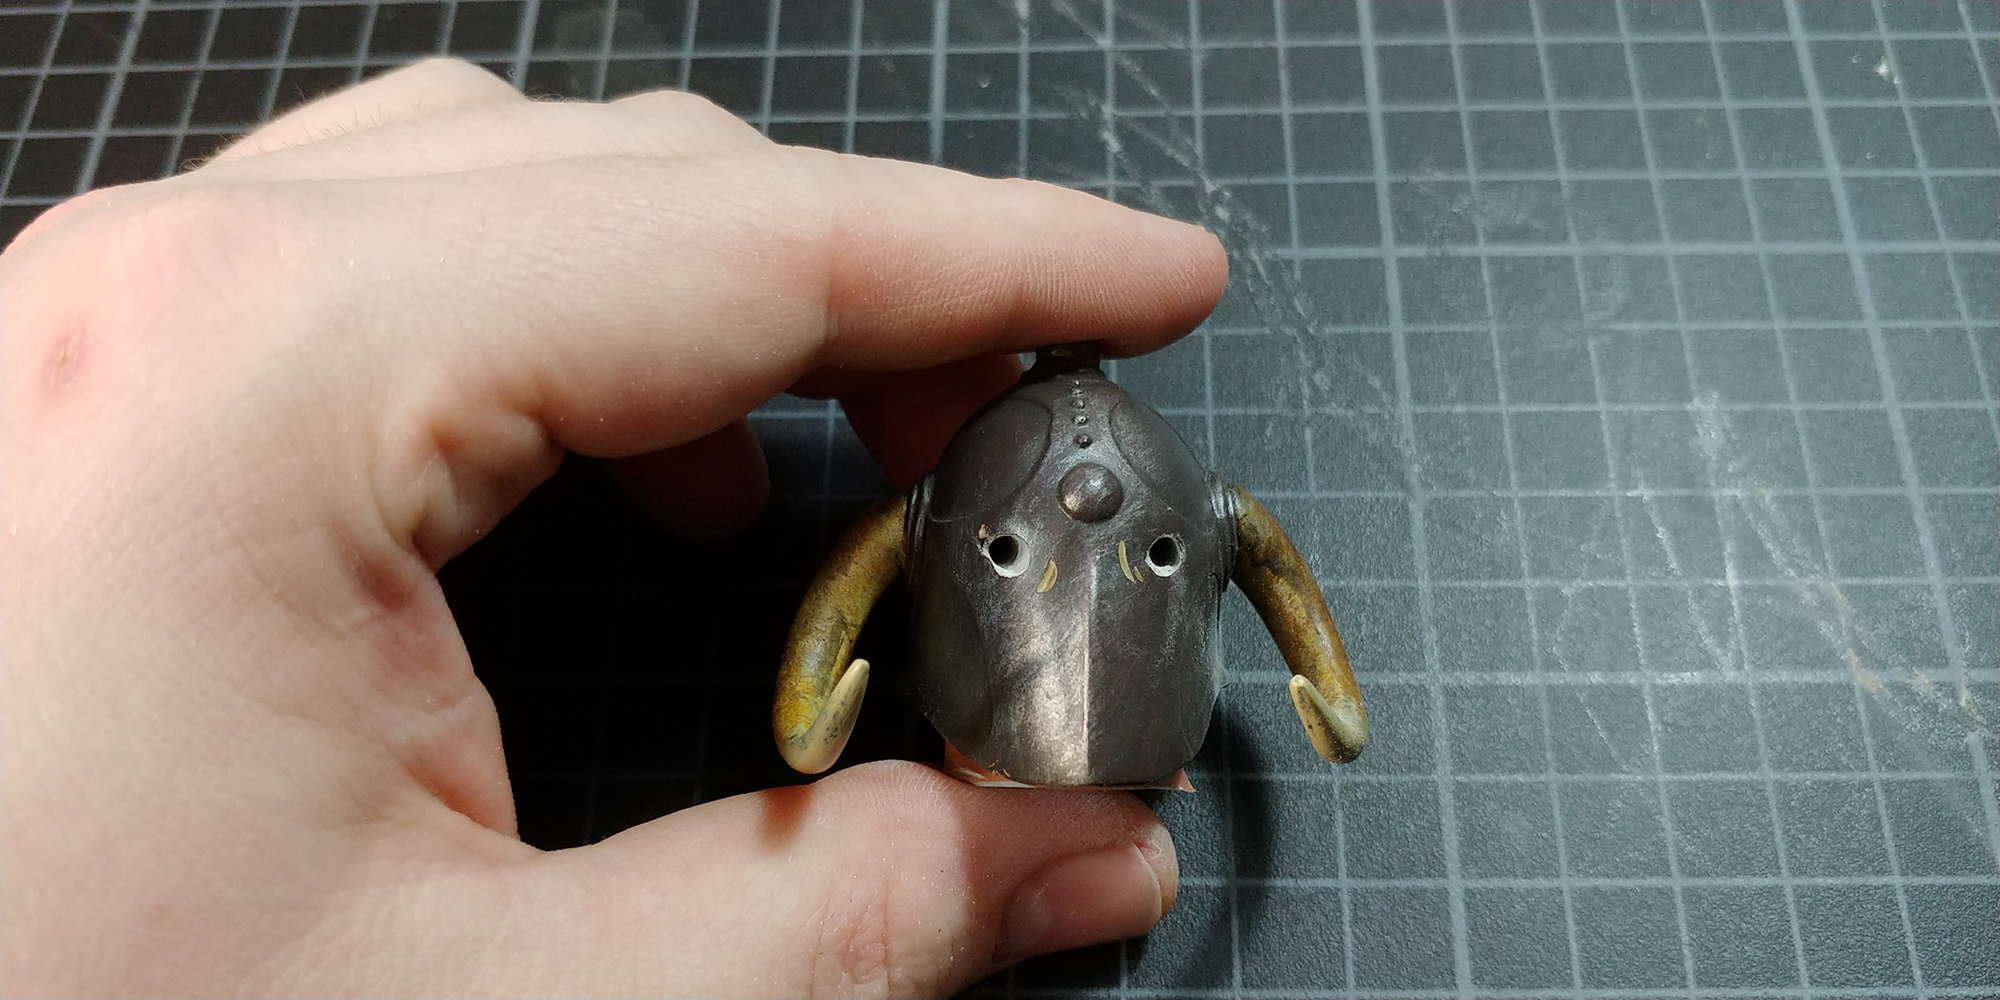
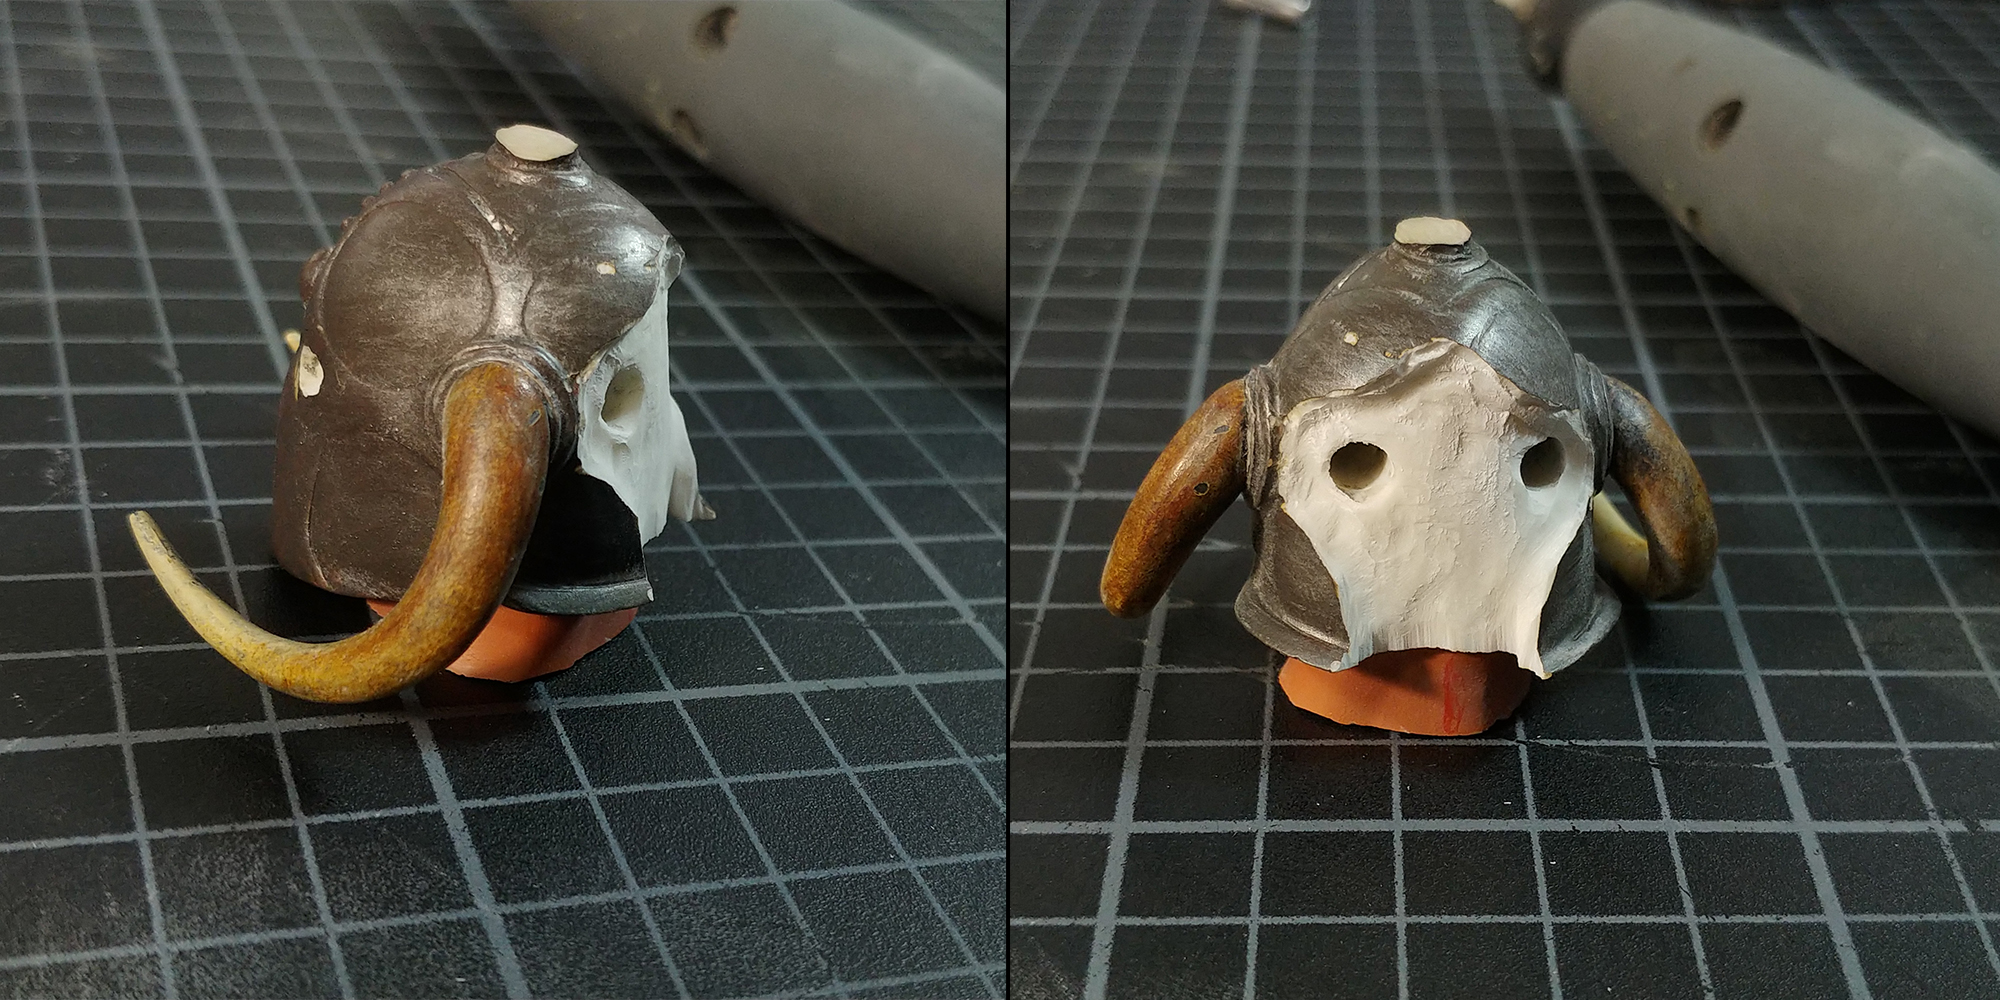
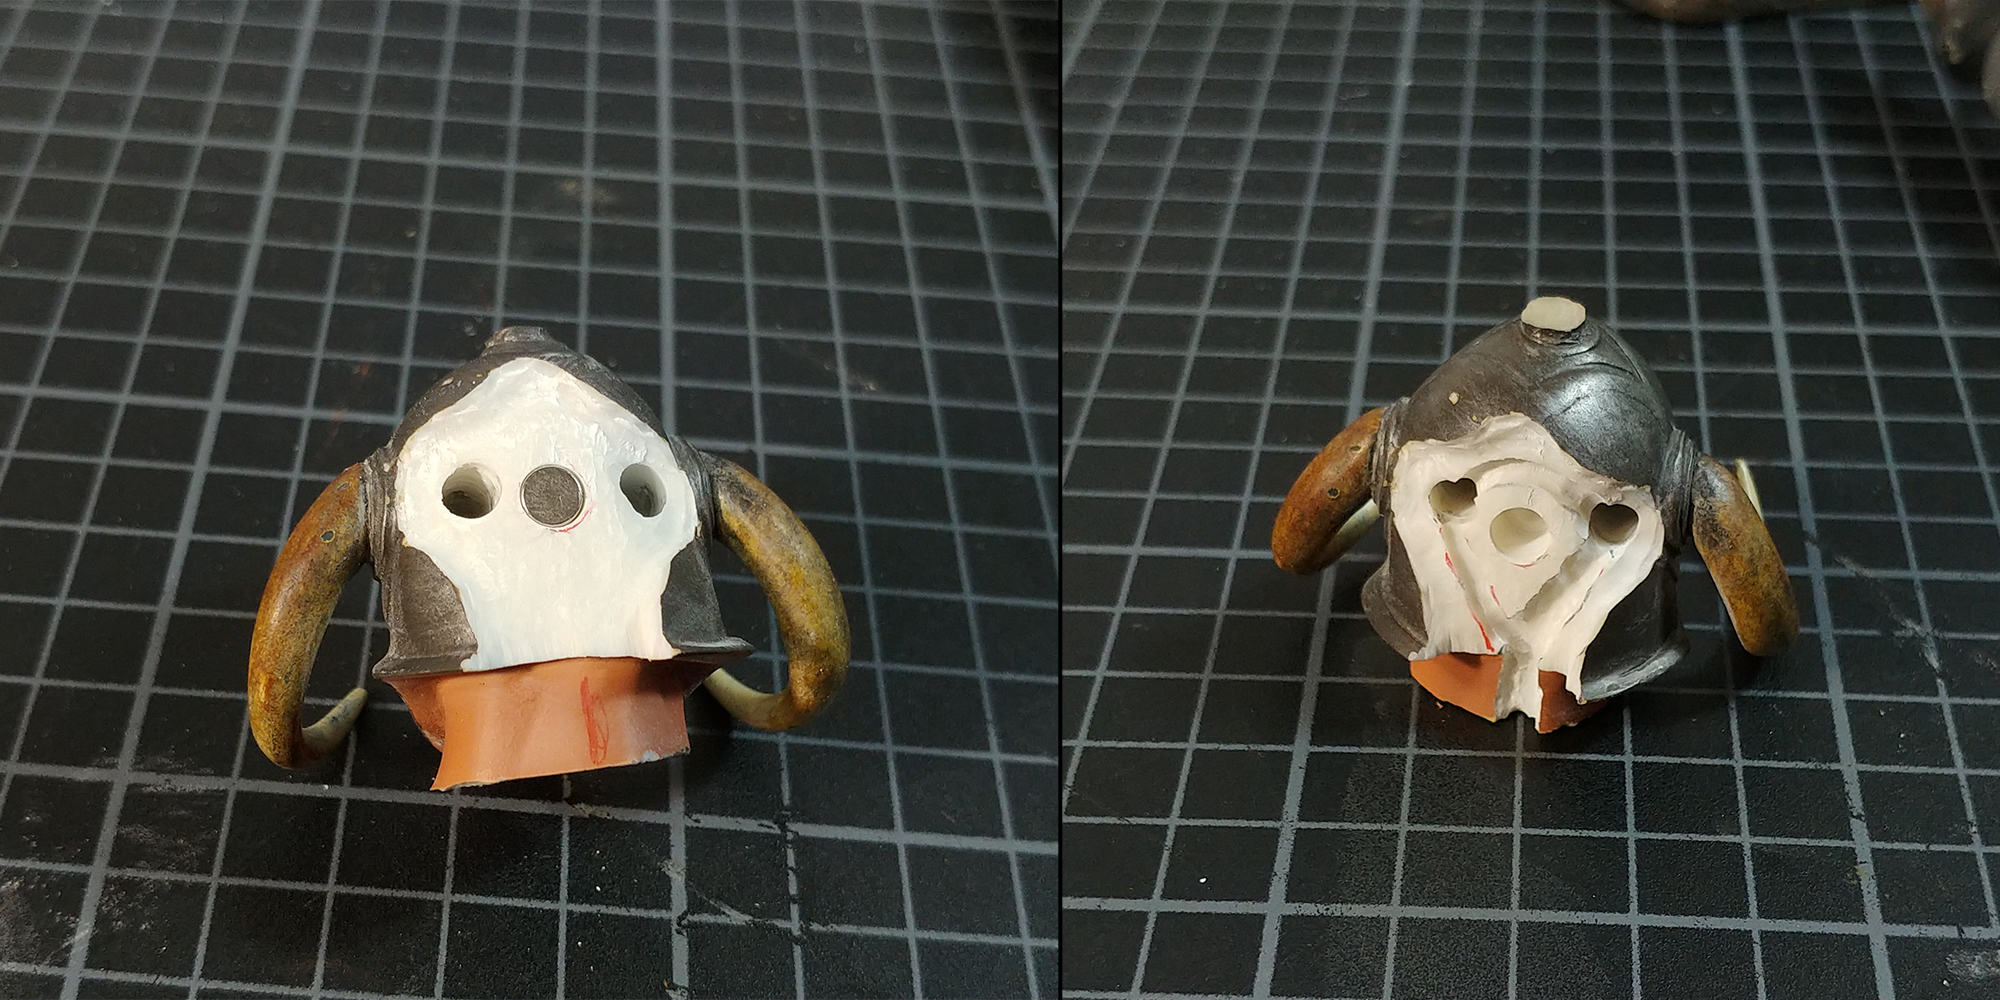
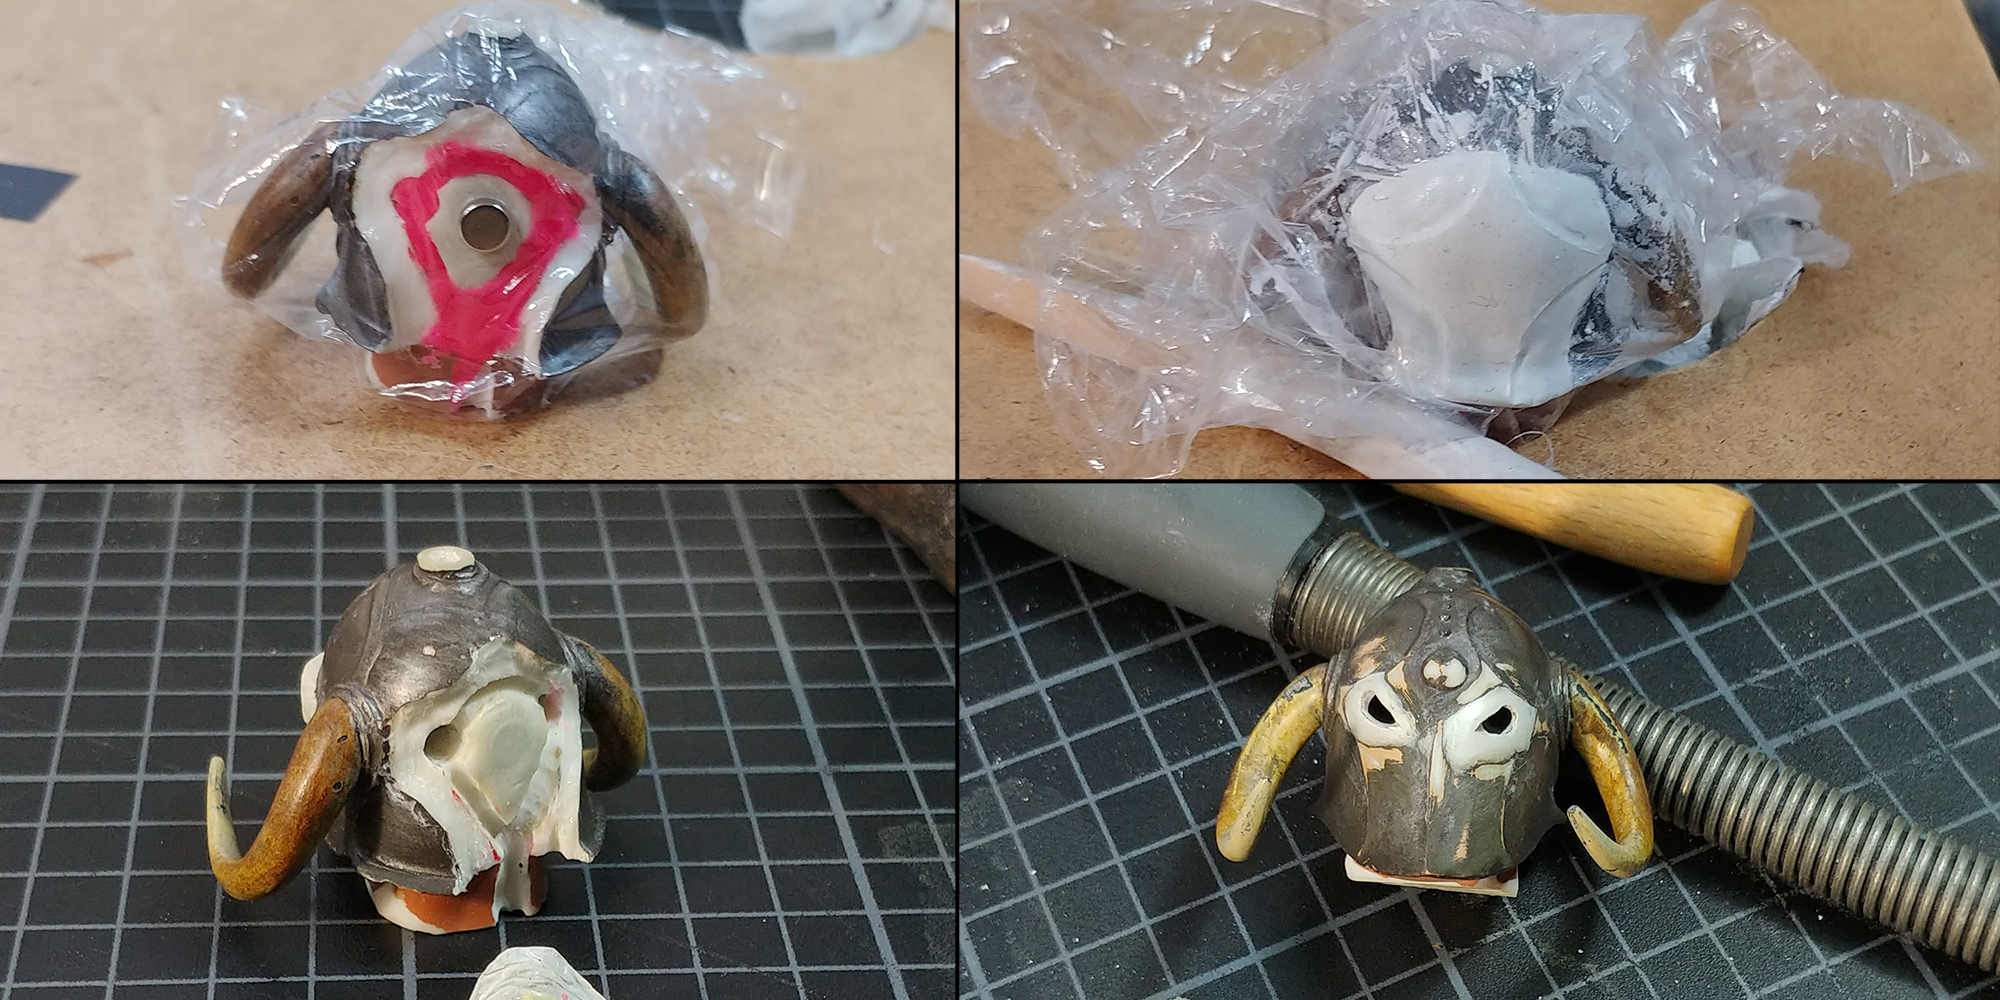
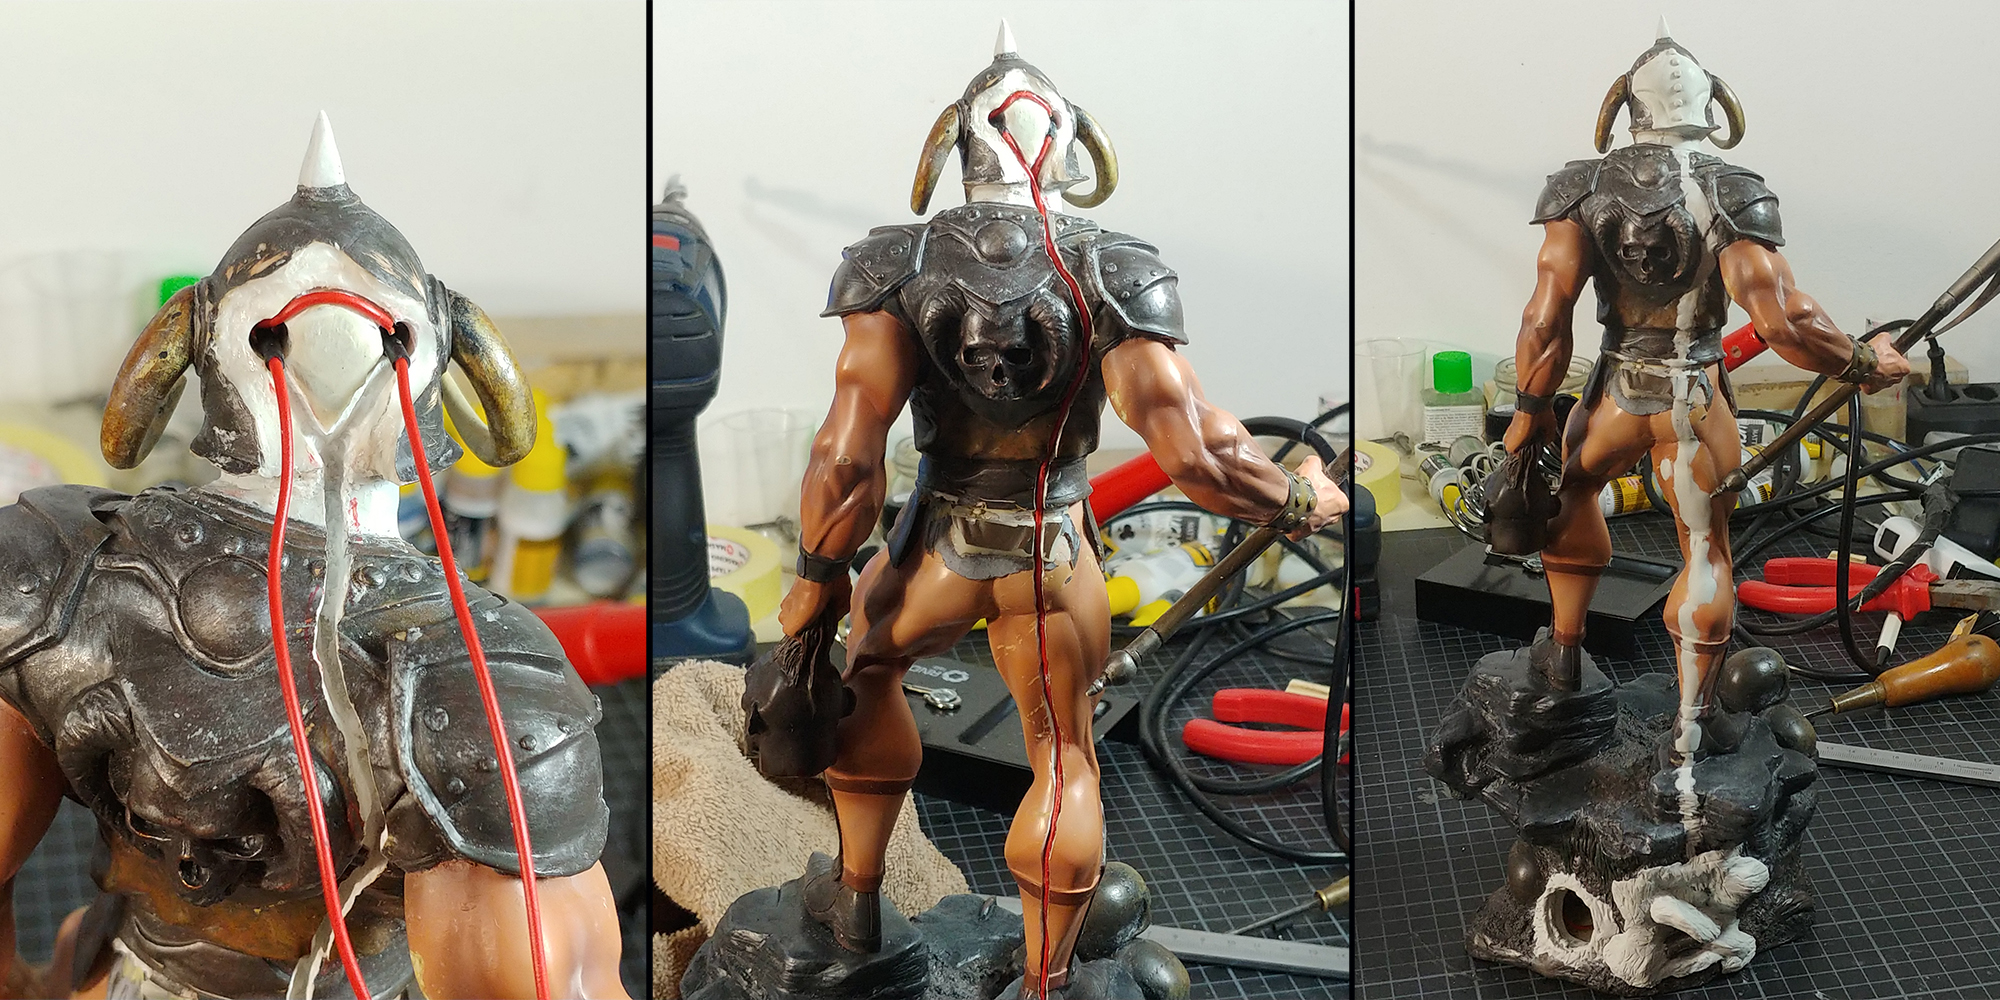
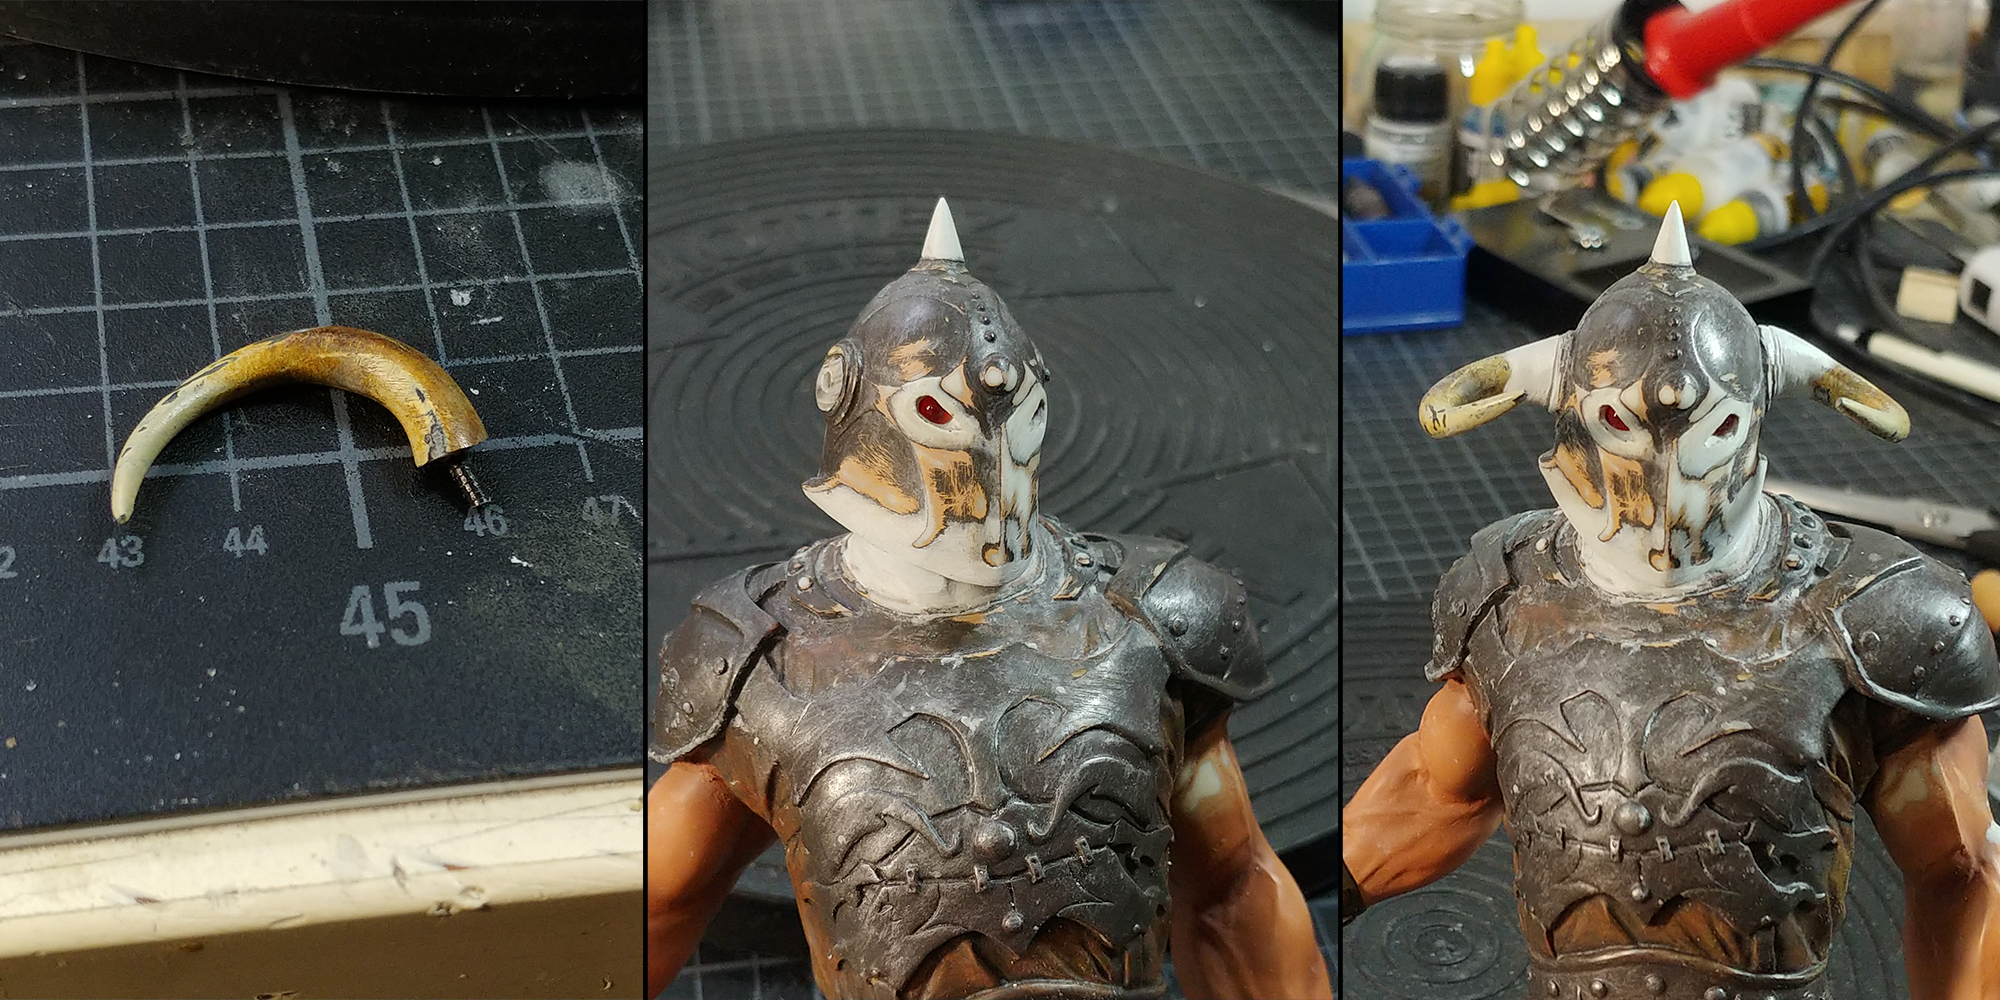
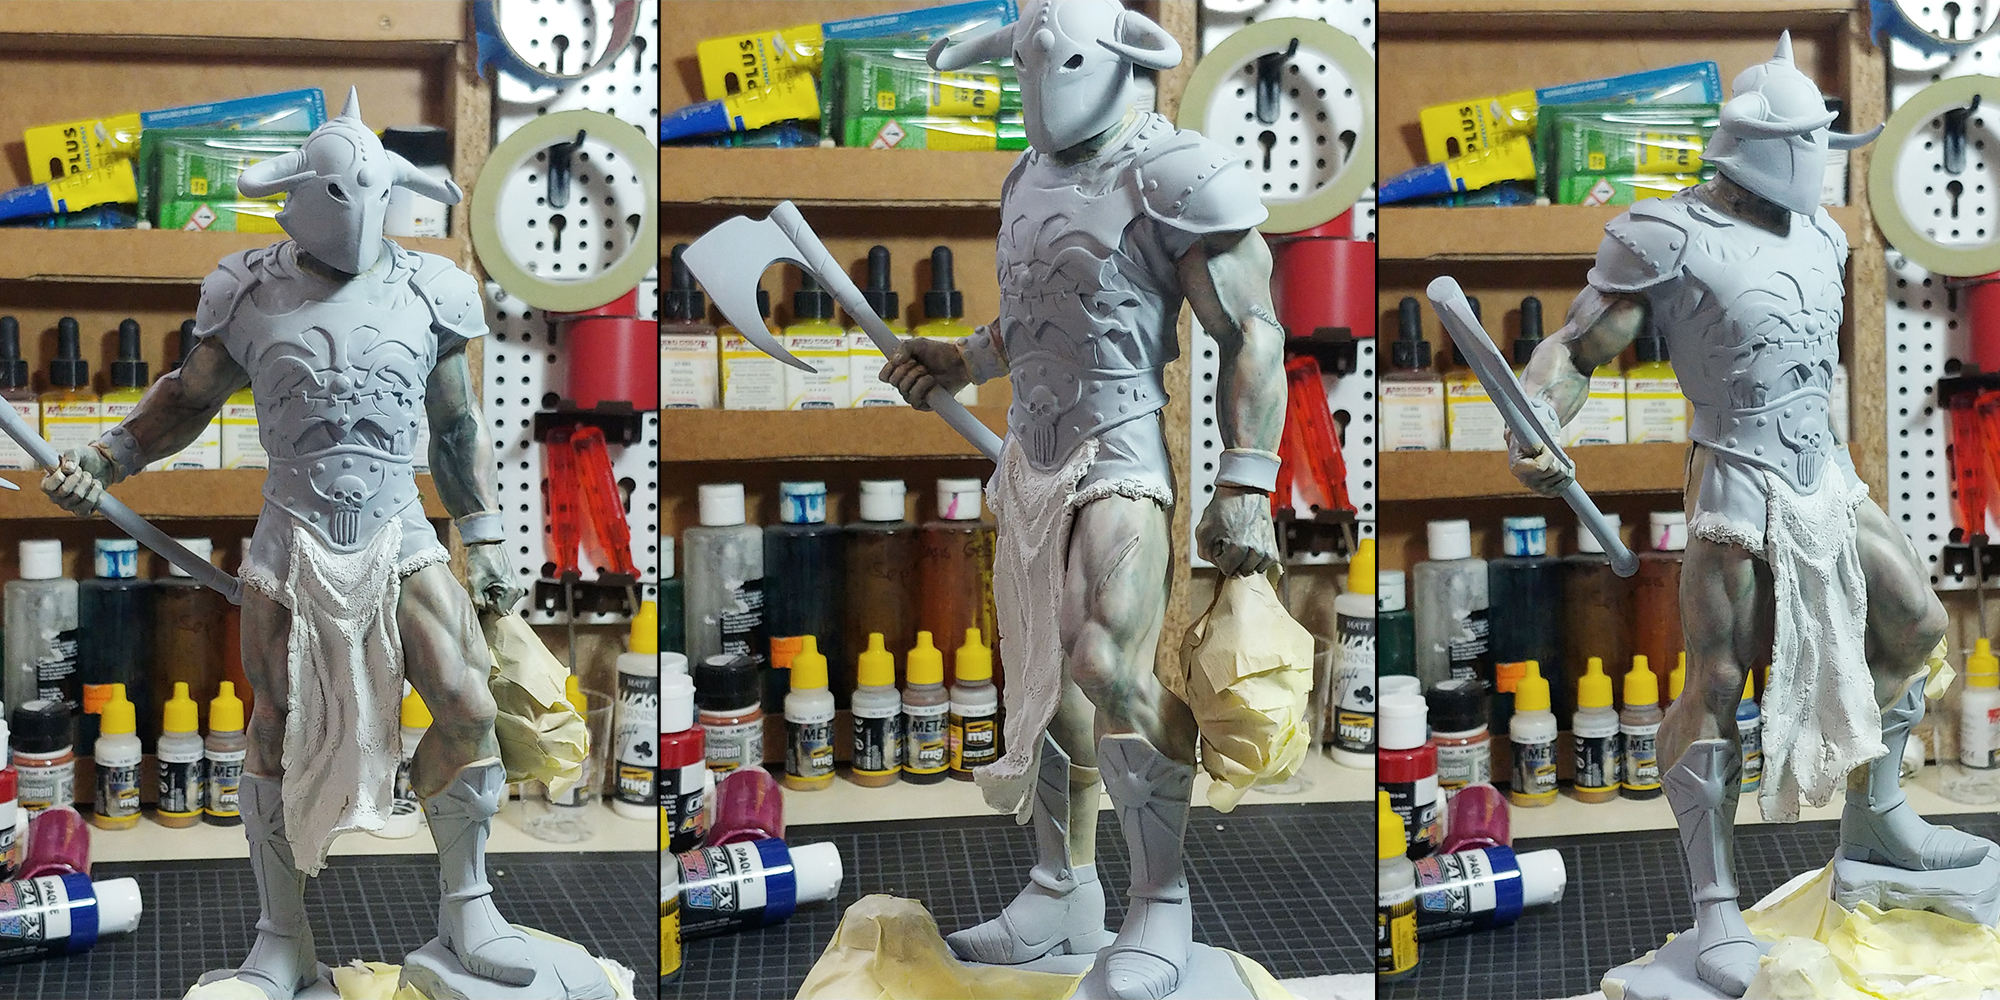
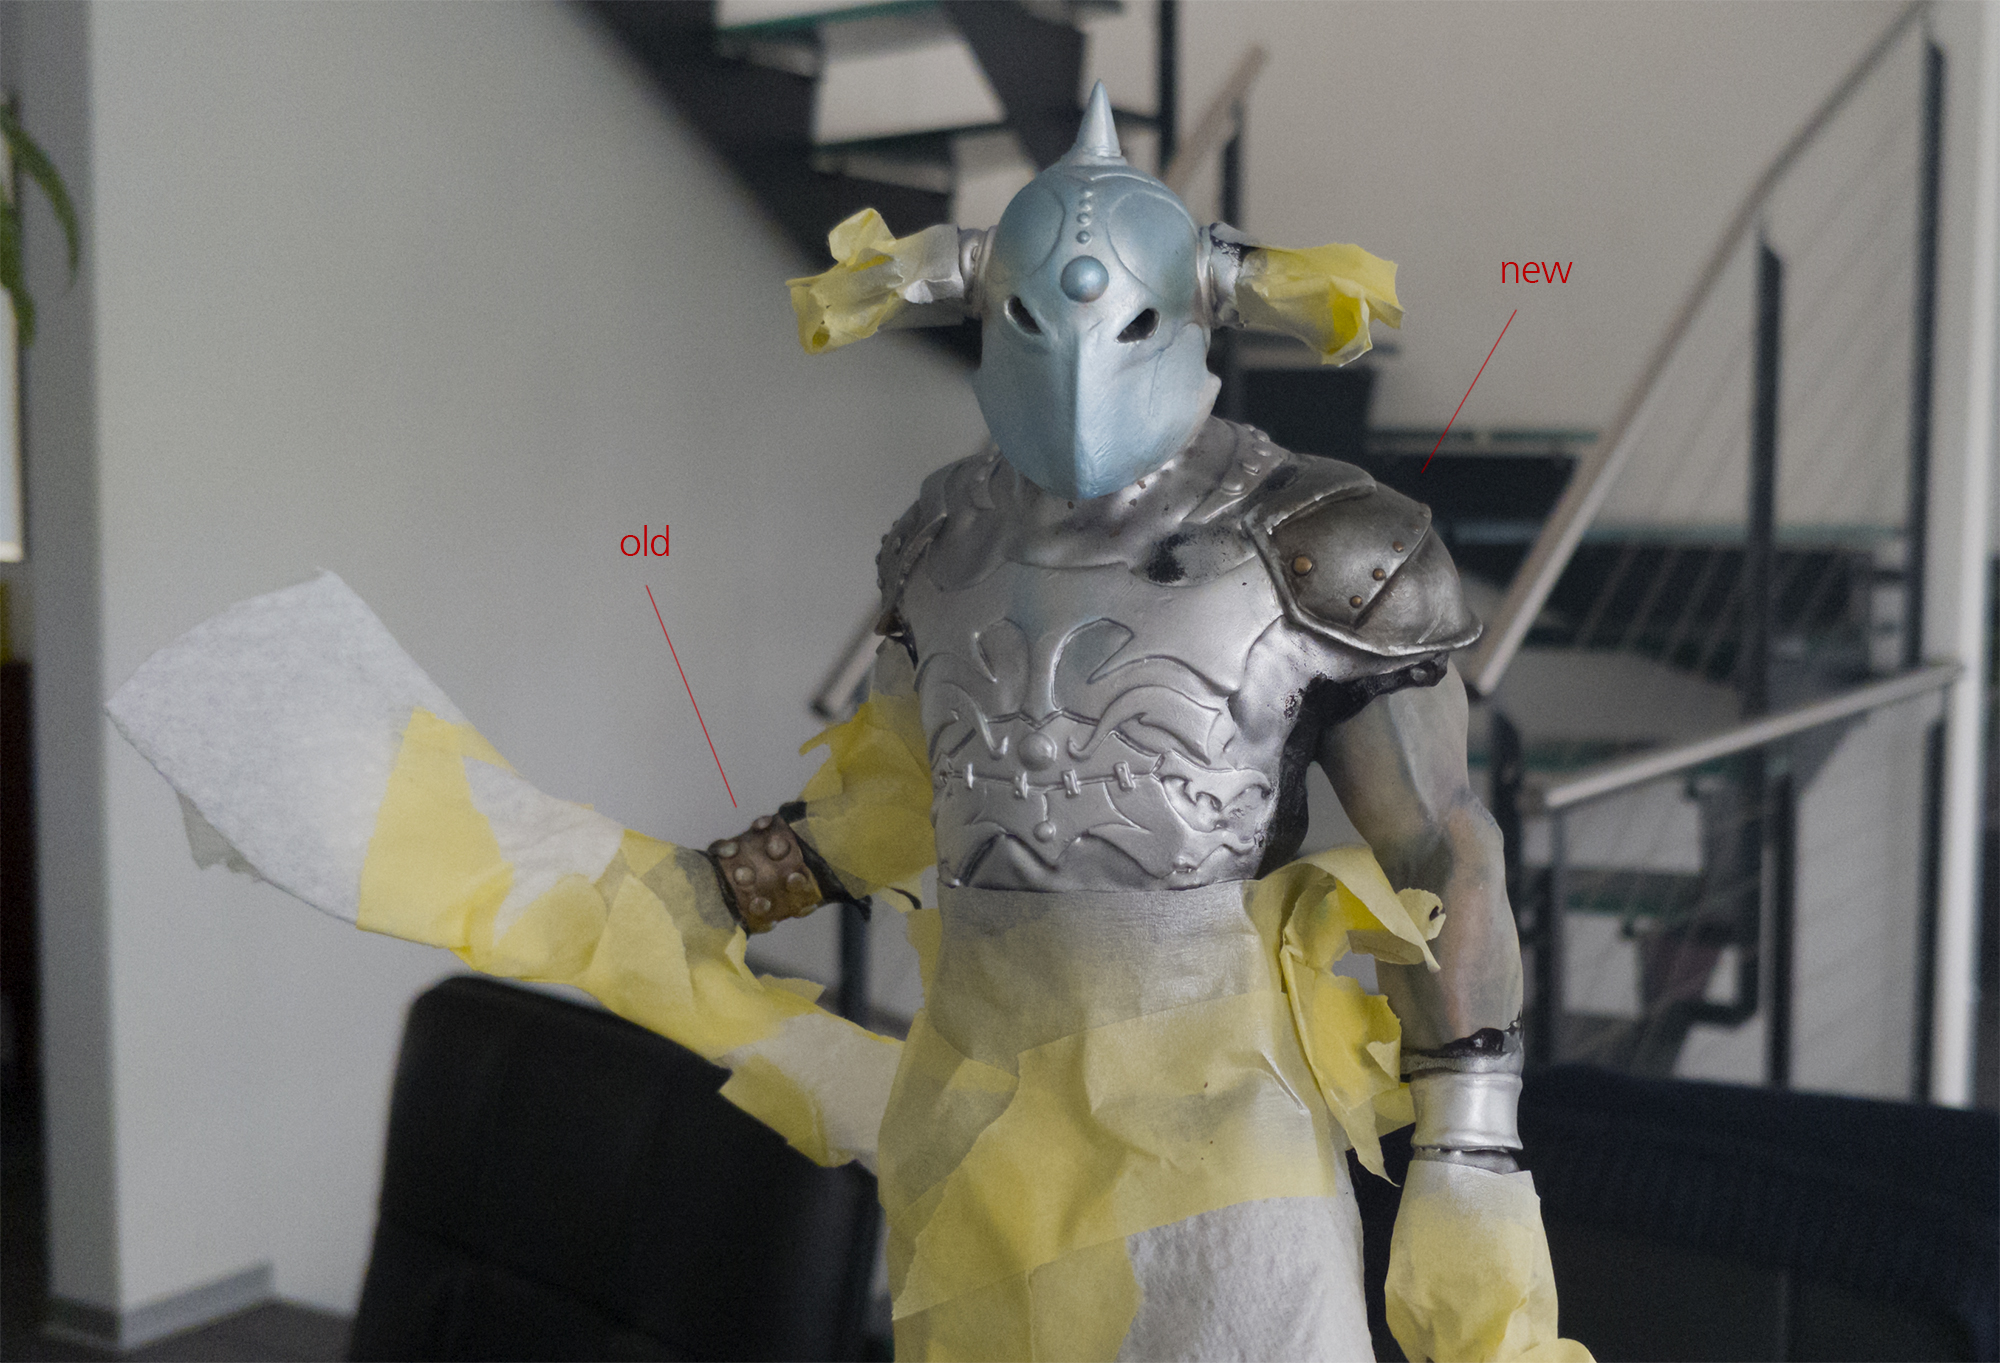
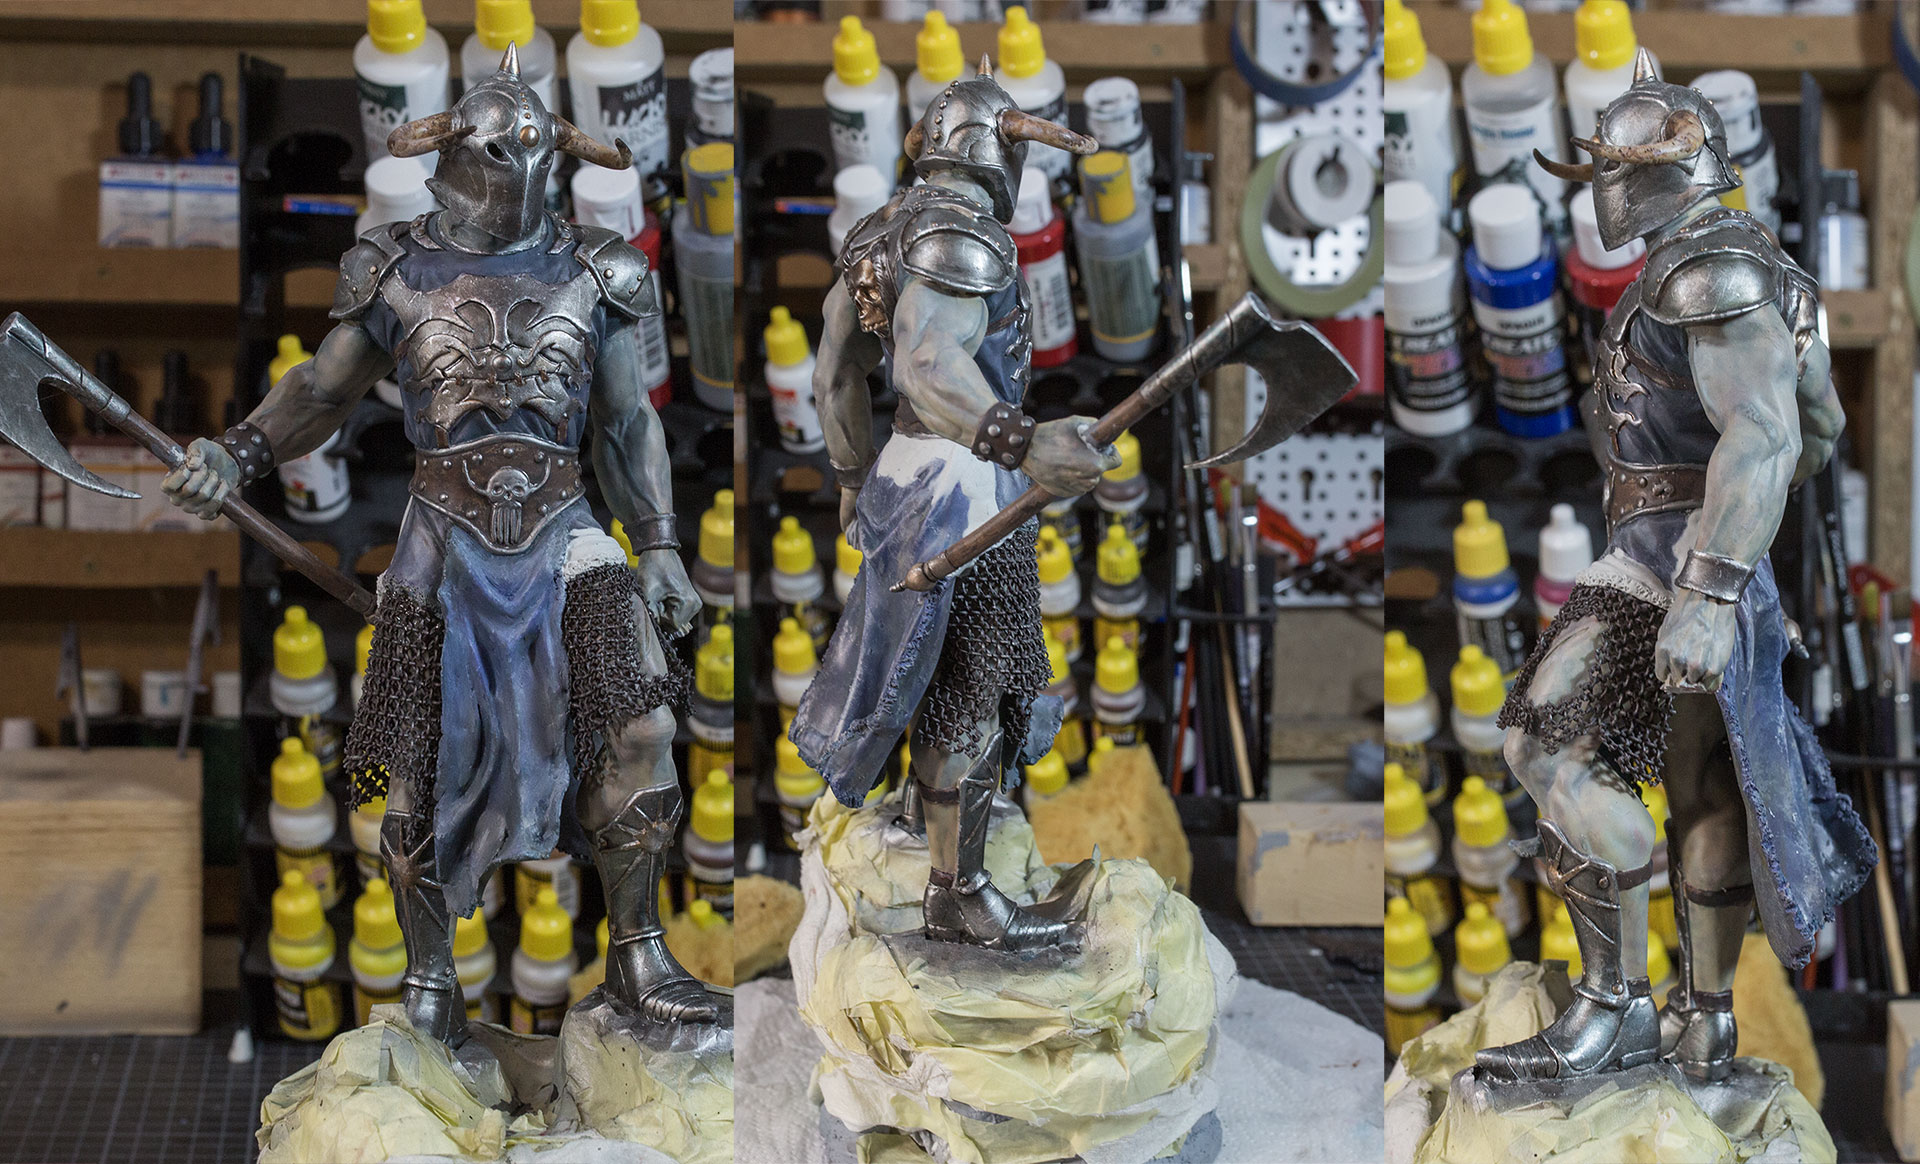
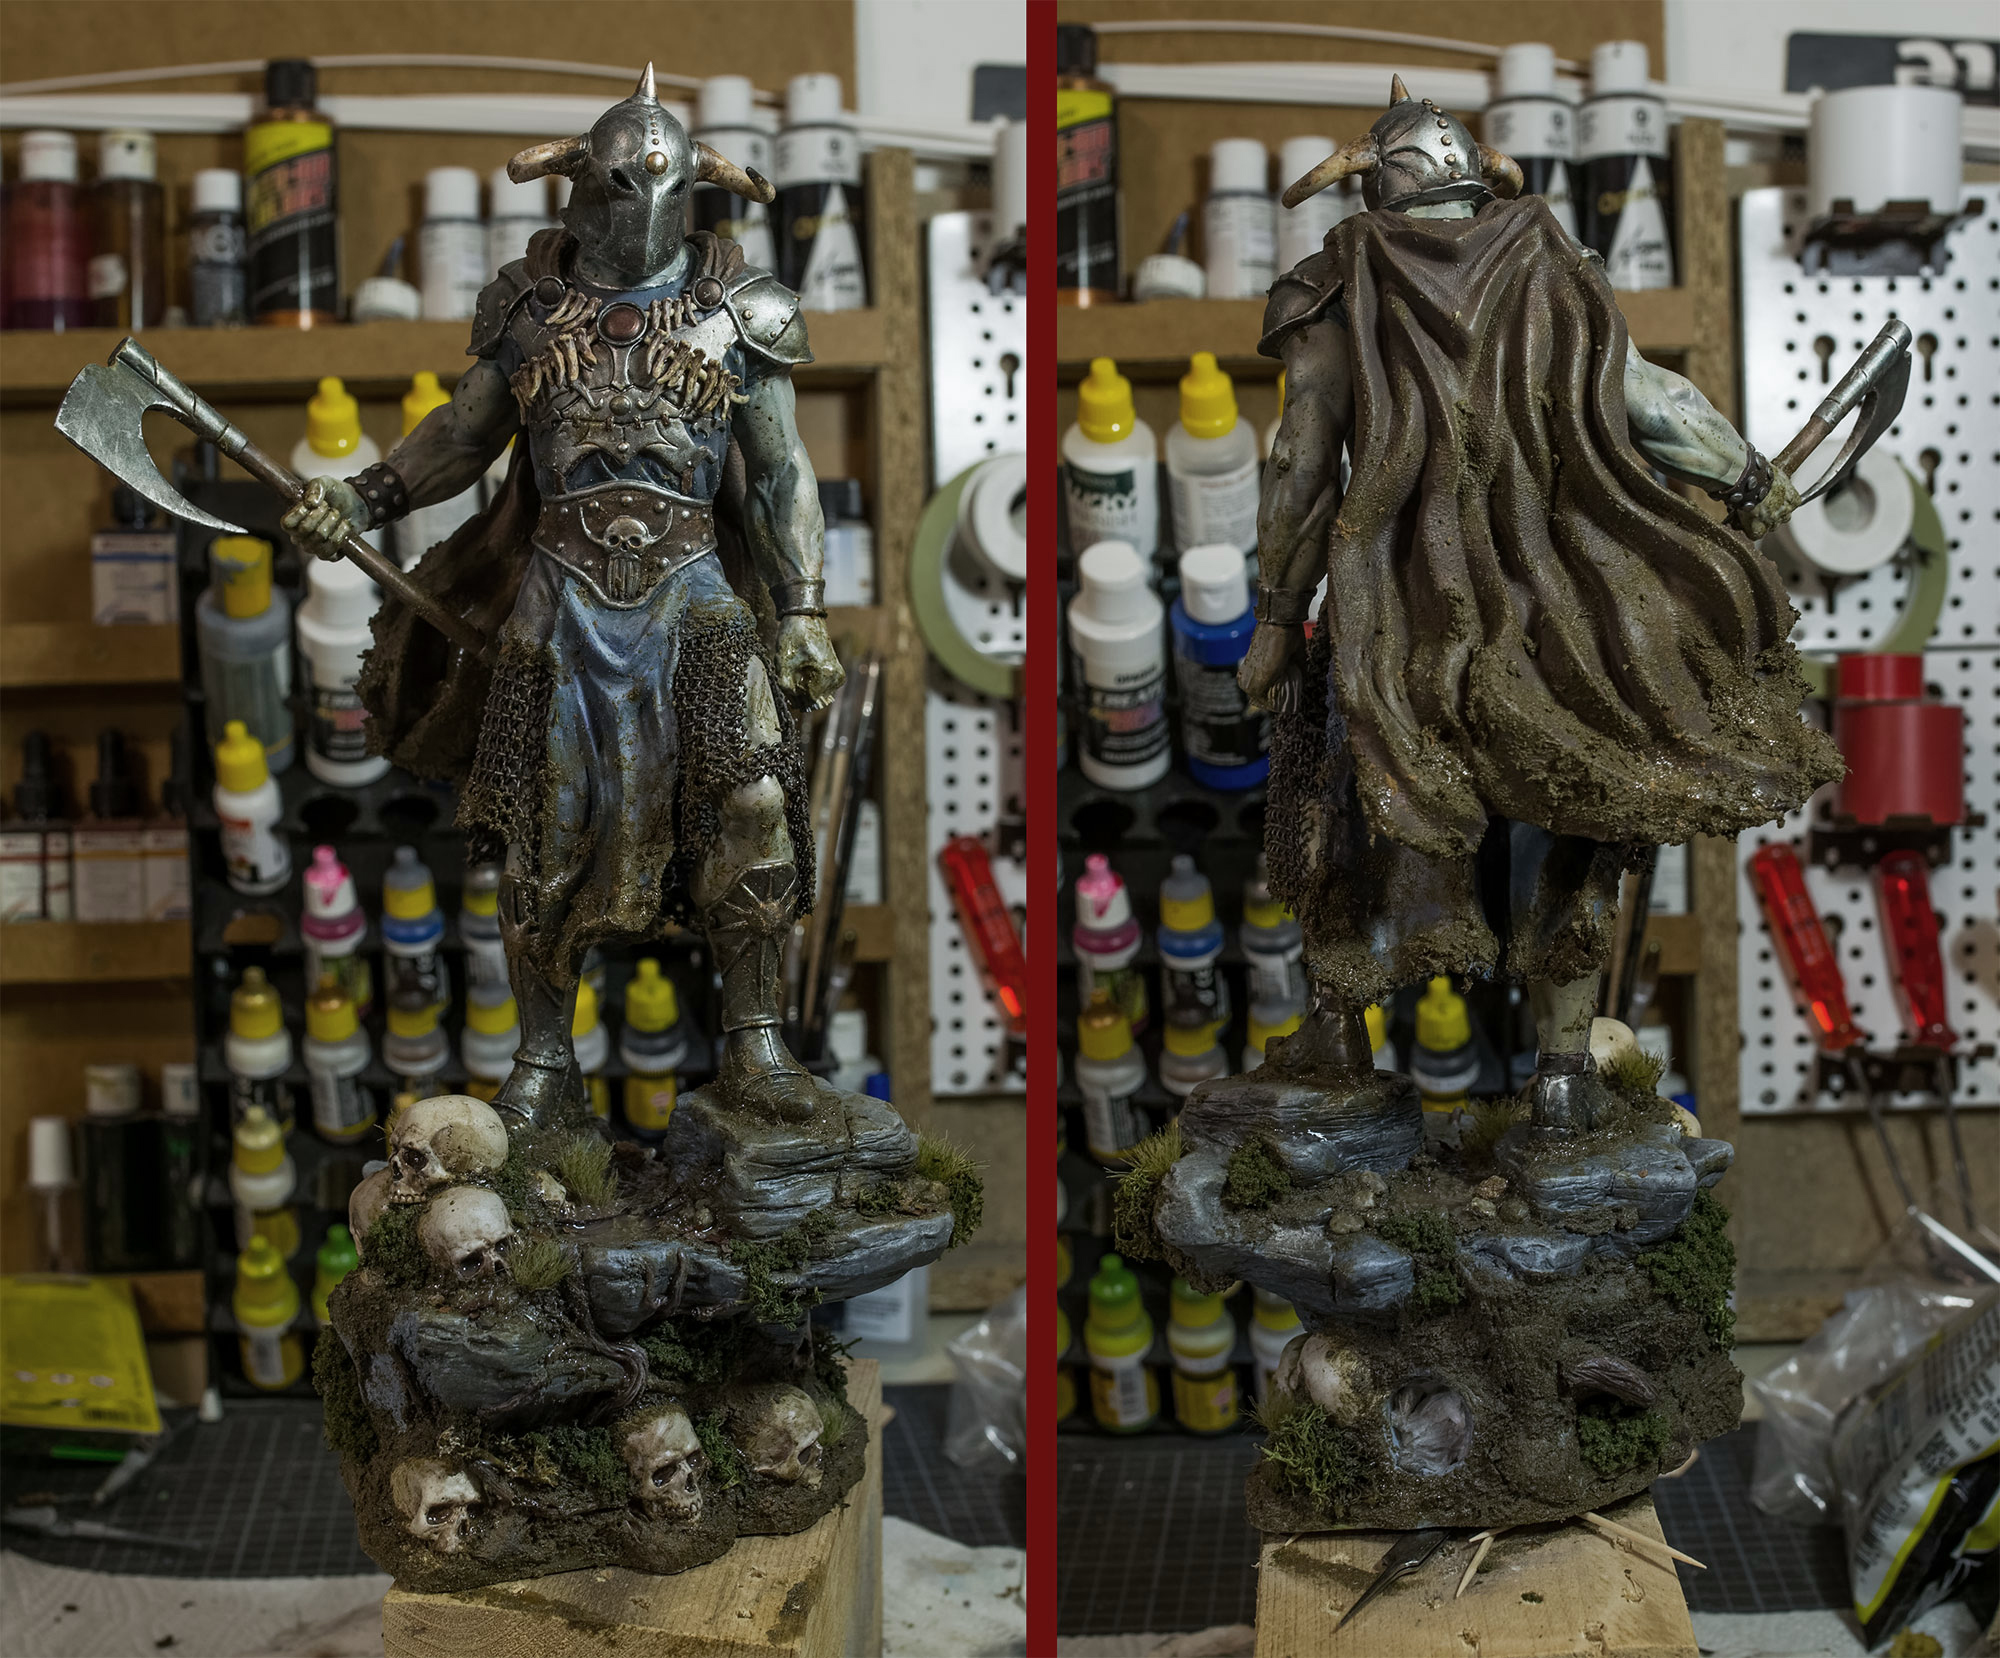
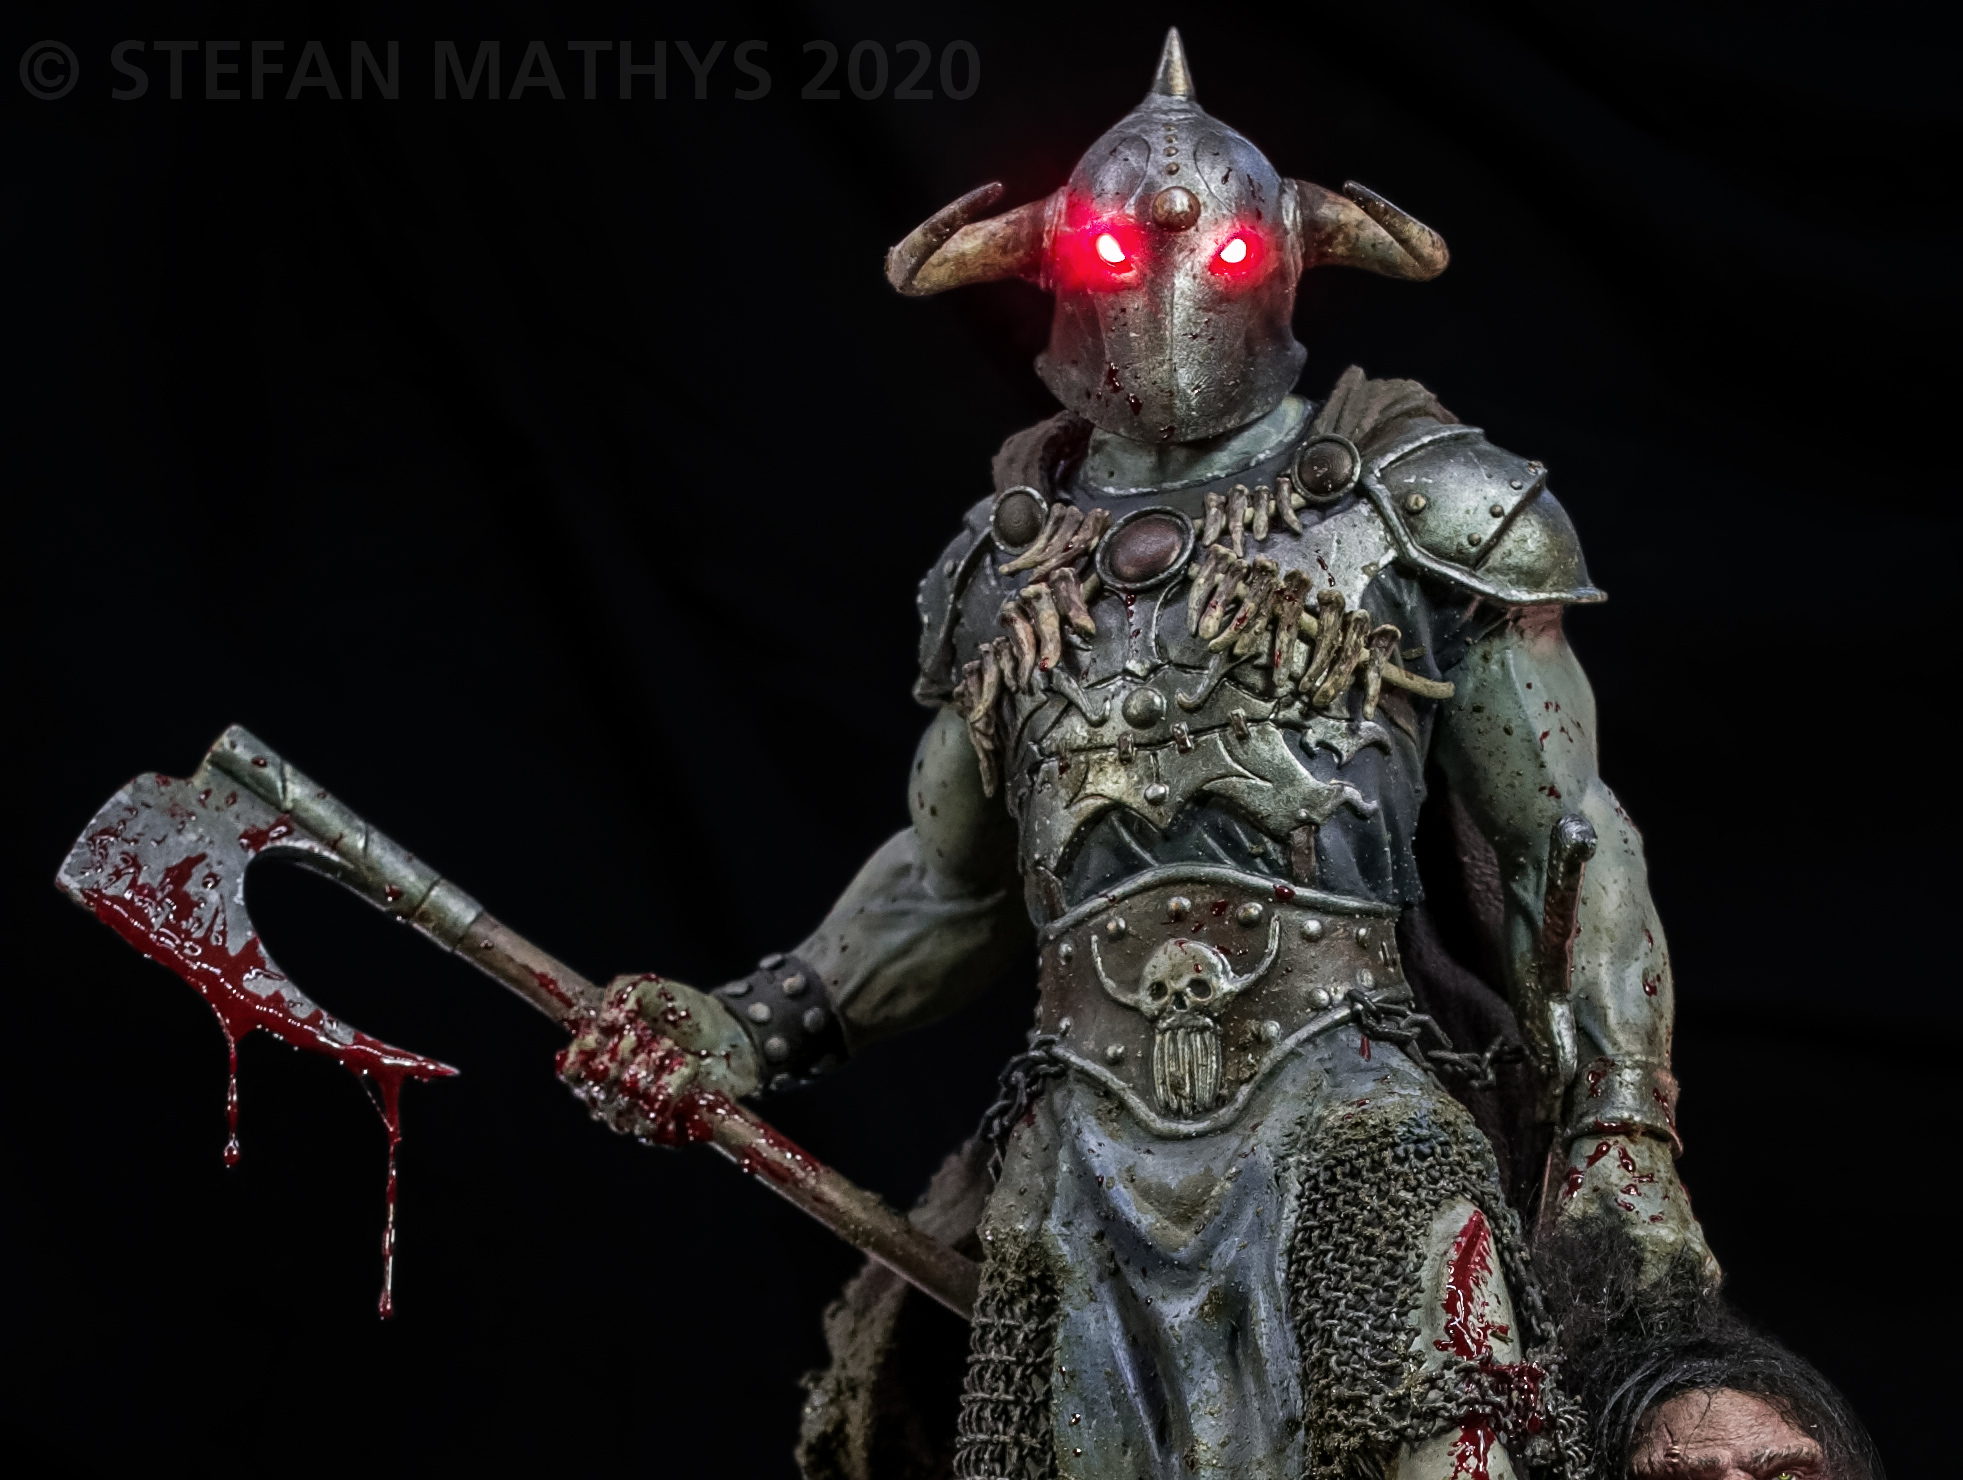
Remember when I said the todo list would get  longer? Yep…I couldn’t stop and changed the position of the horns. 🙈

I wanted a more aggressive look, where the horns would go more to the side. More like a bull.

While I was at it, I found the helmet to be too small in my opinion, so i added another 2-3mm and changed the shape at the bottom a little bit. 

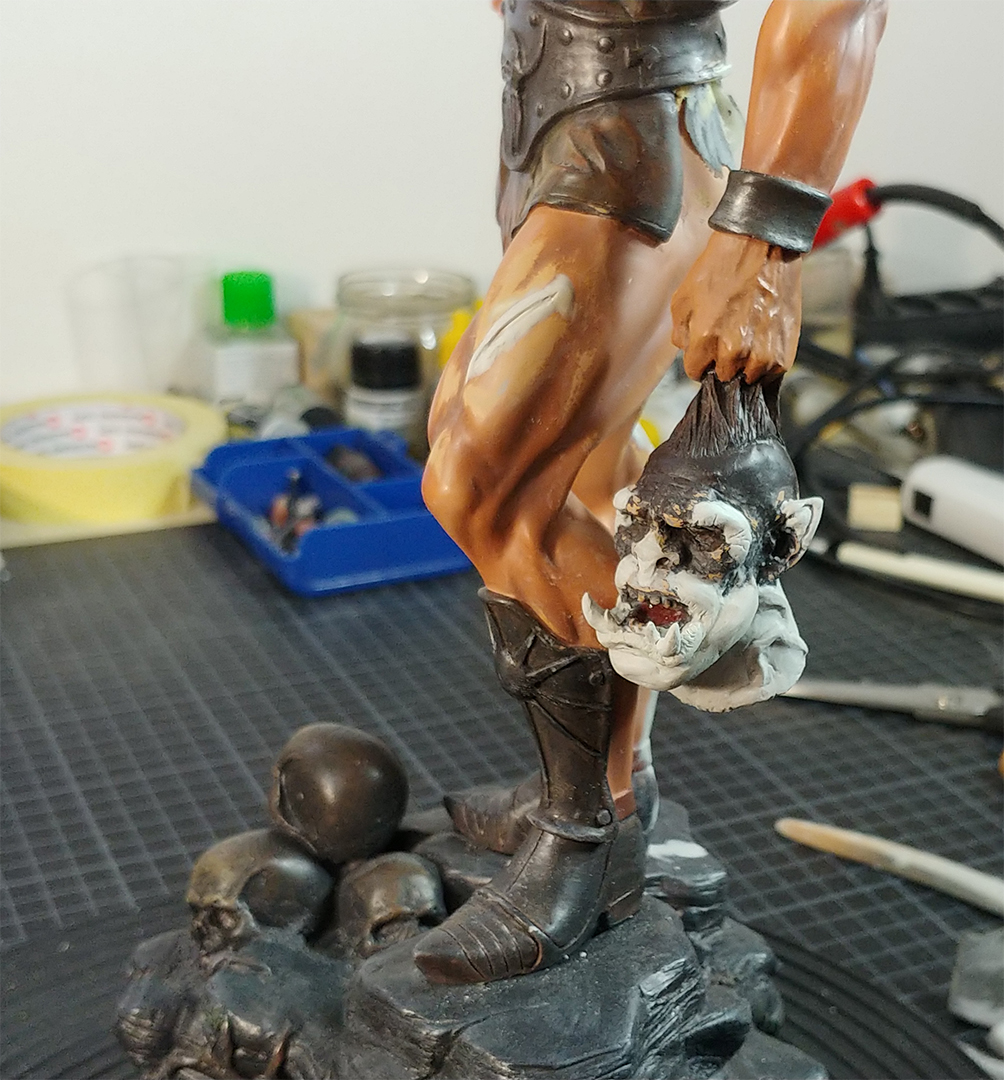
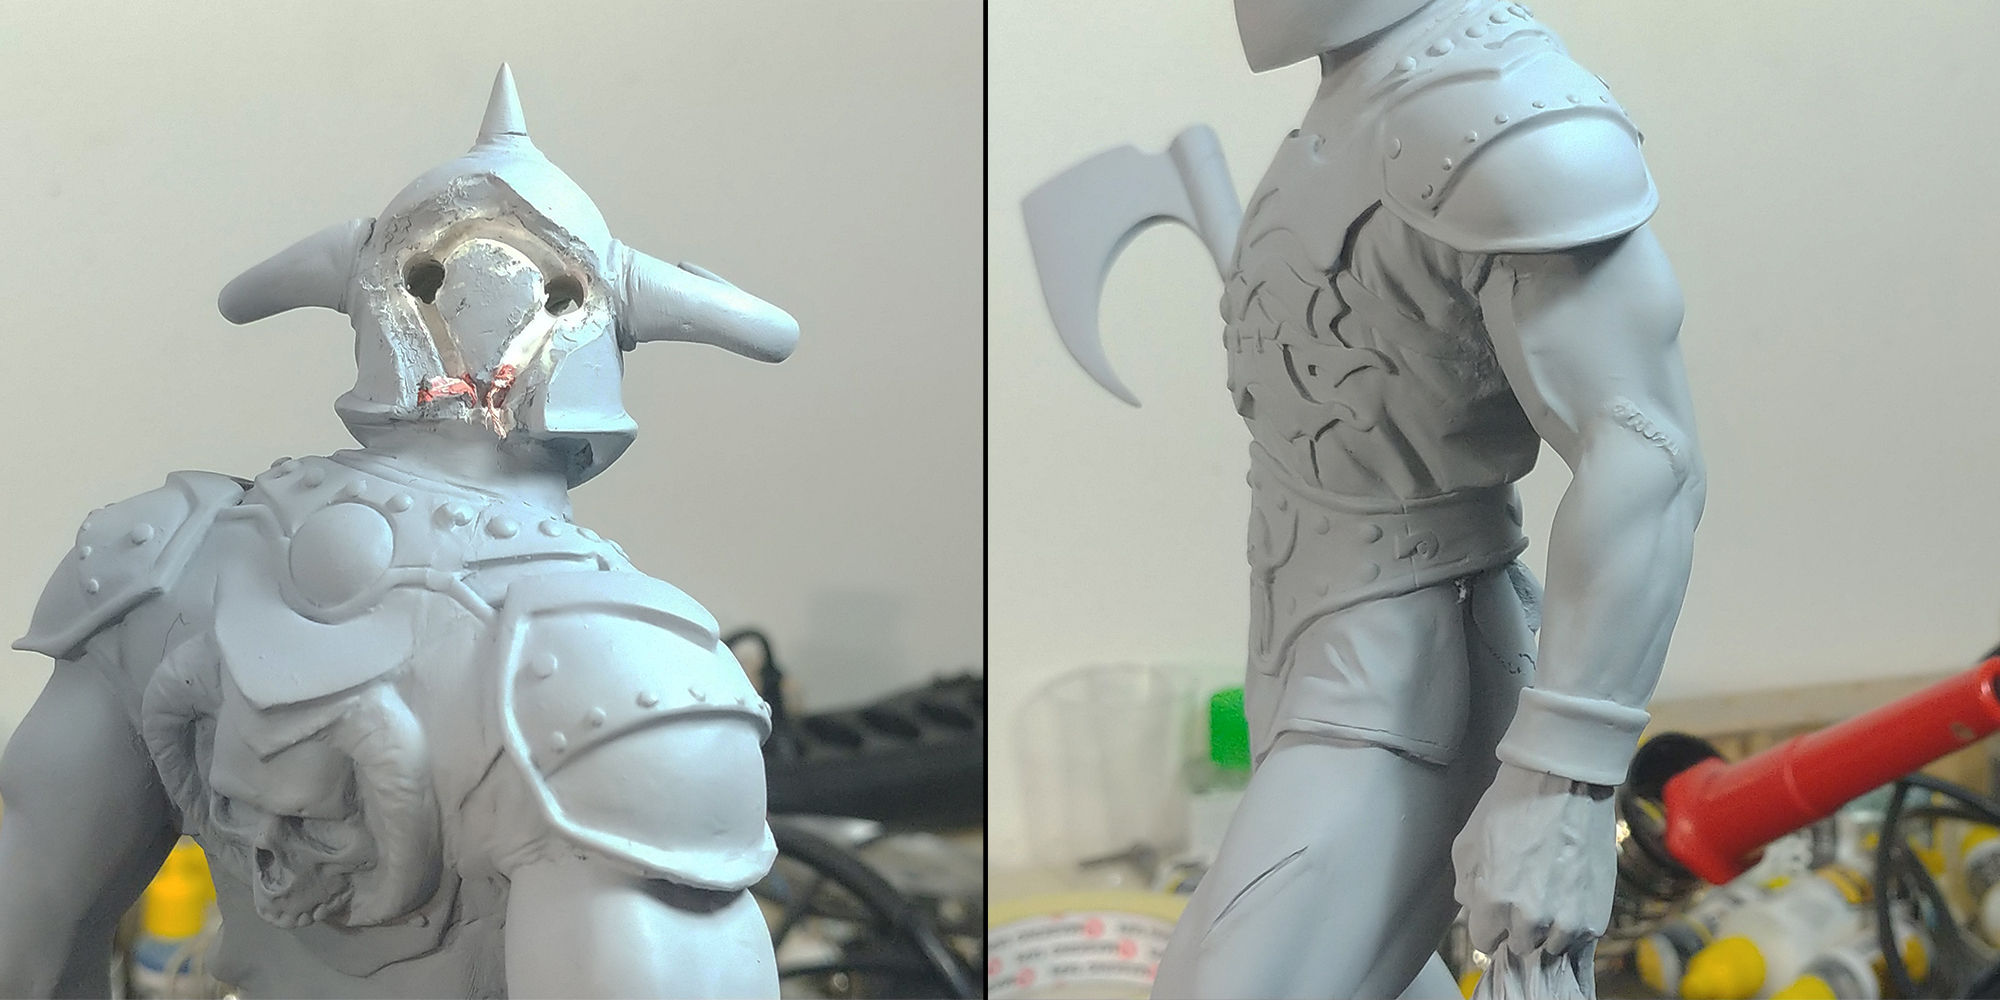
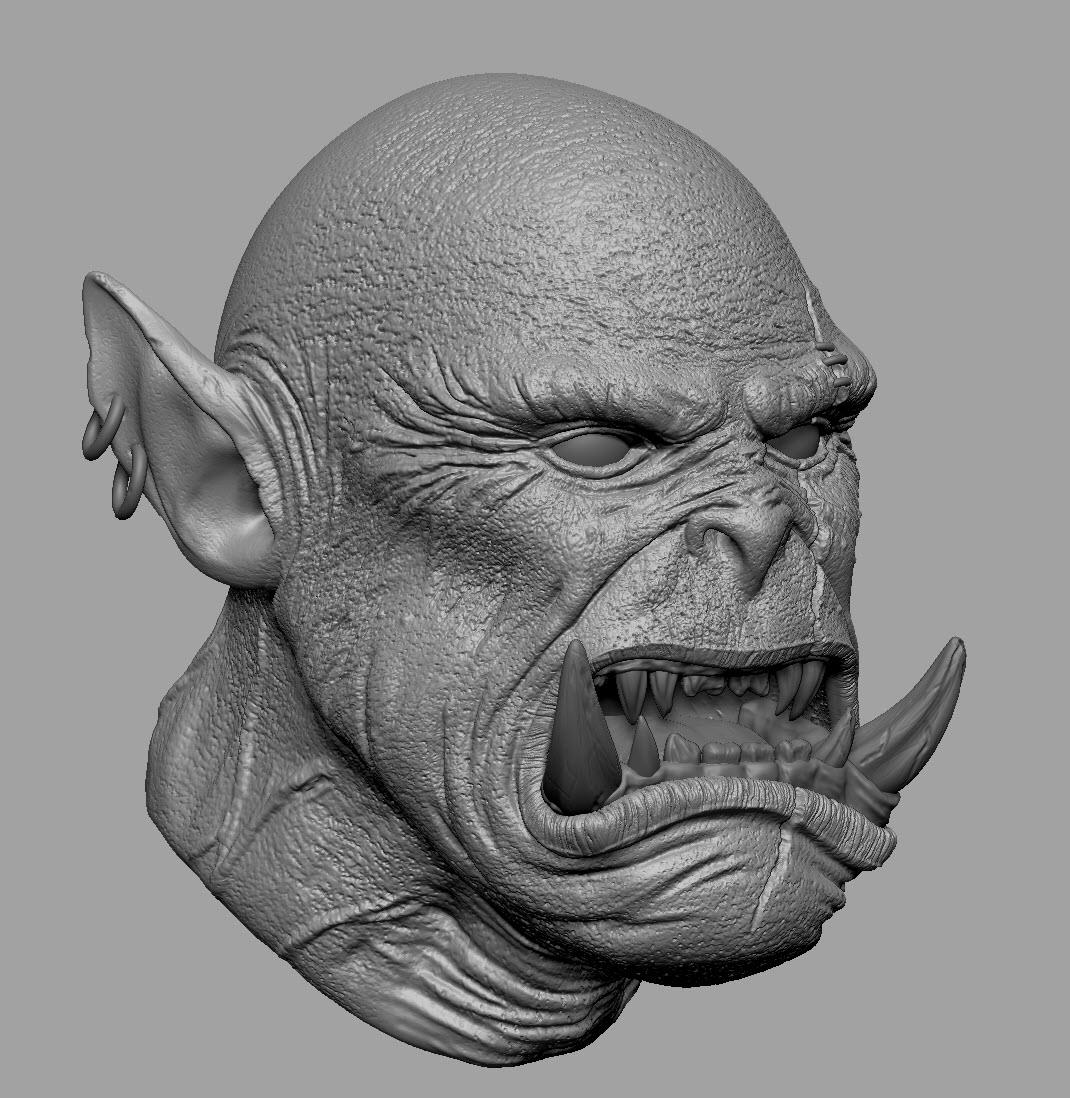
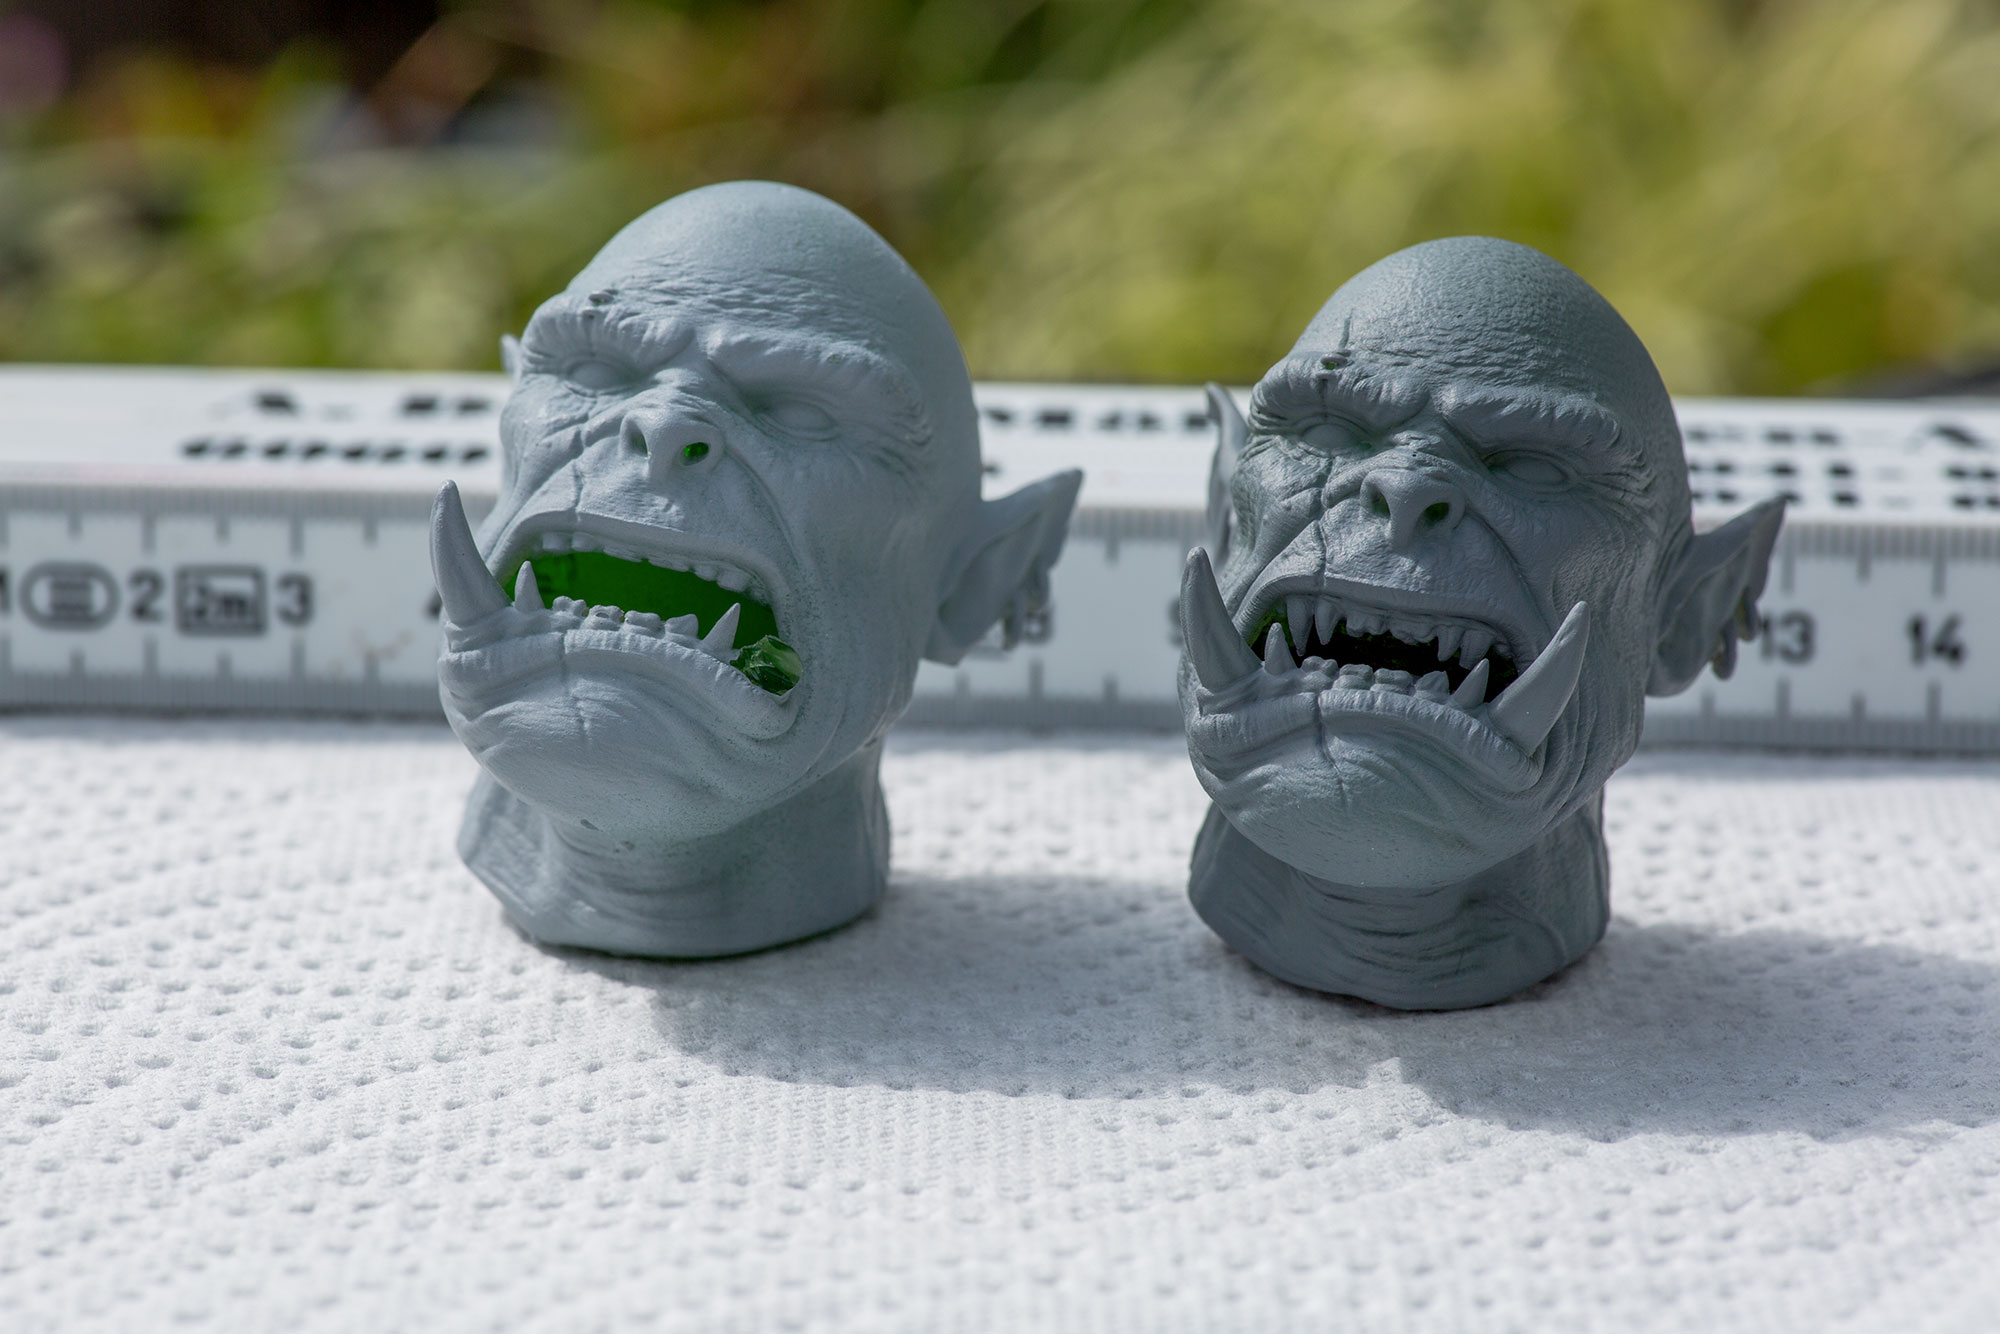
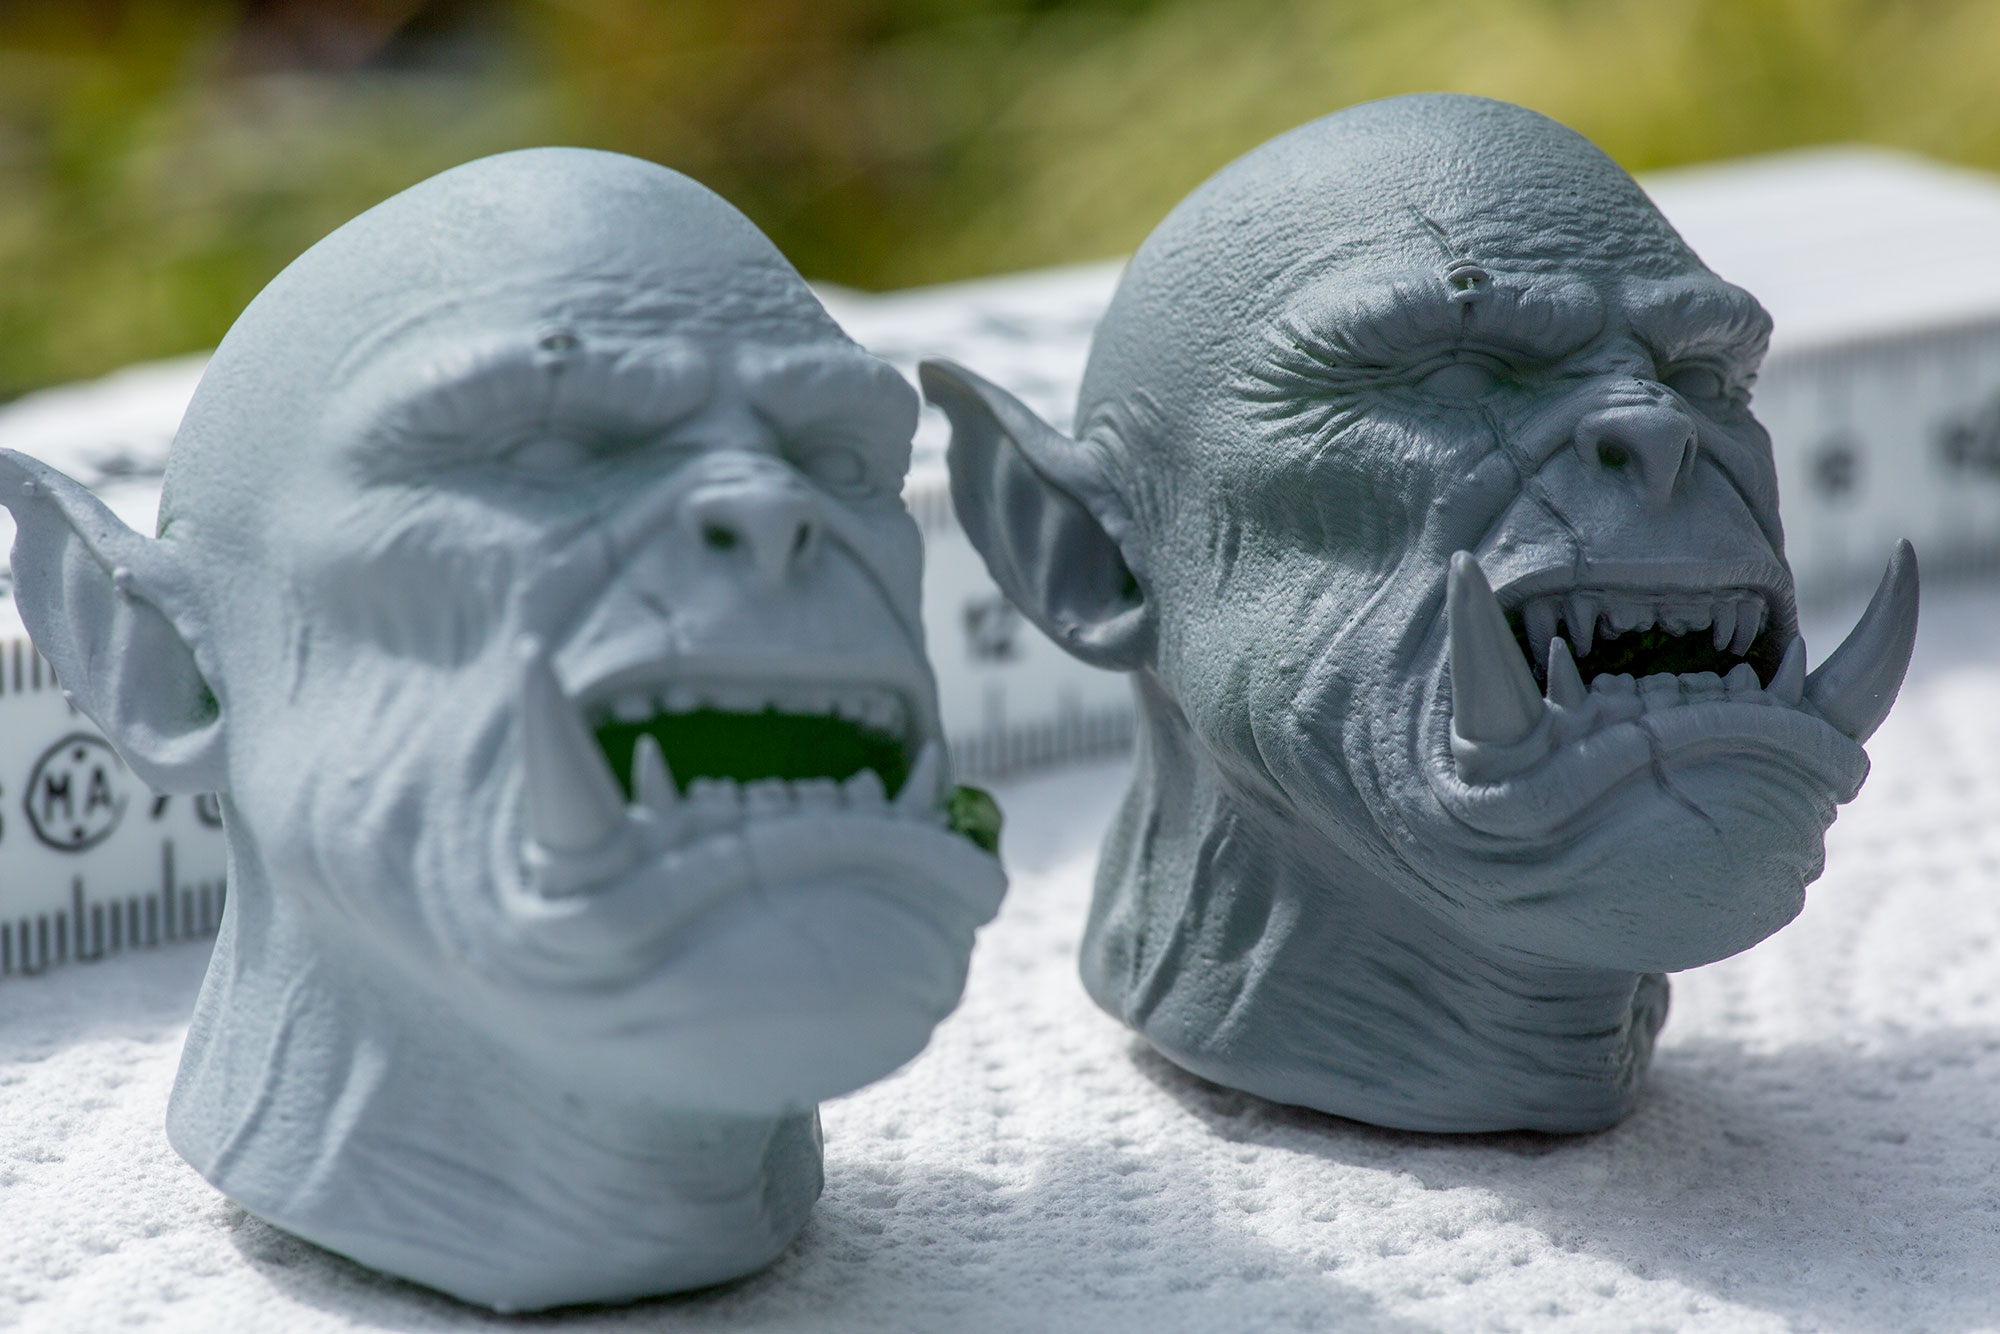
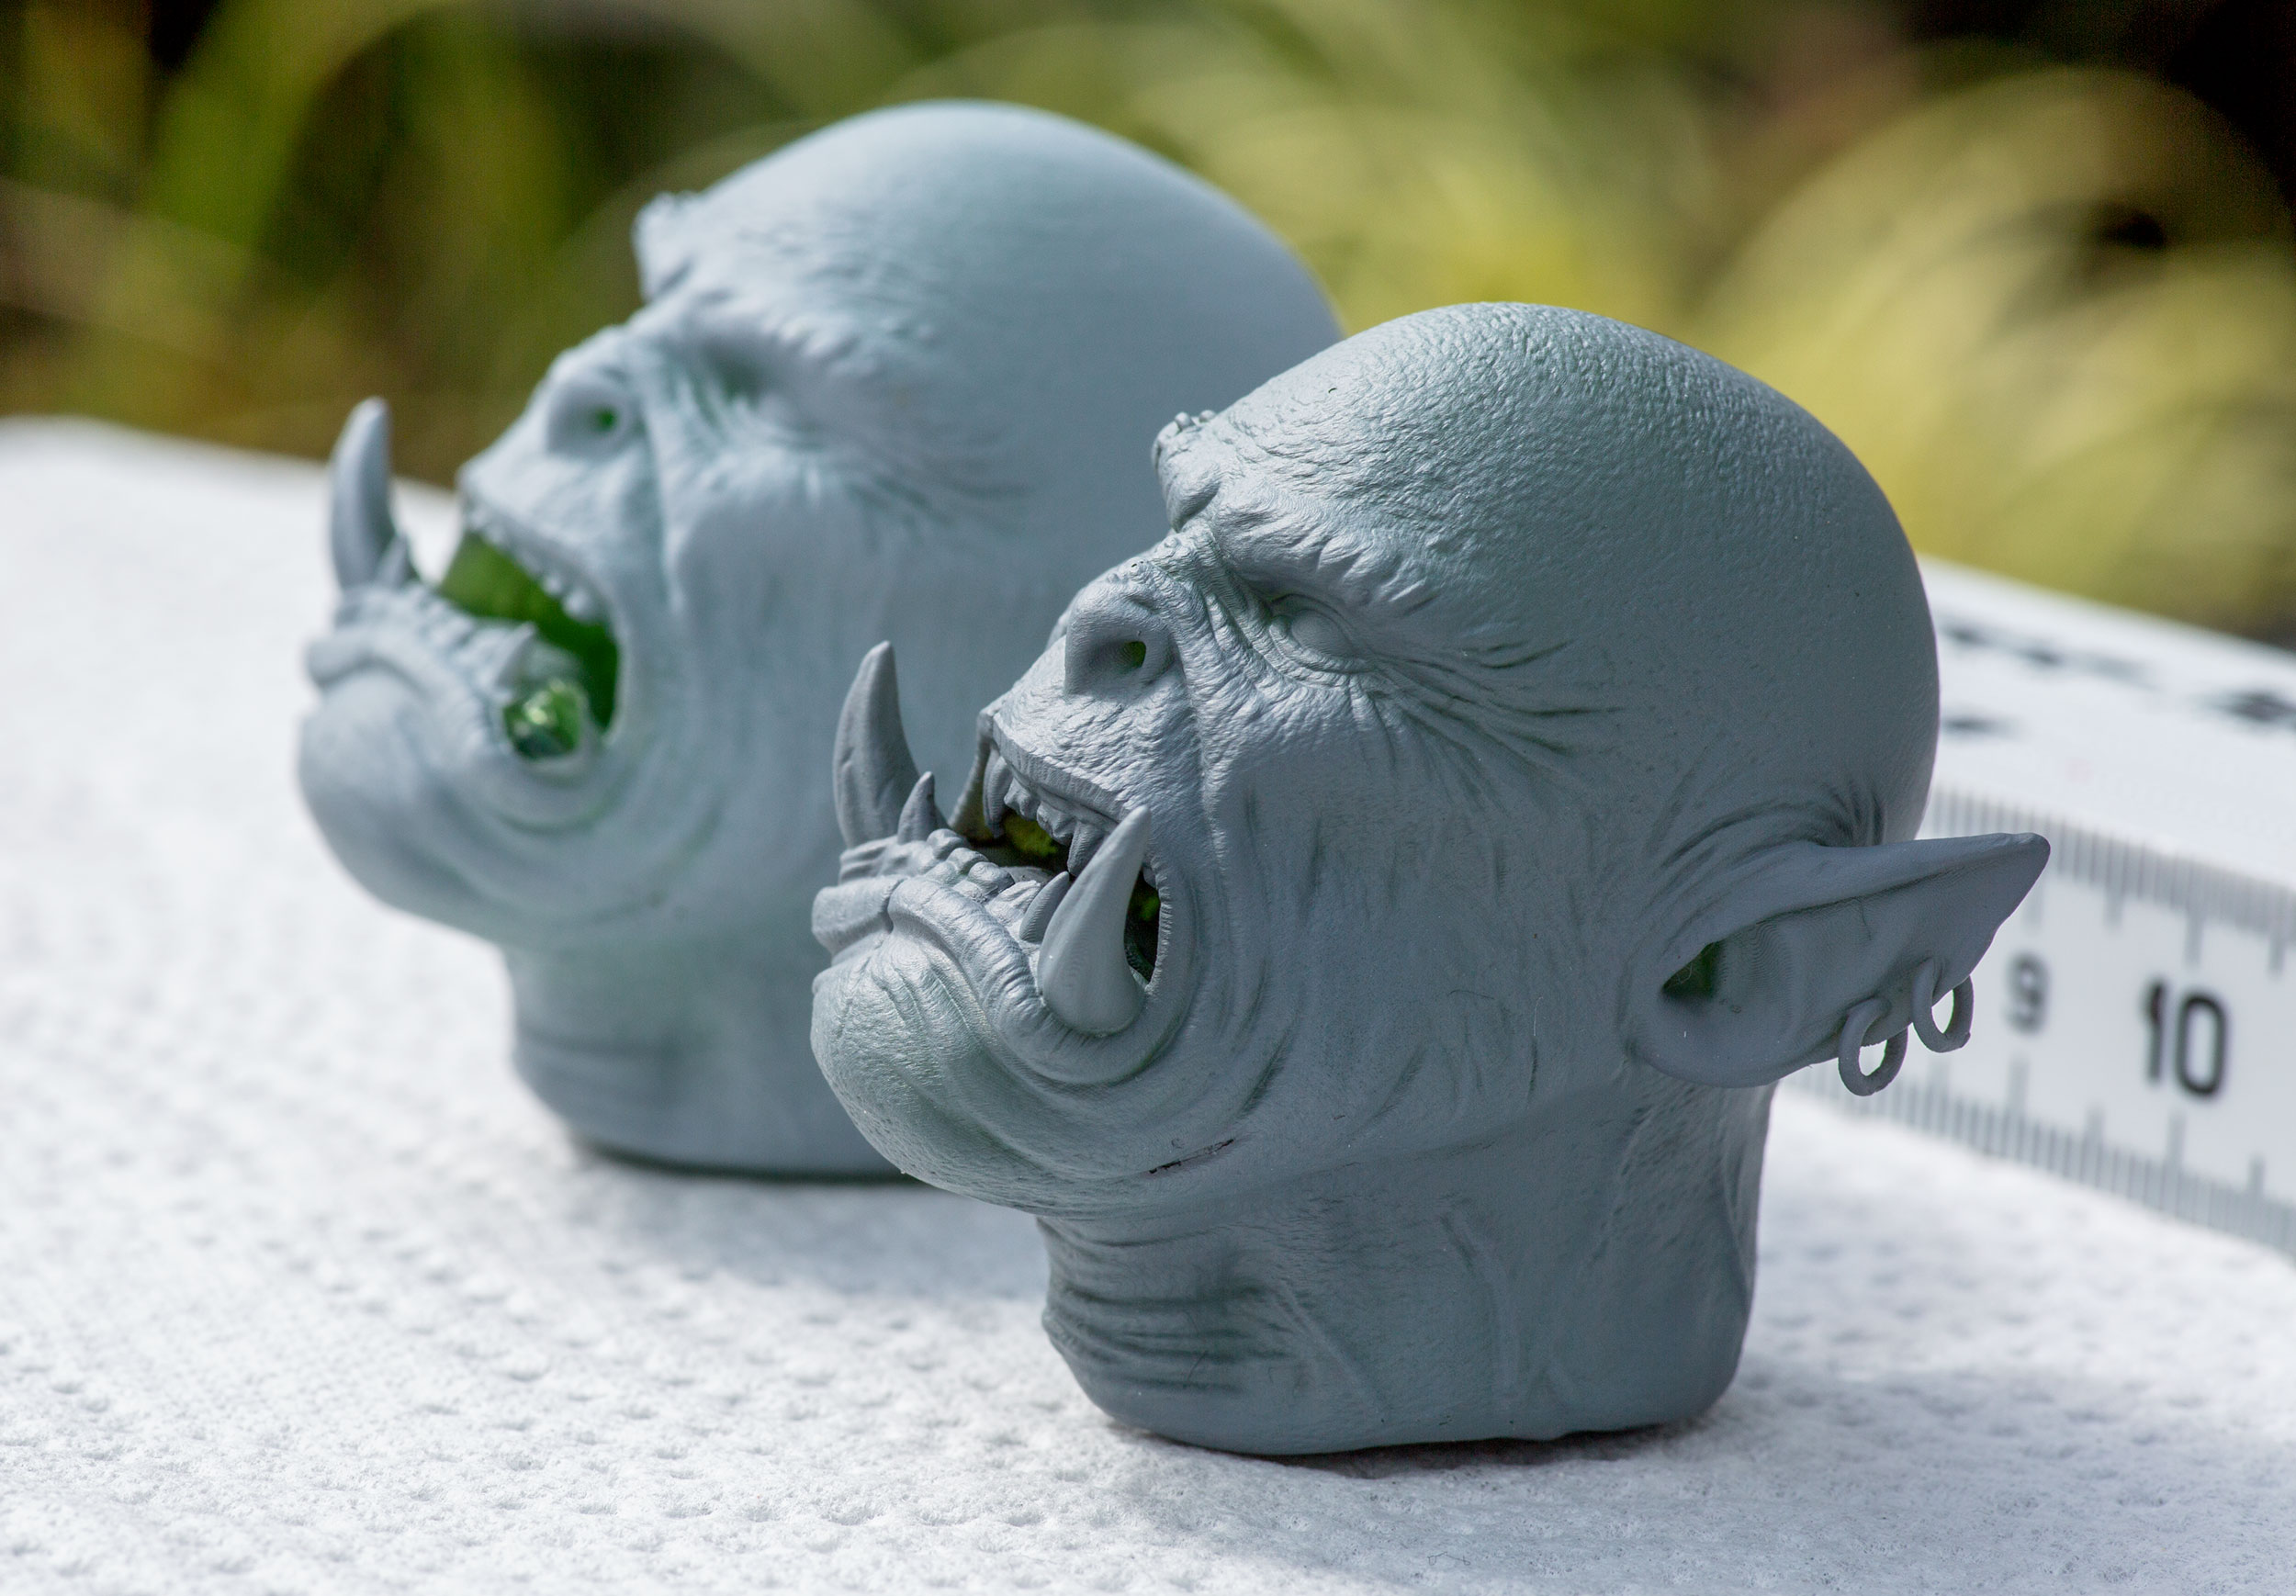
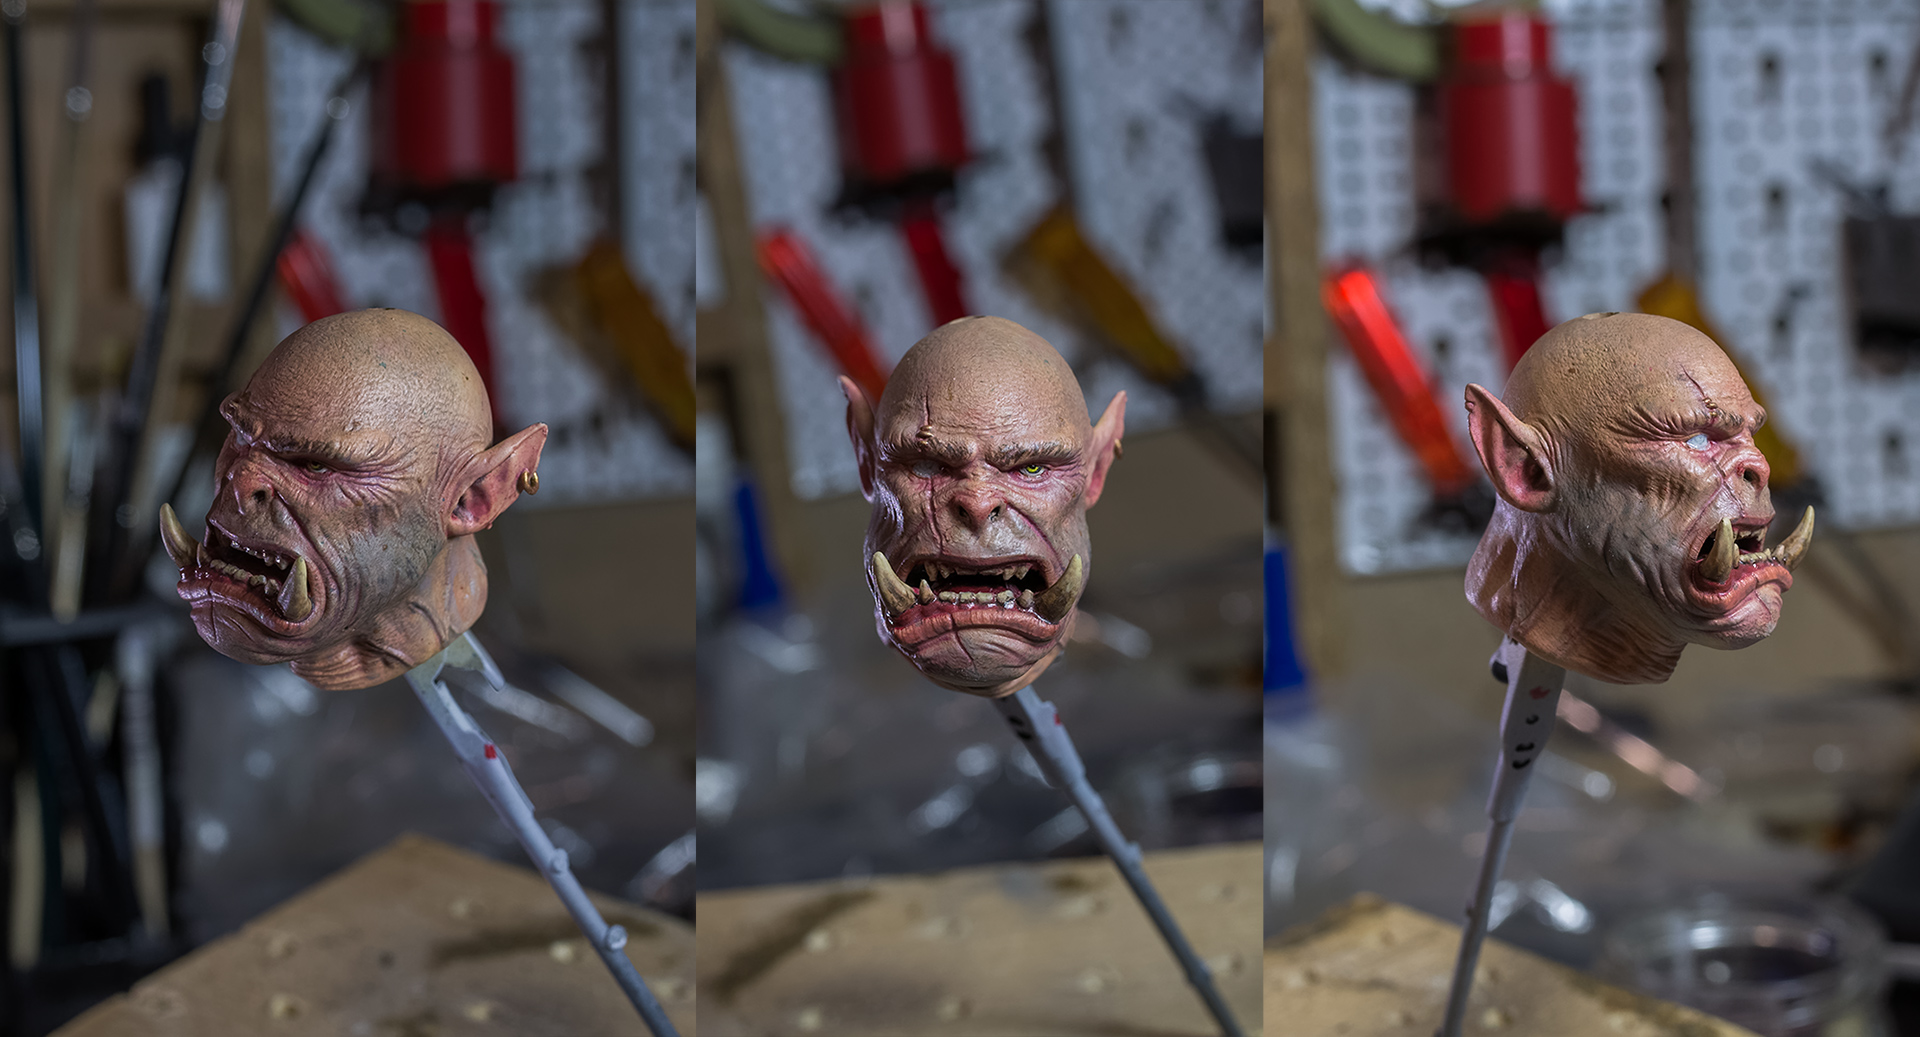
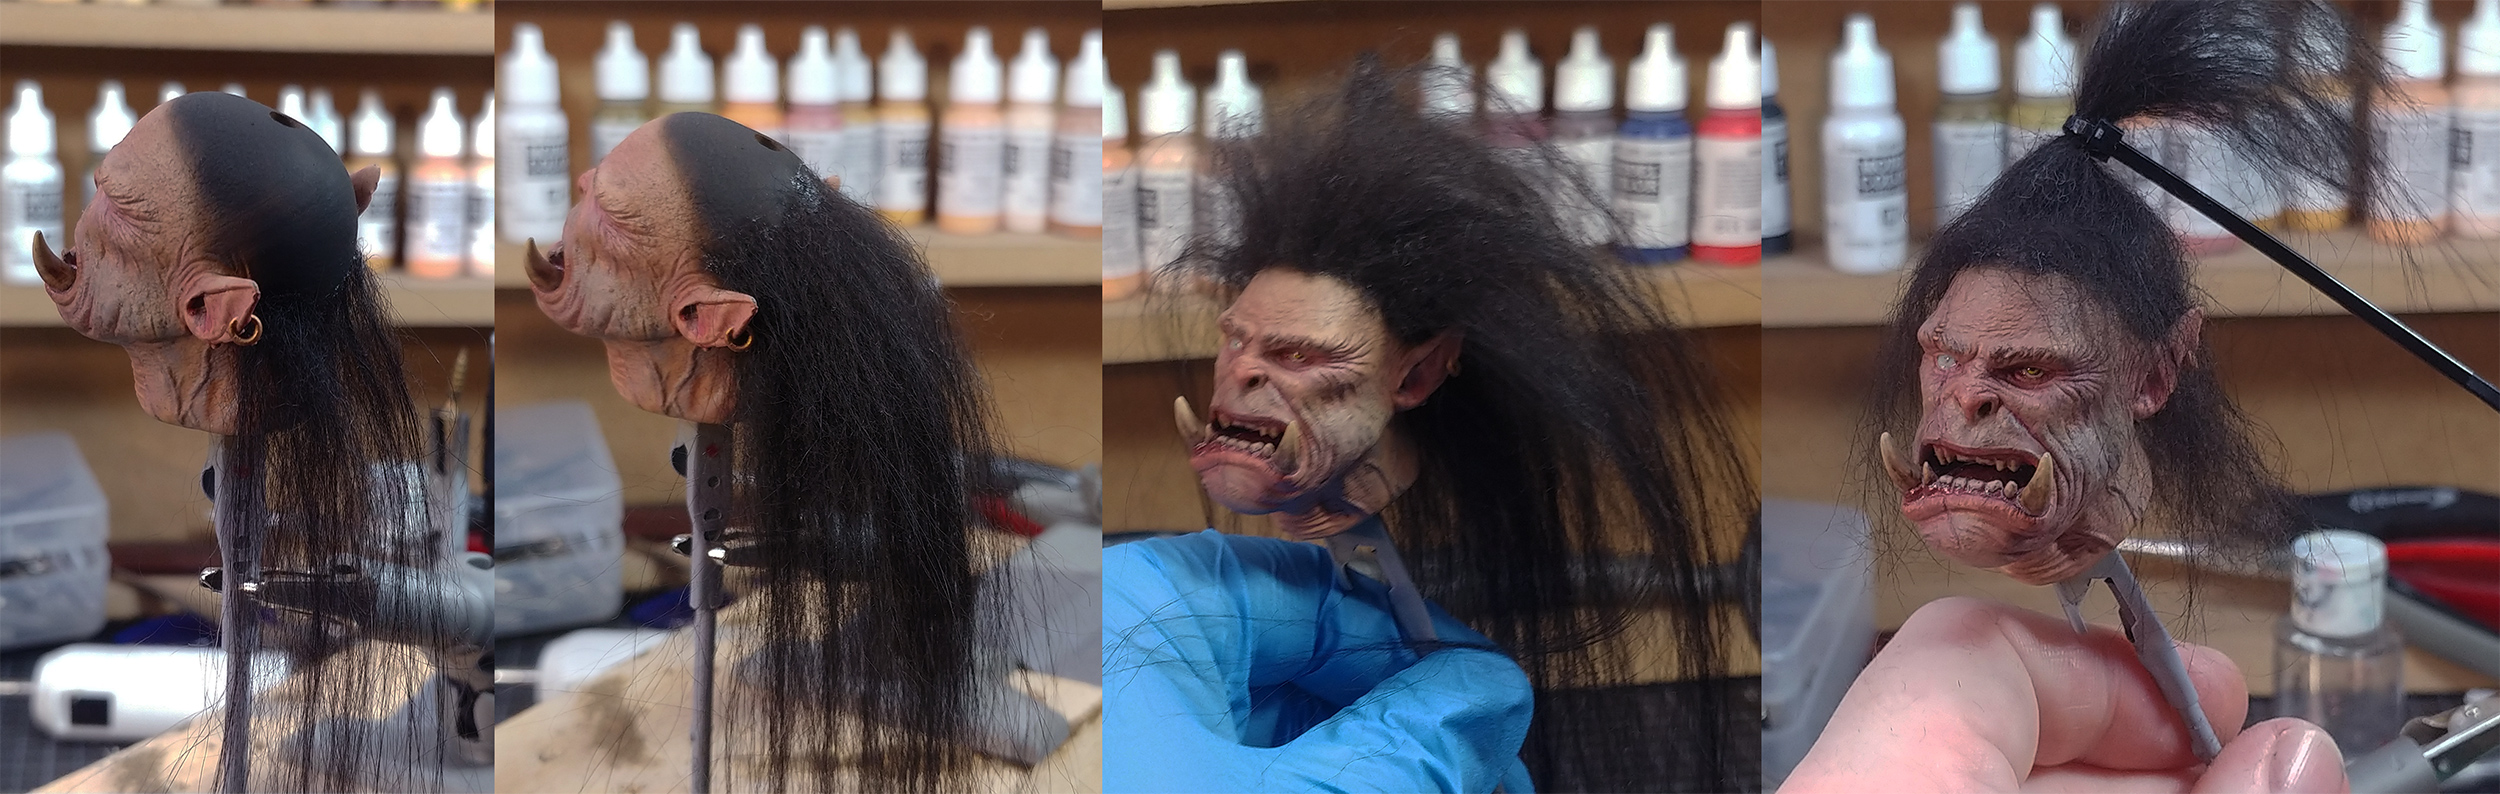
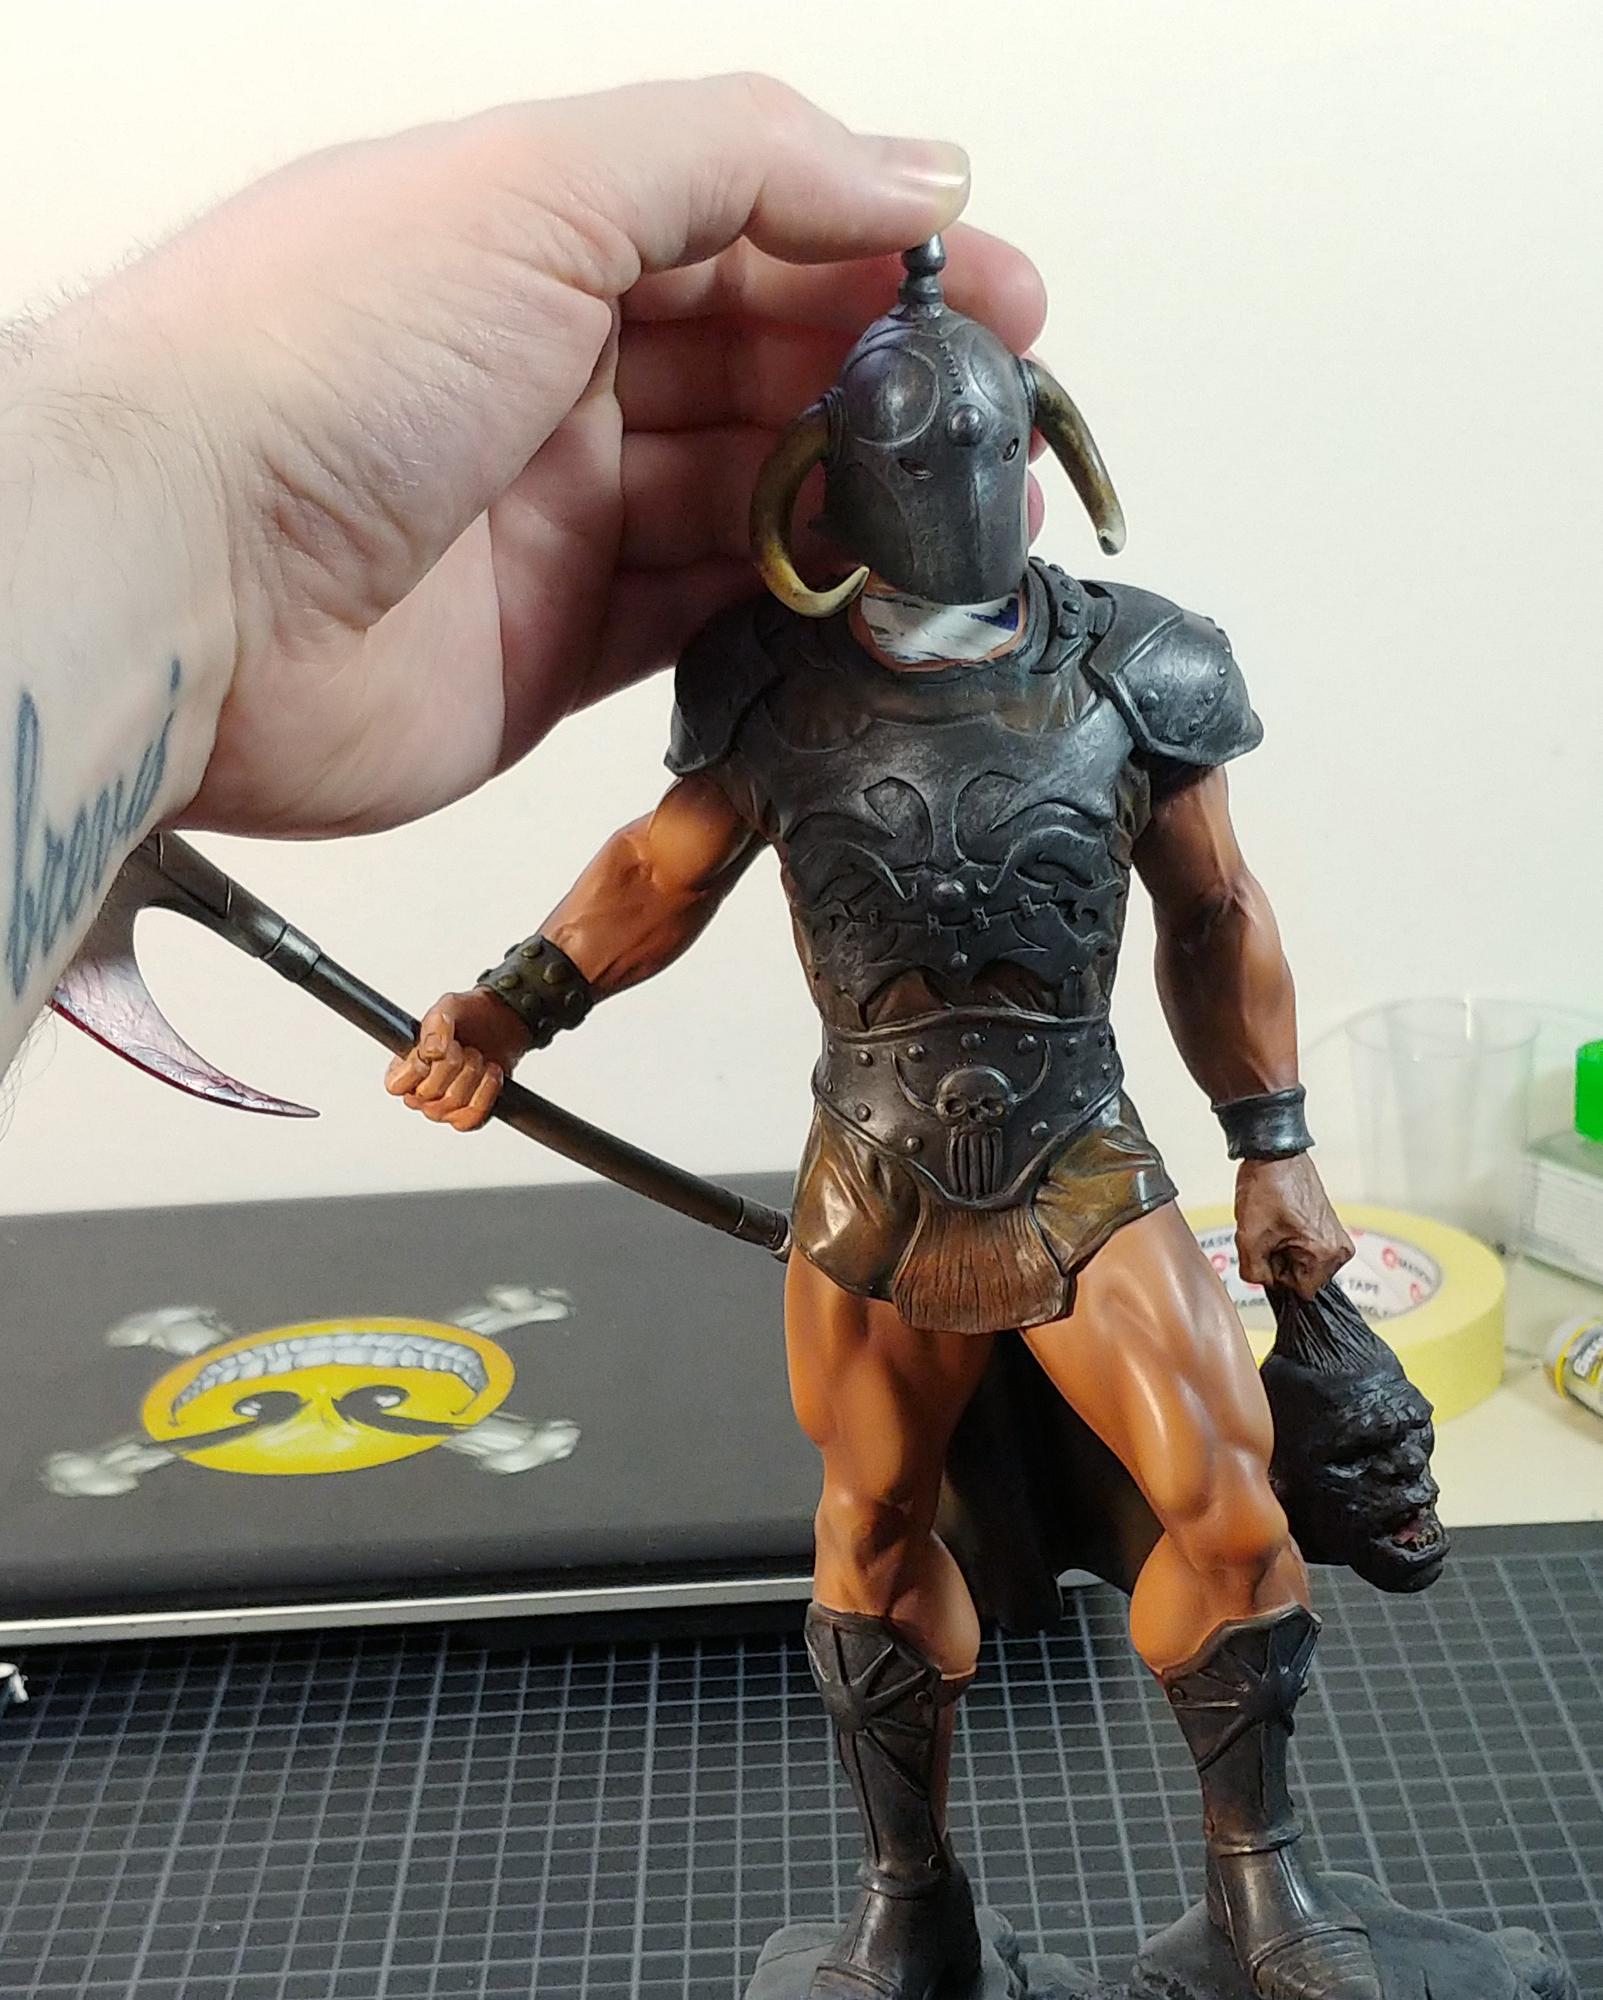
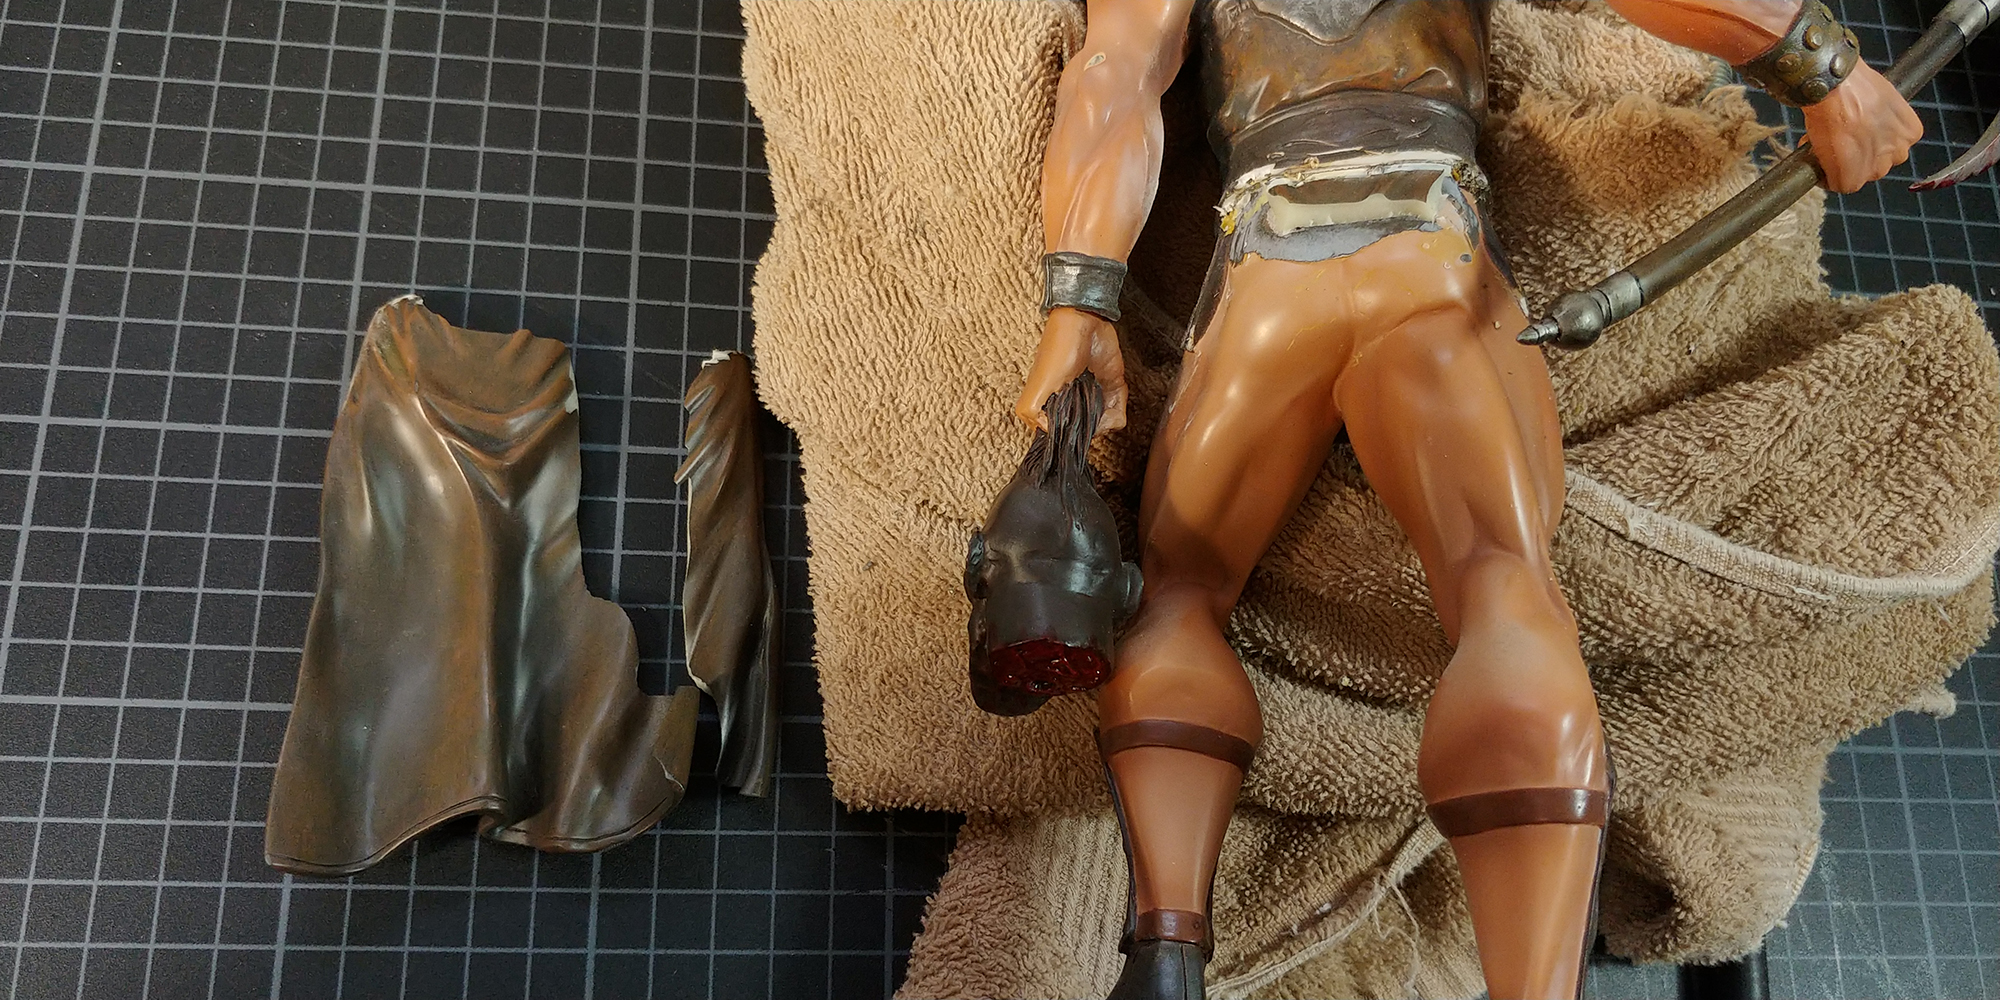
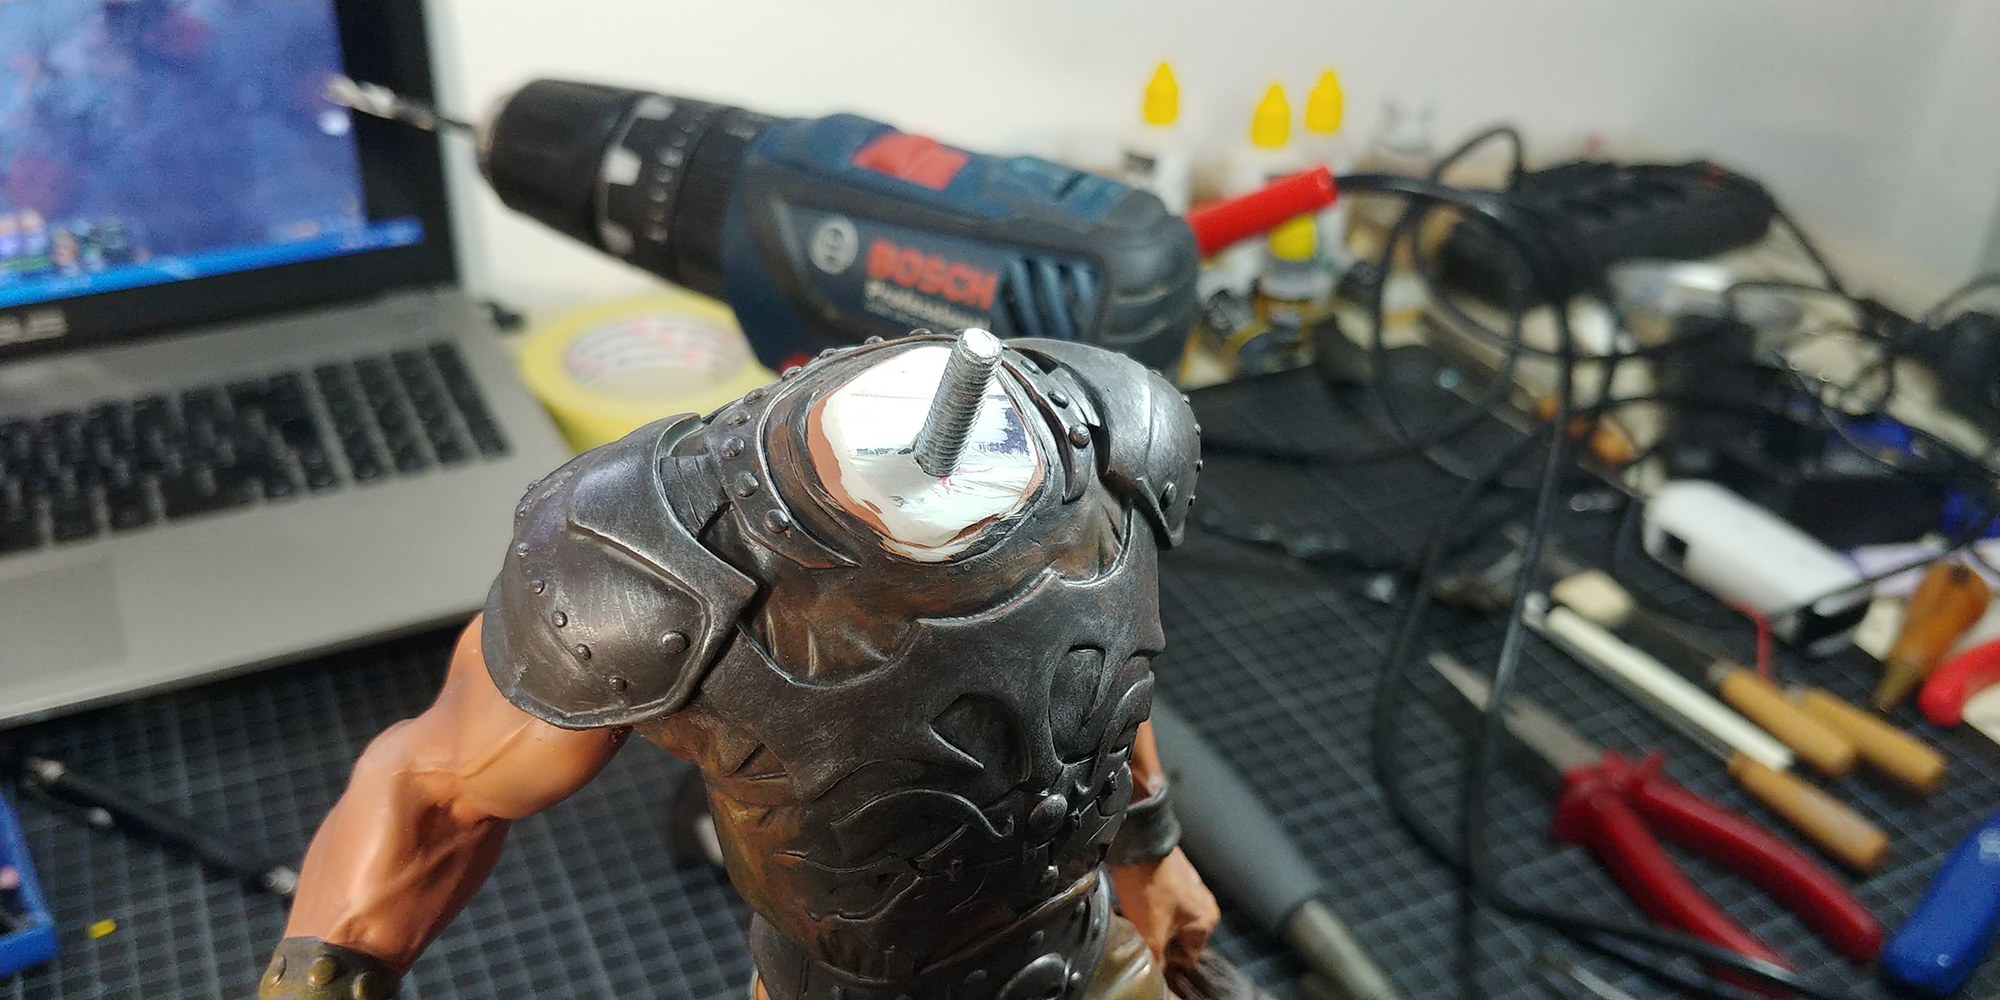
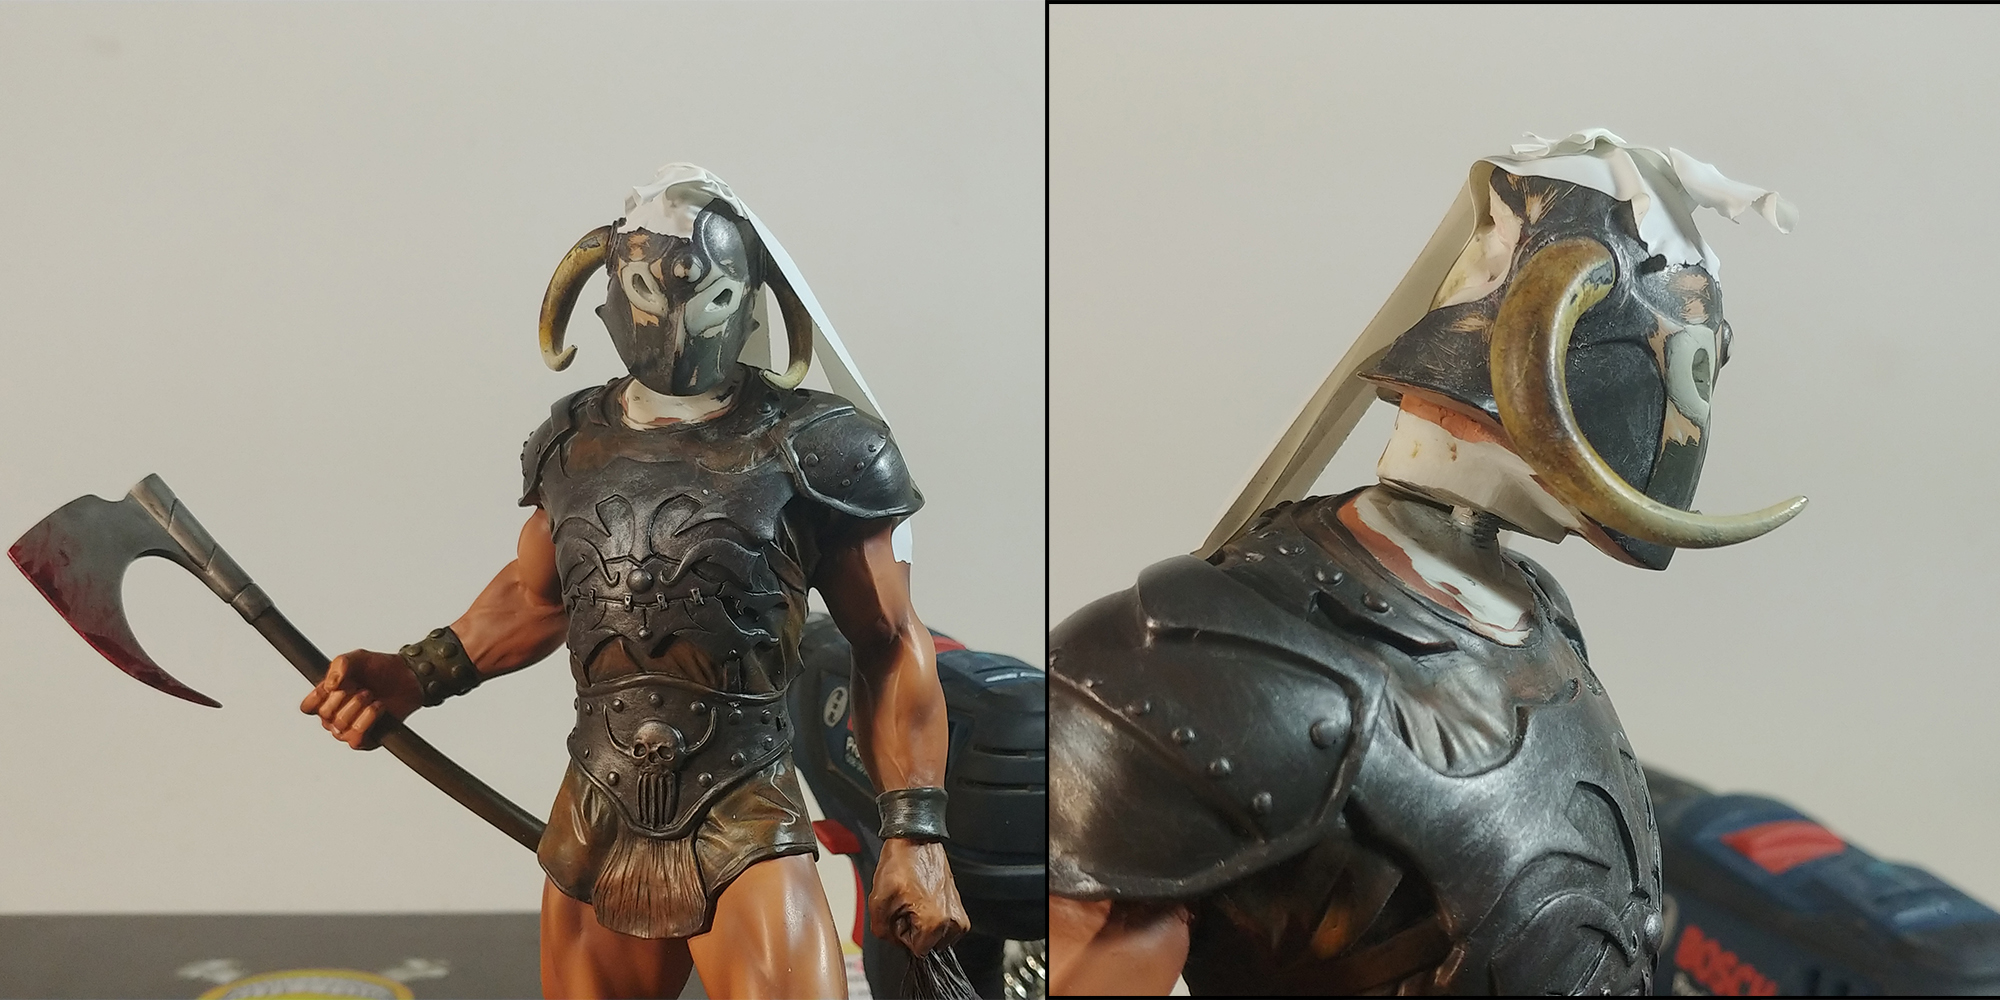
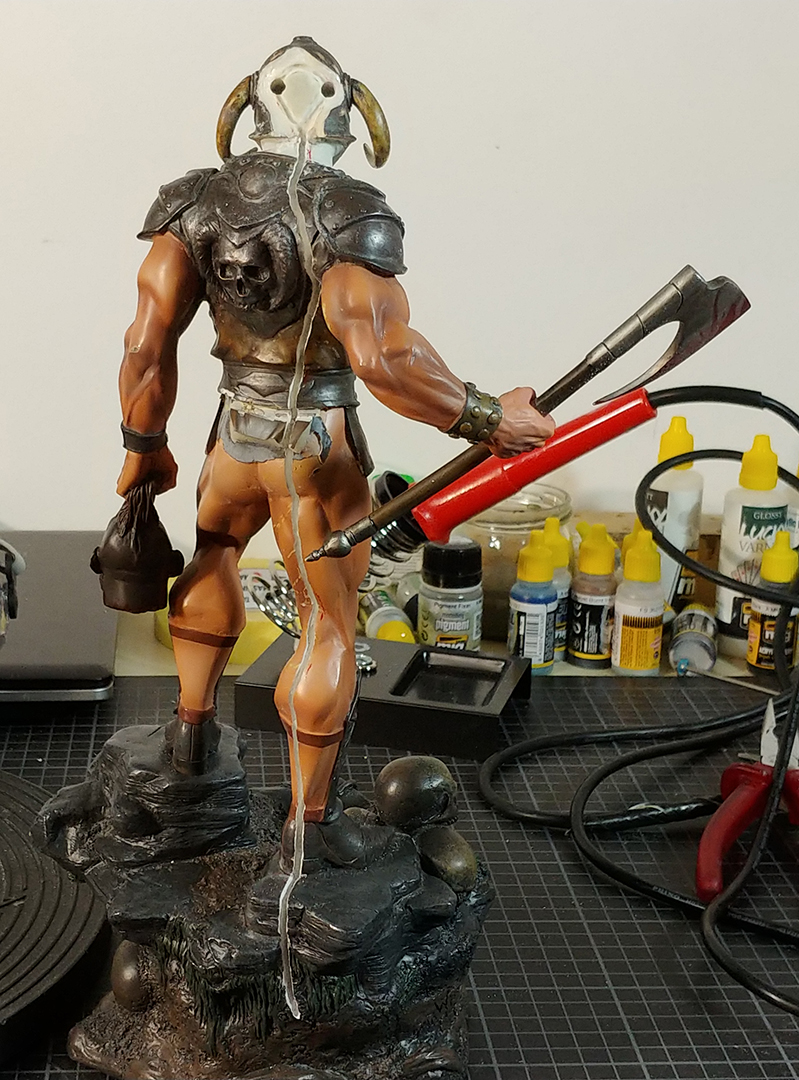
Further I wanted the beheaded to be an orc, so I remodeled the head and neck. This won’t be last time. The head was close to the leg, which made it really hard to sculpt.

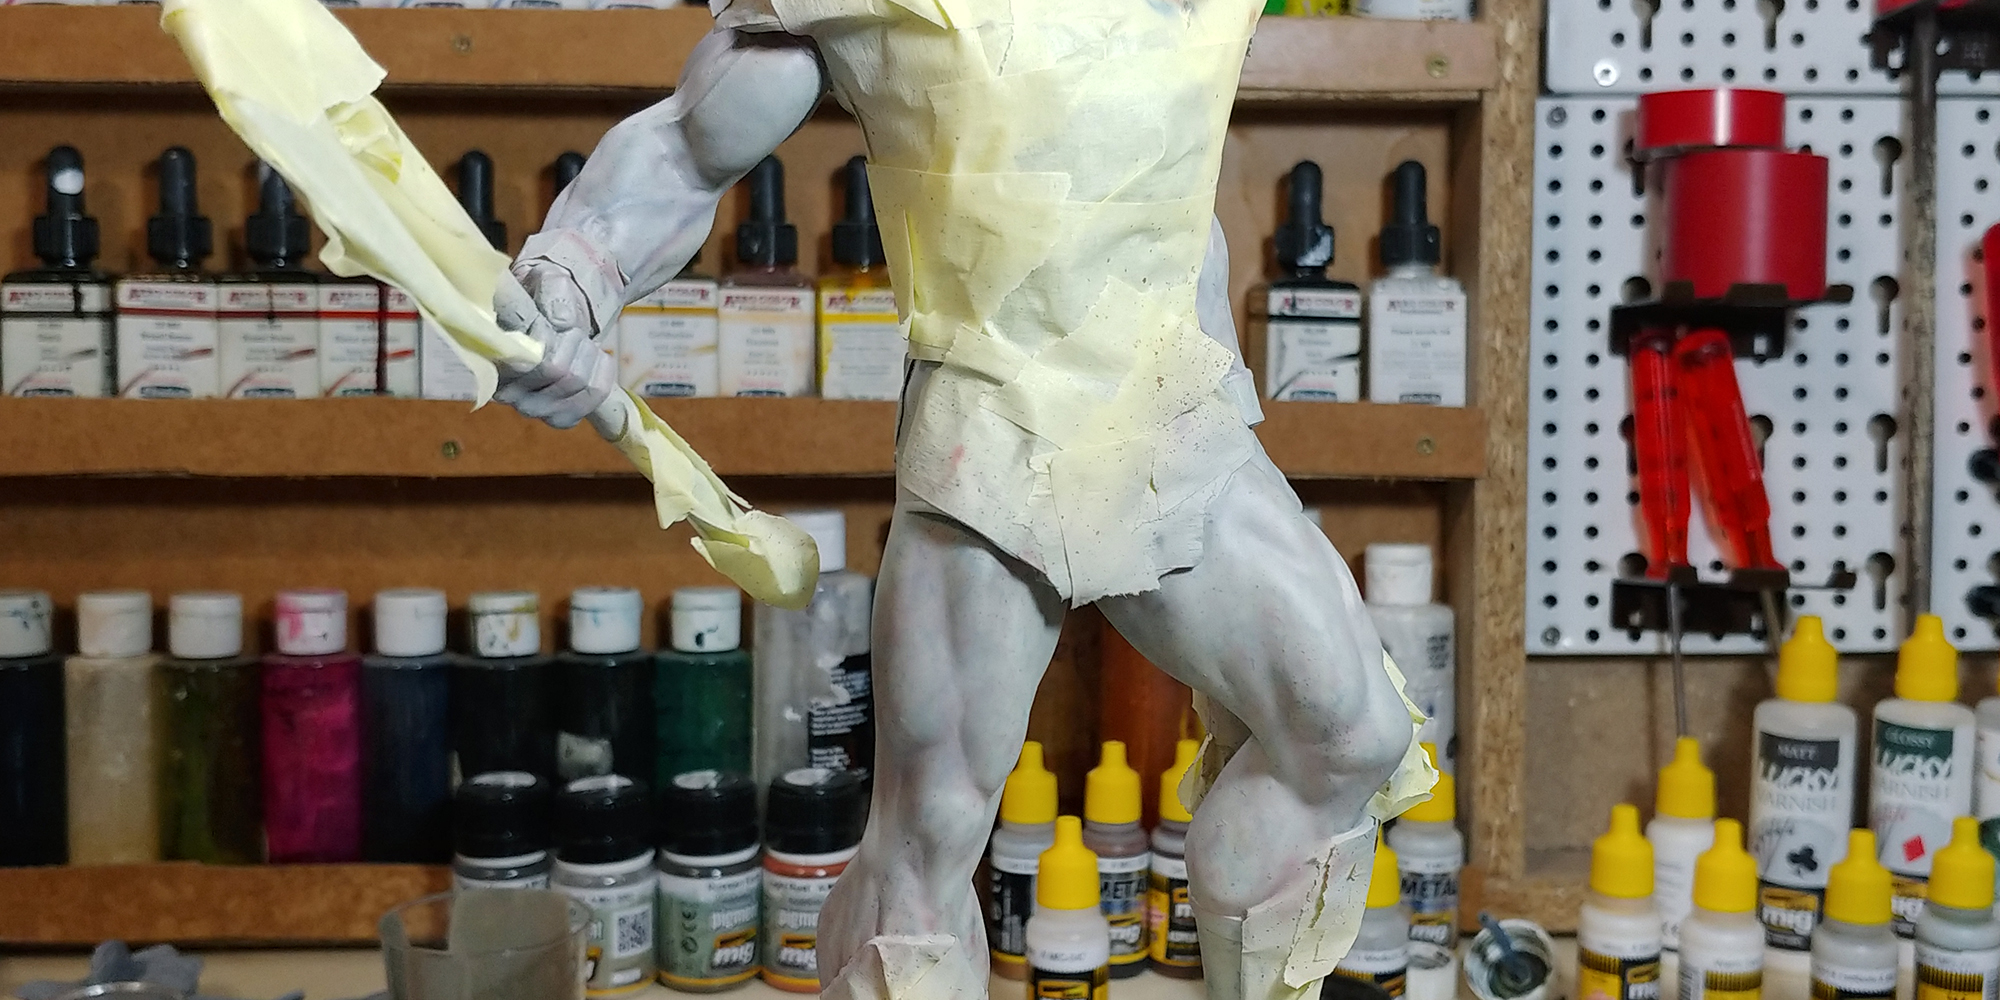
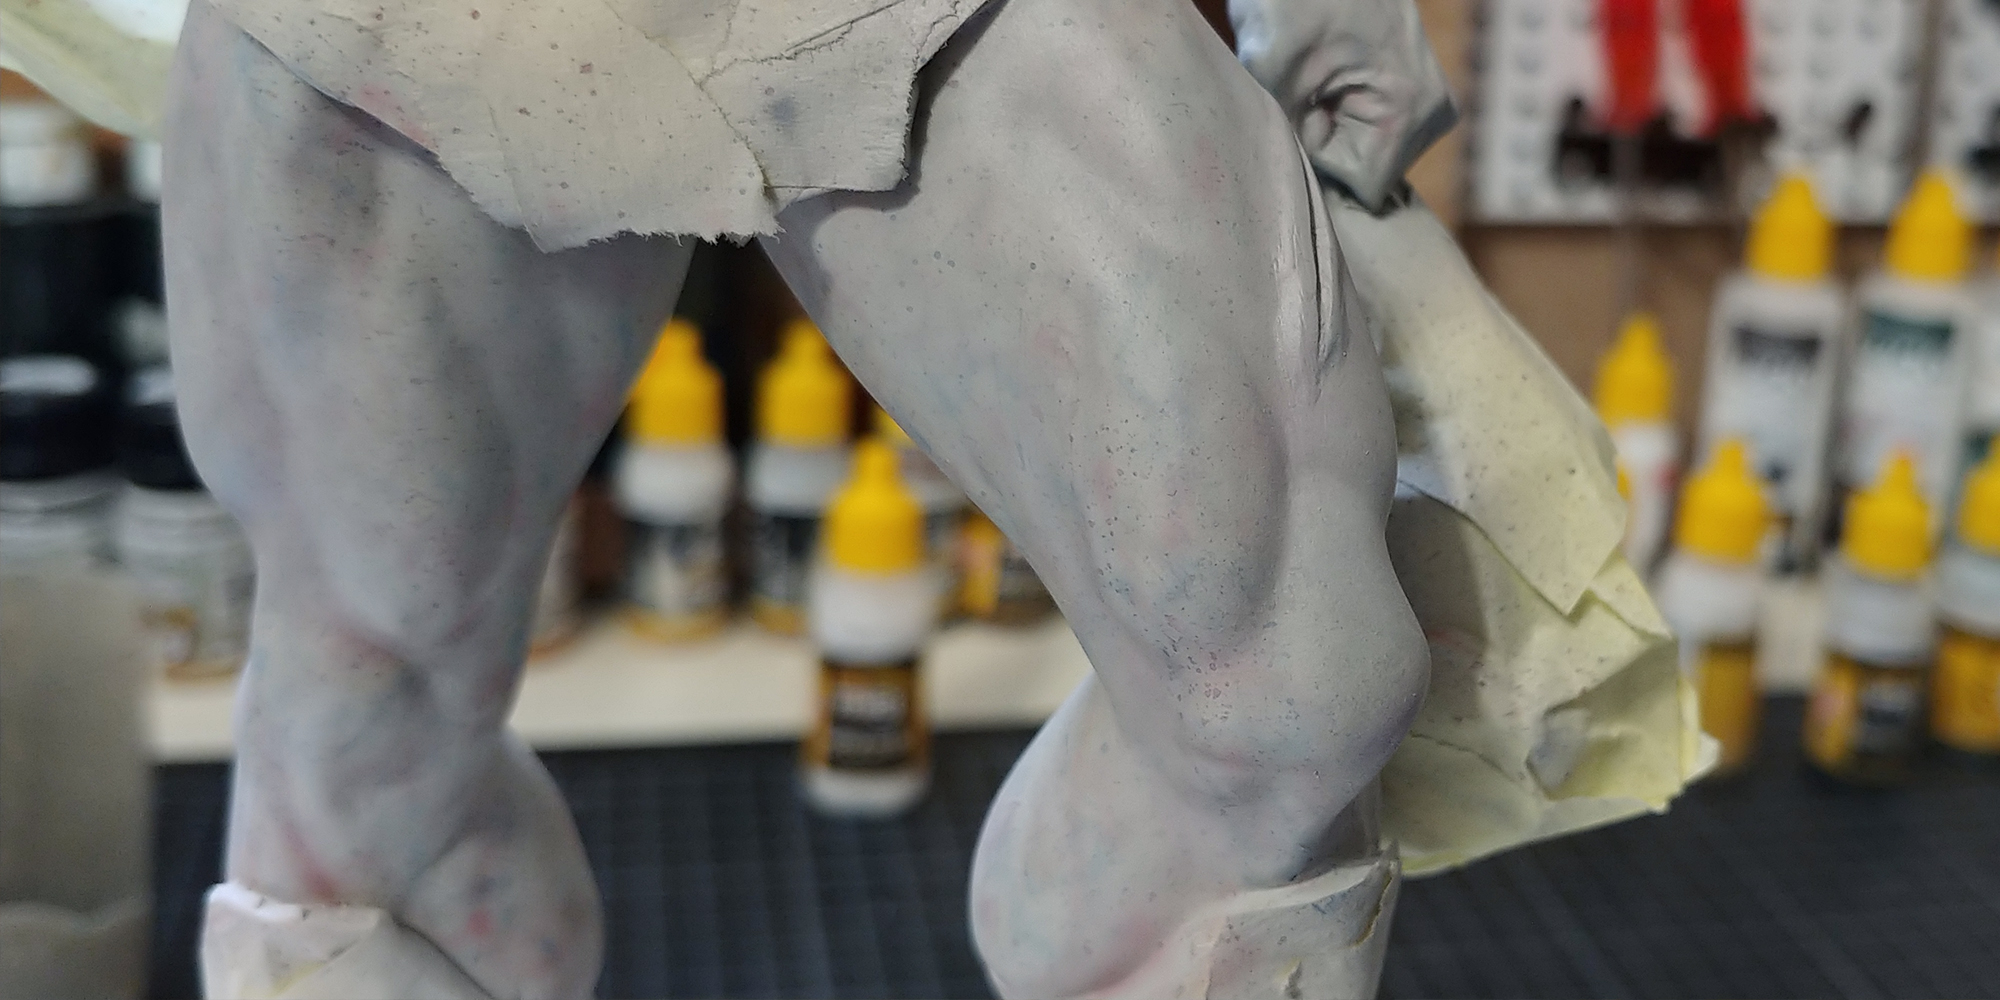
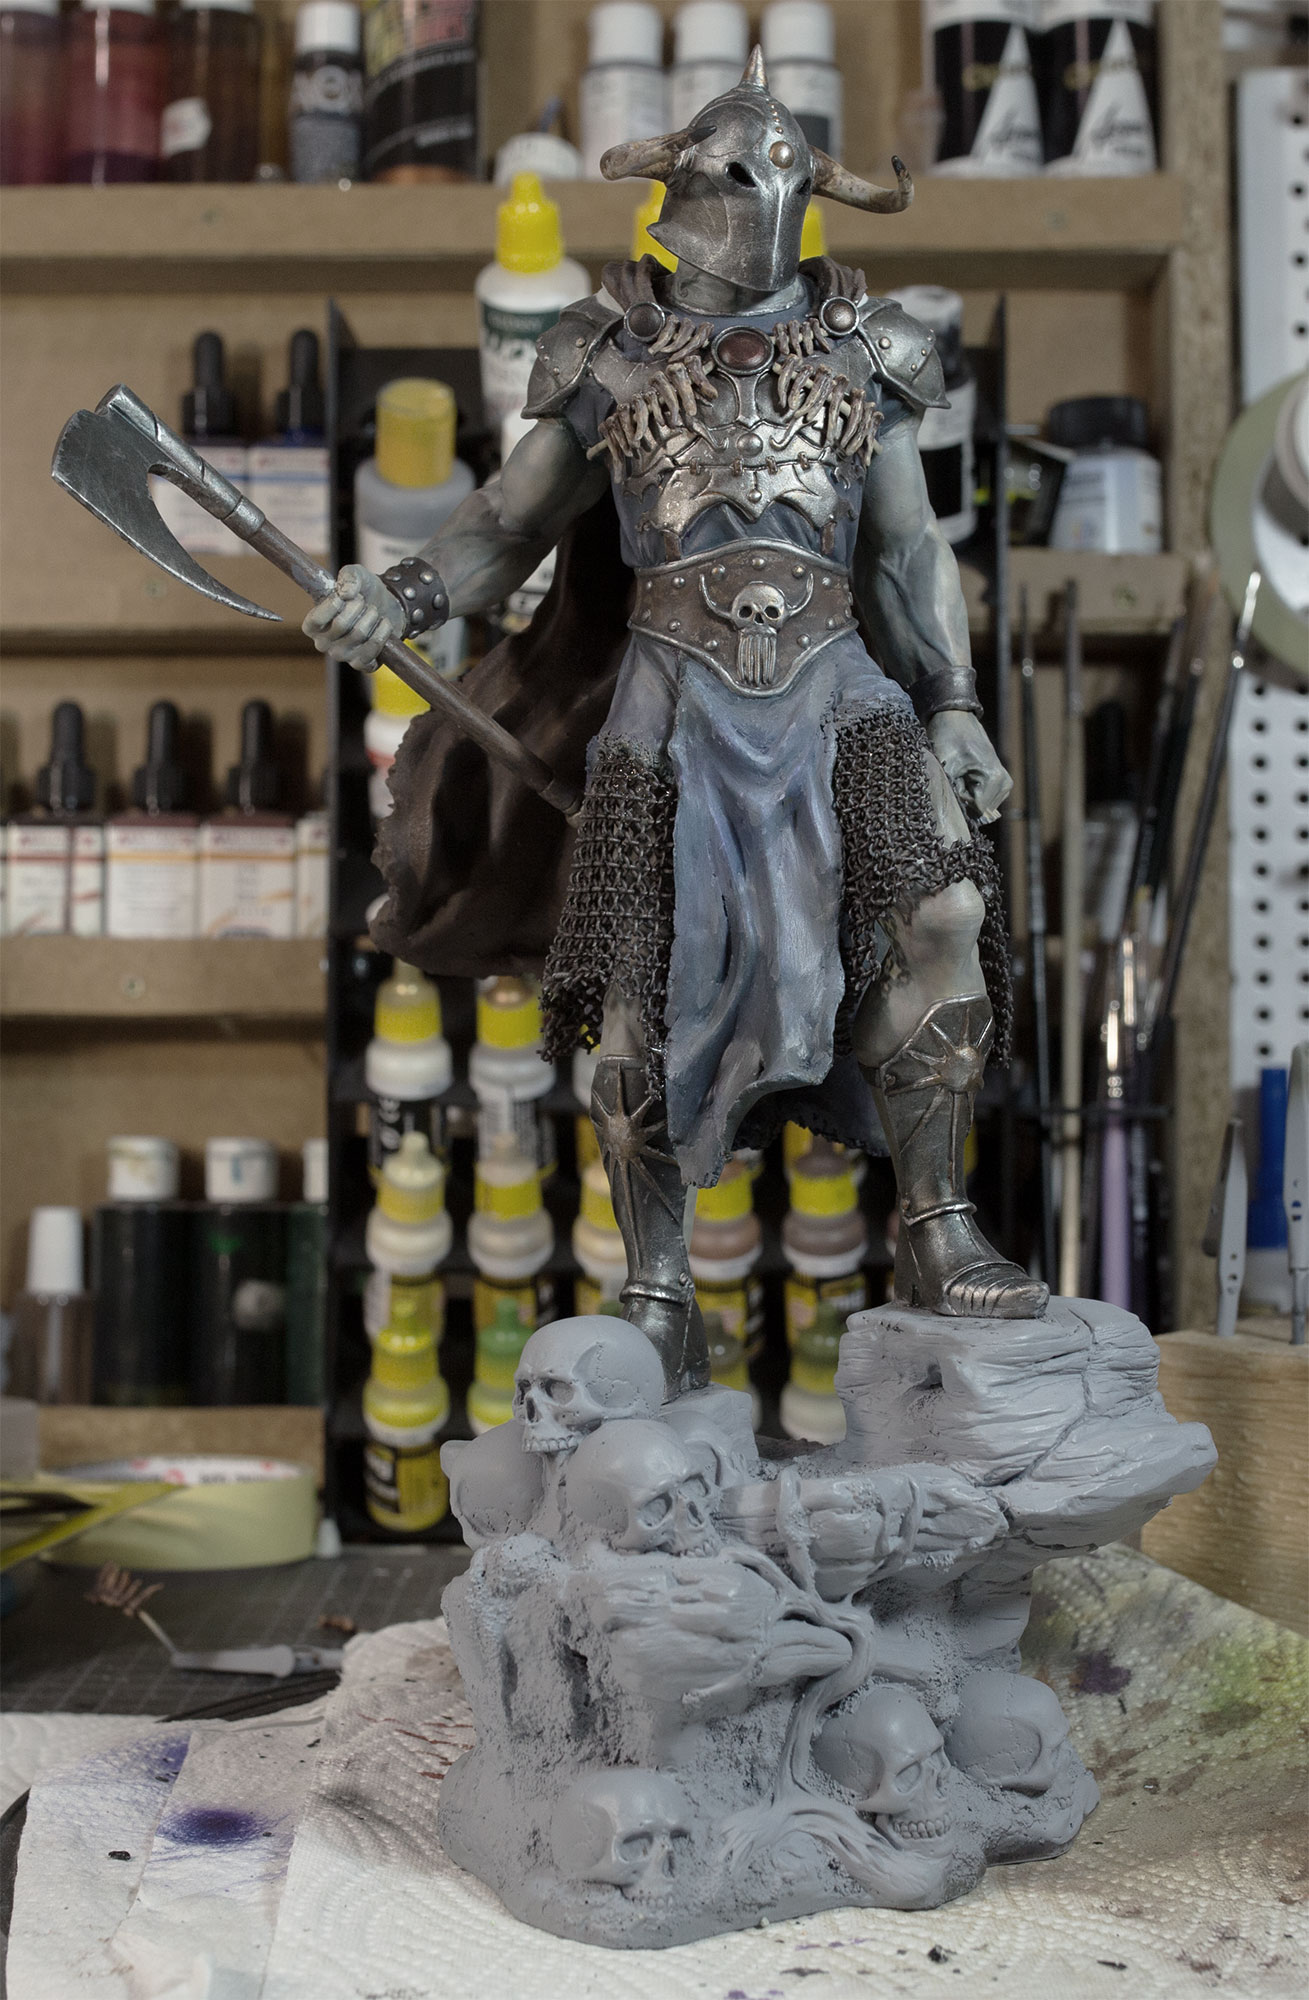
For finishing the resculpting process, I added a scar to the arm and a fresh cut to the leg. Always try telling story with your work. 

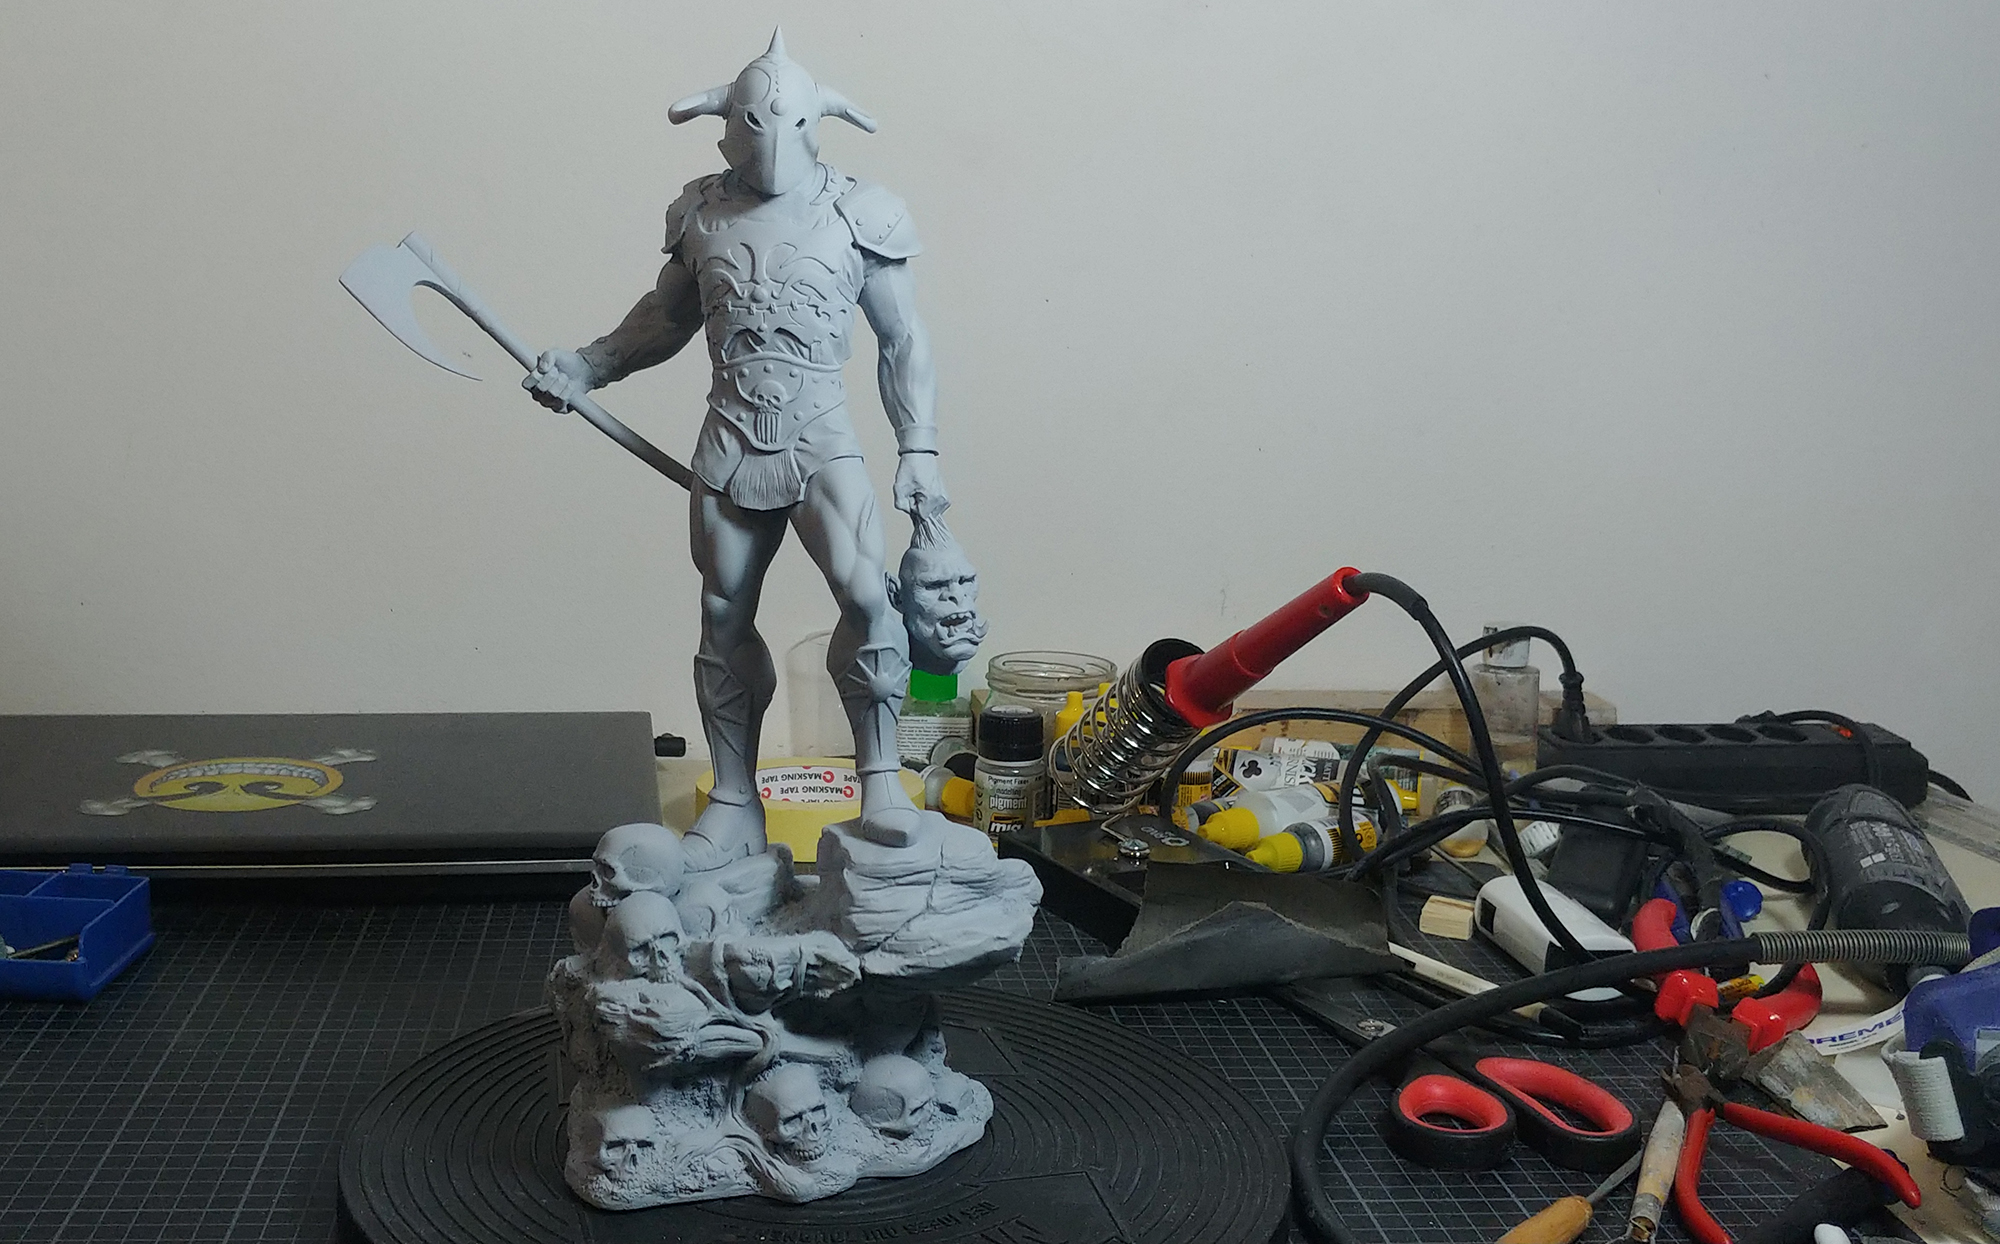
Mine was something like this:
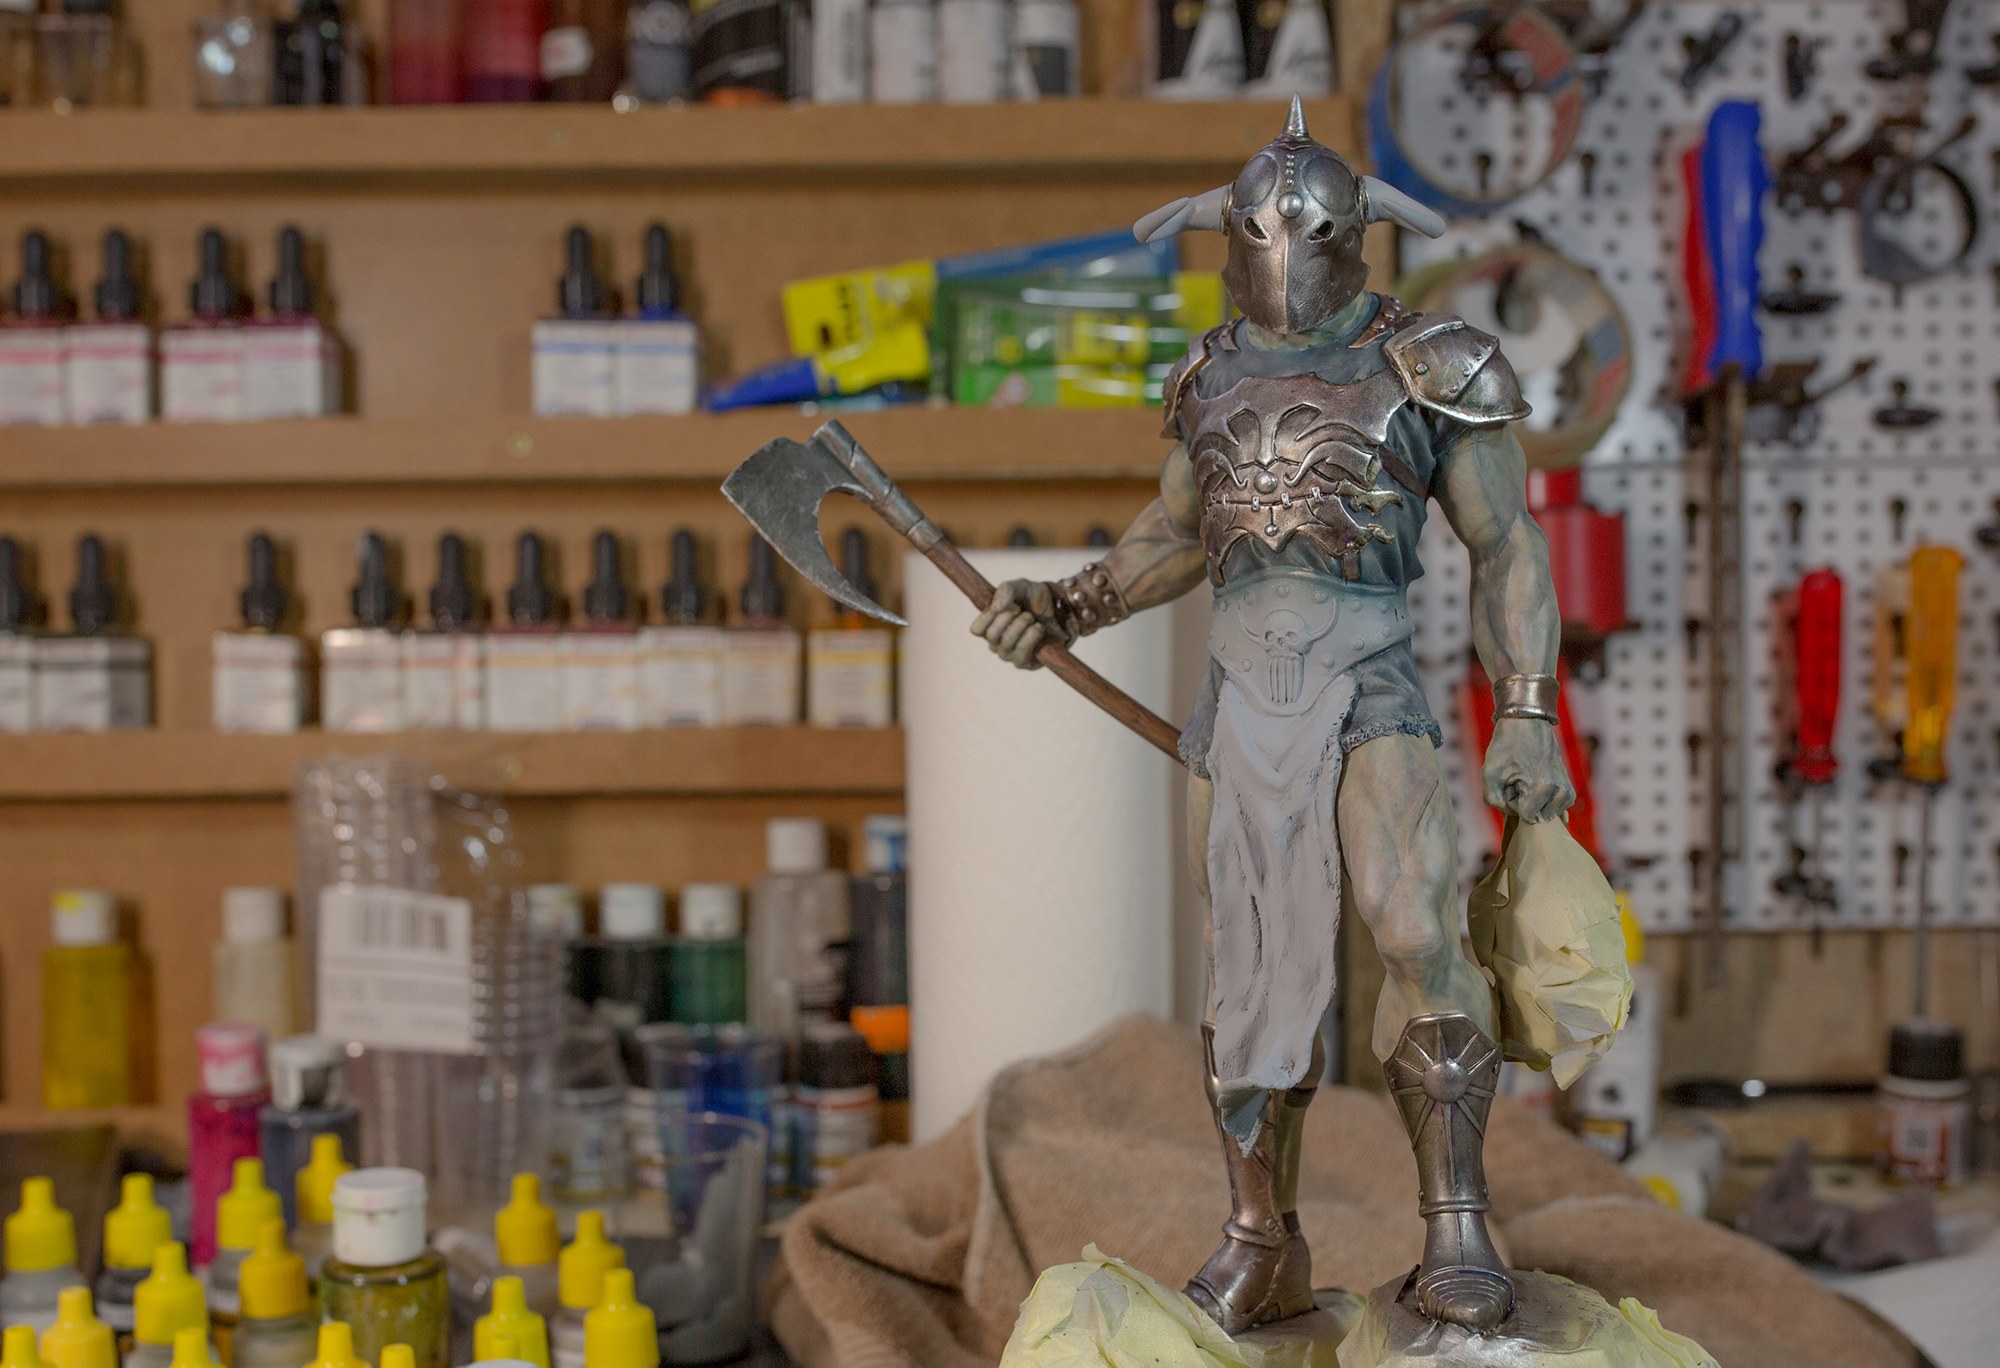
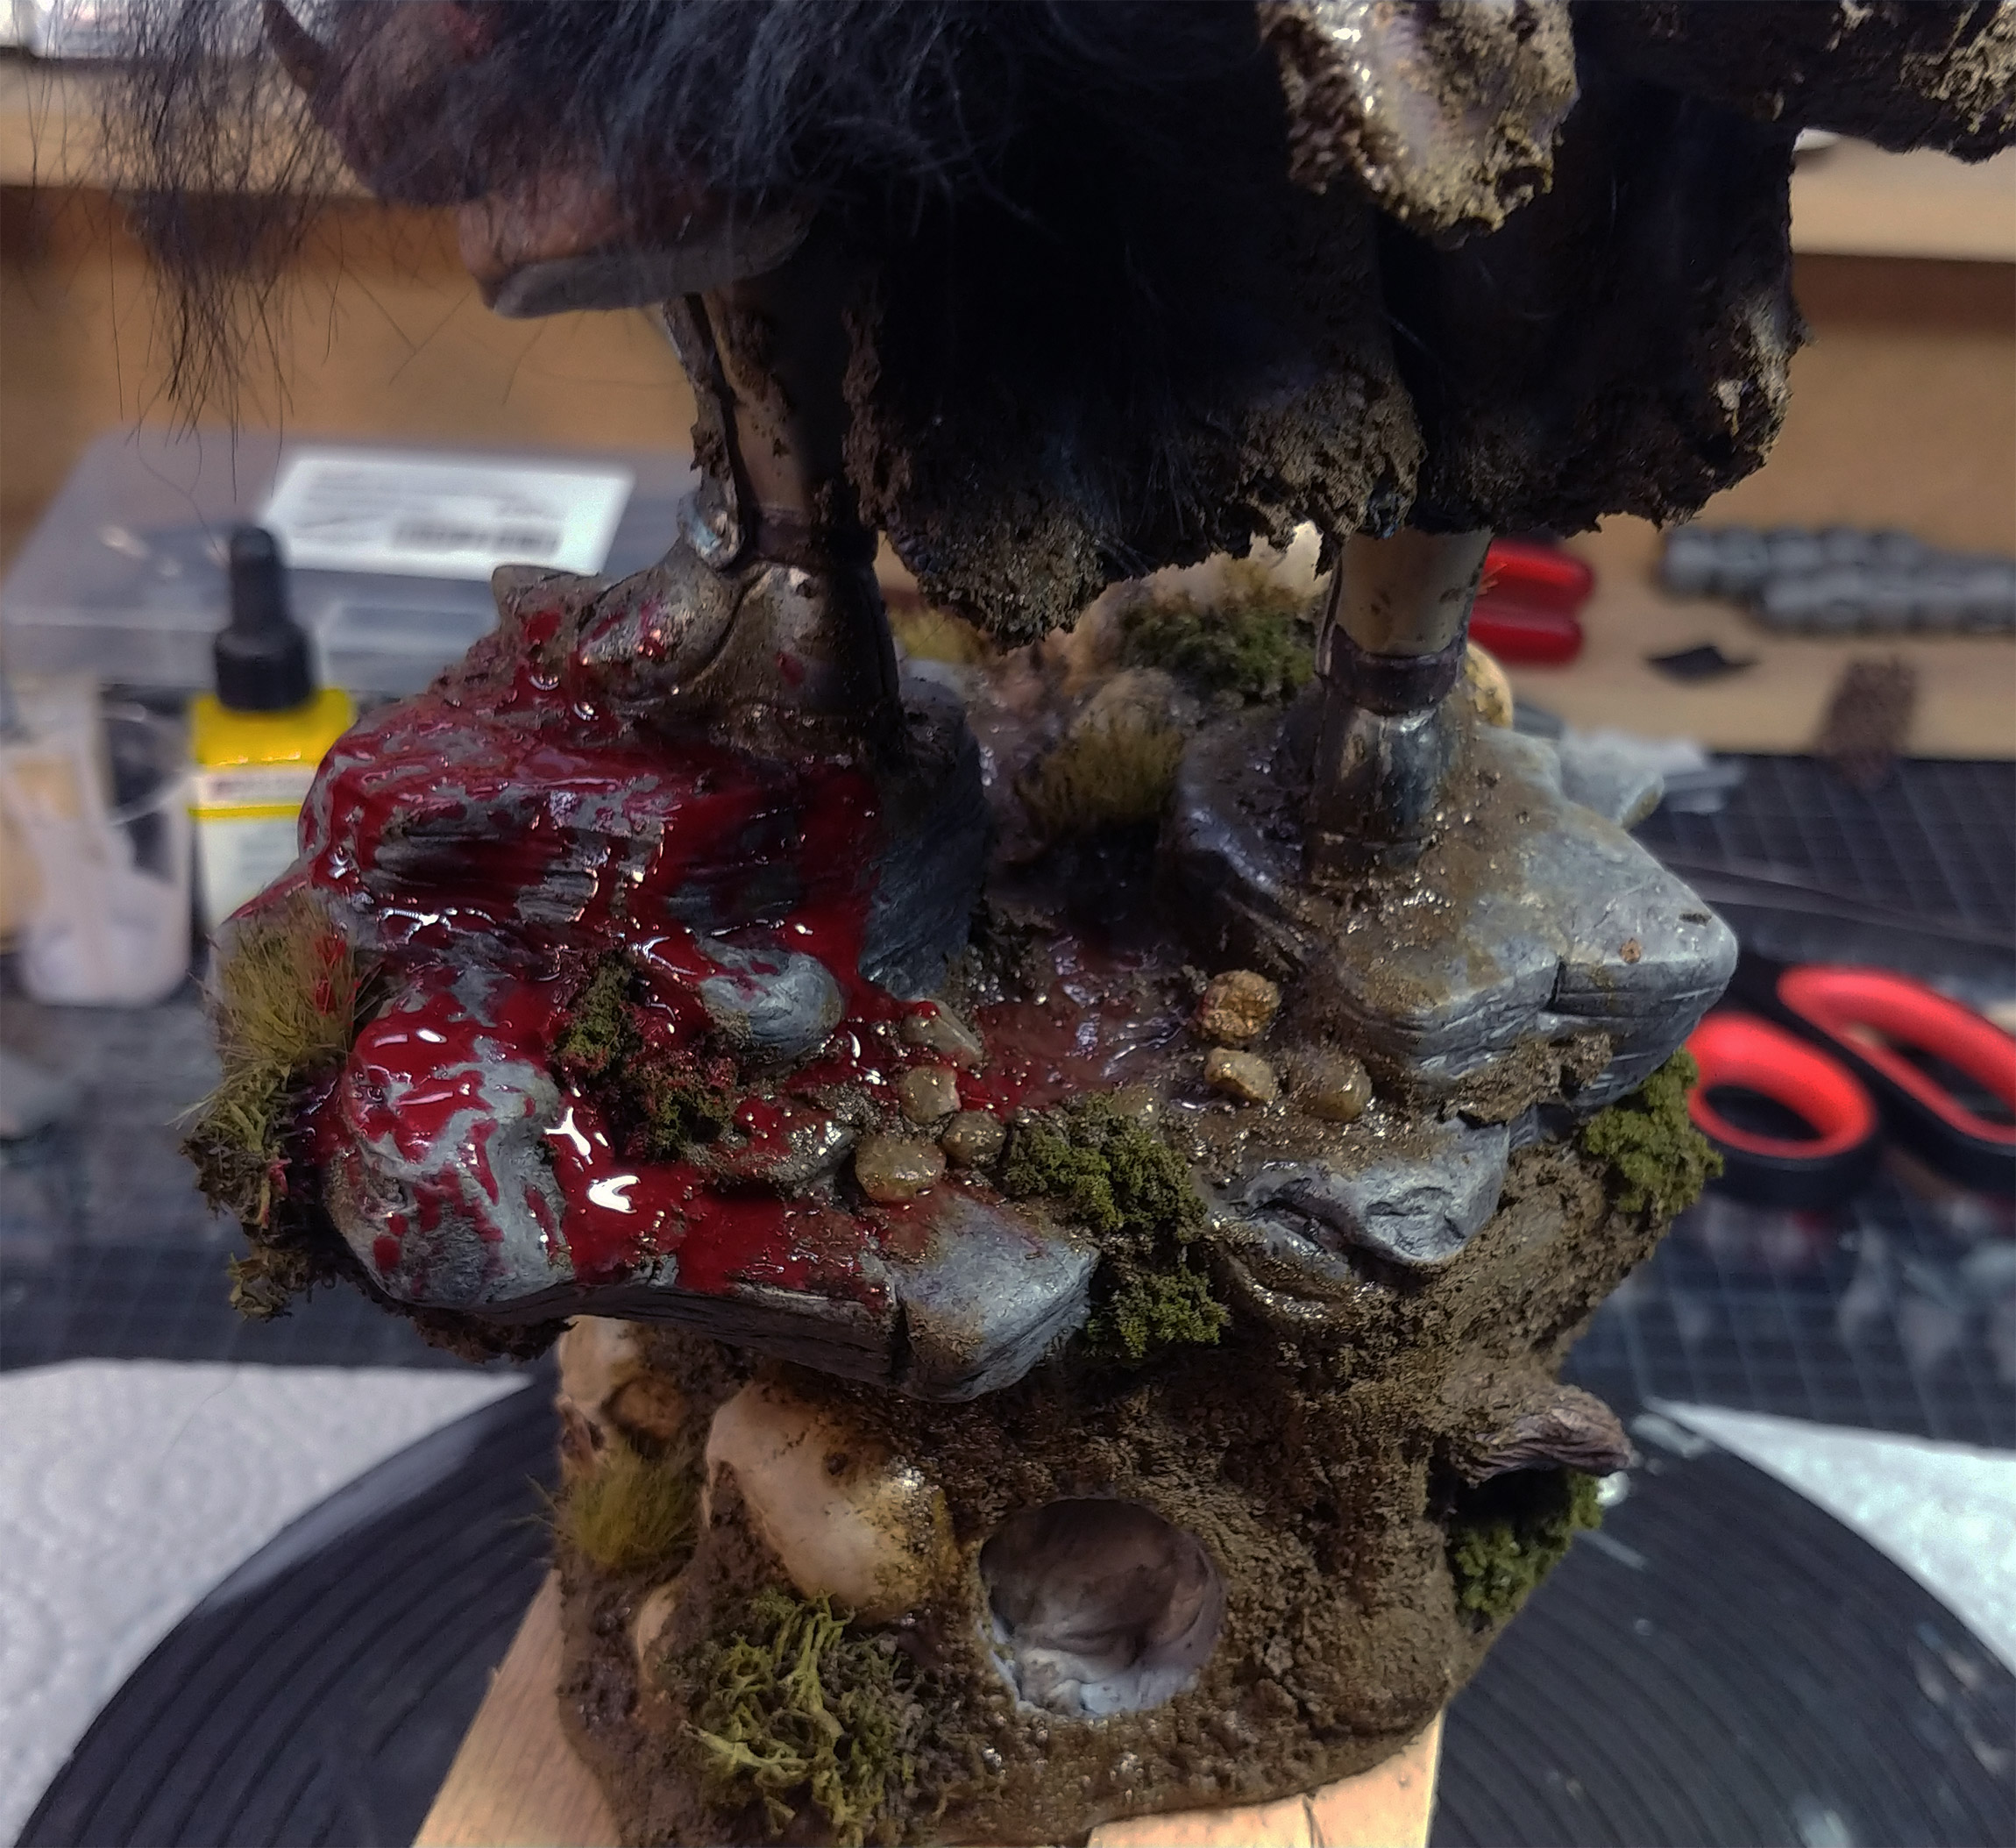
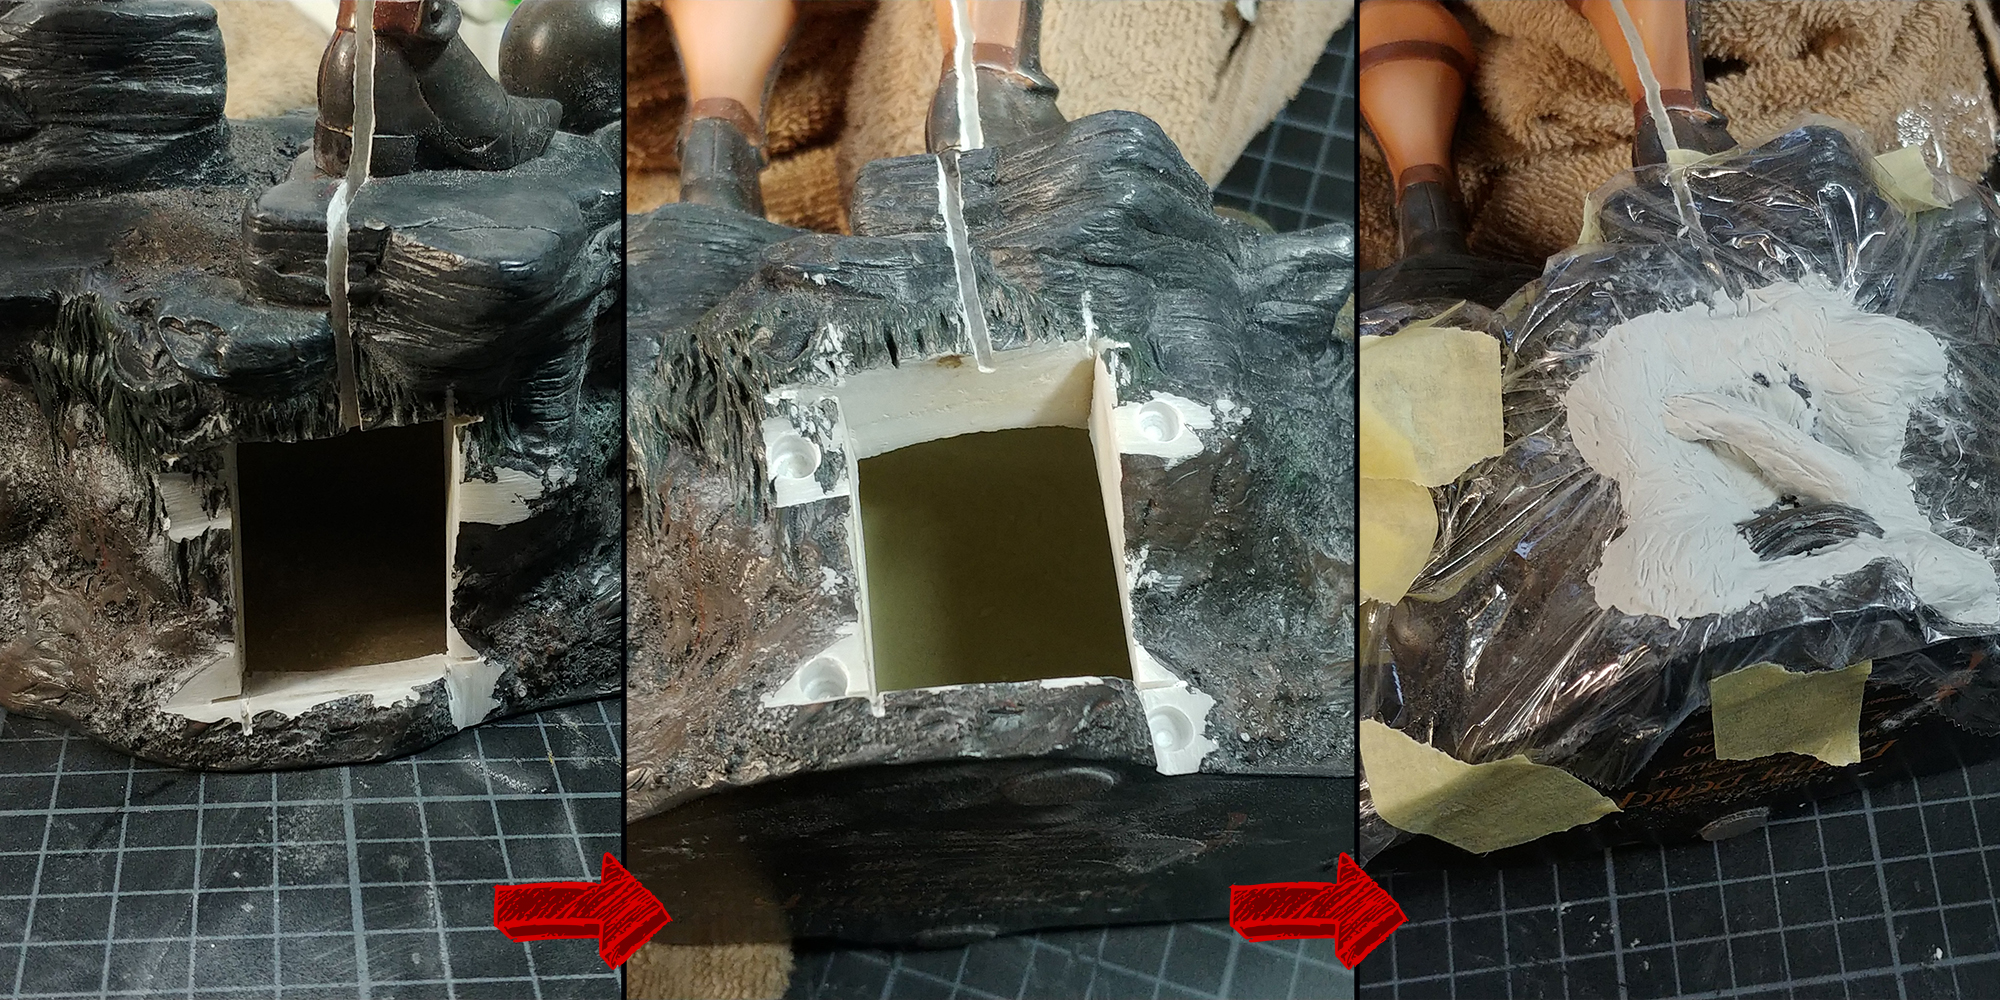
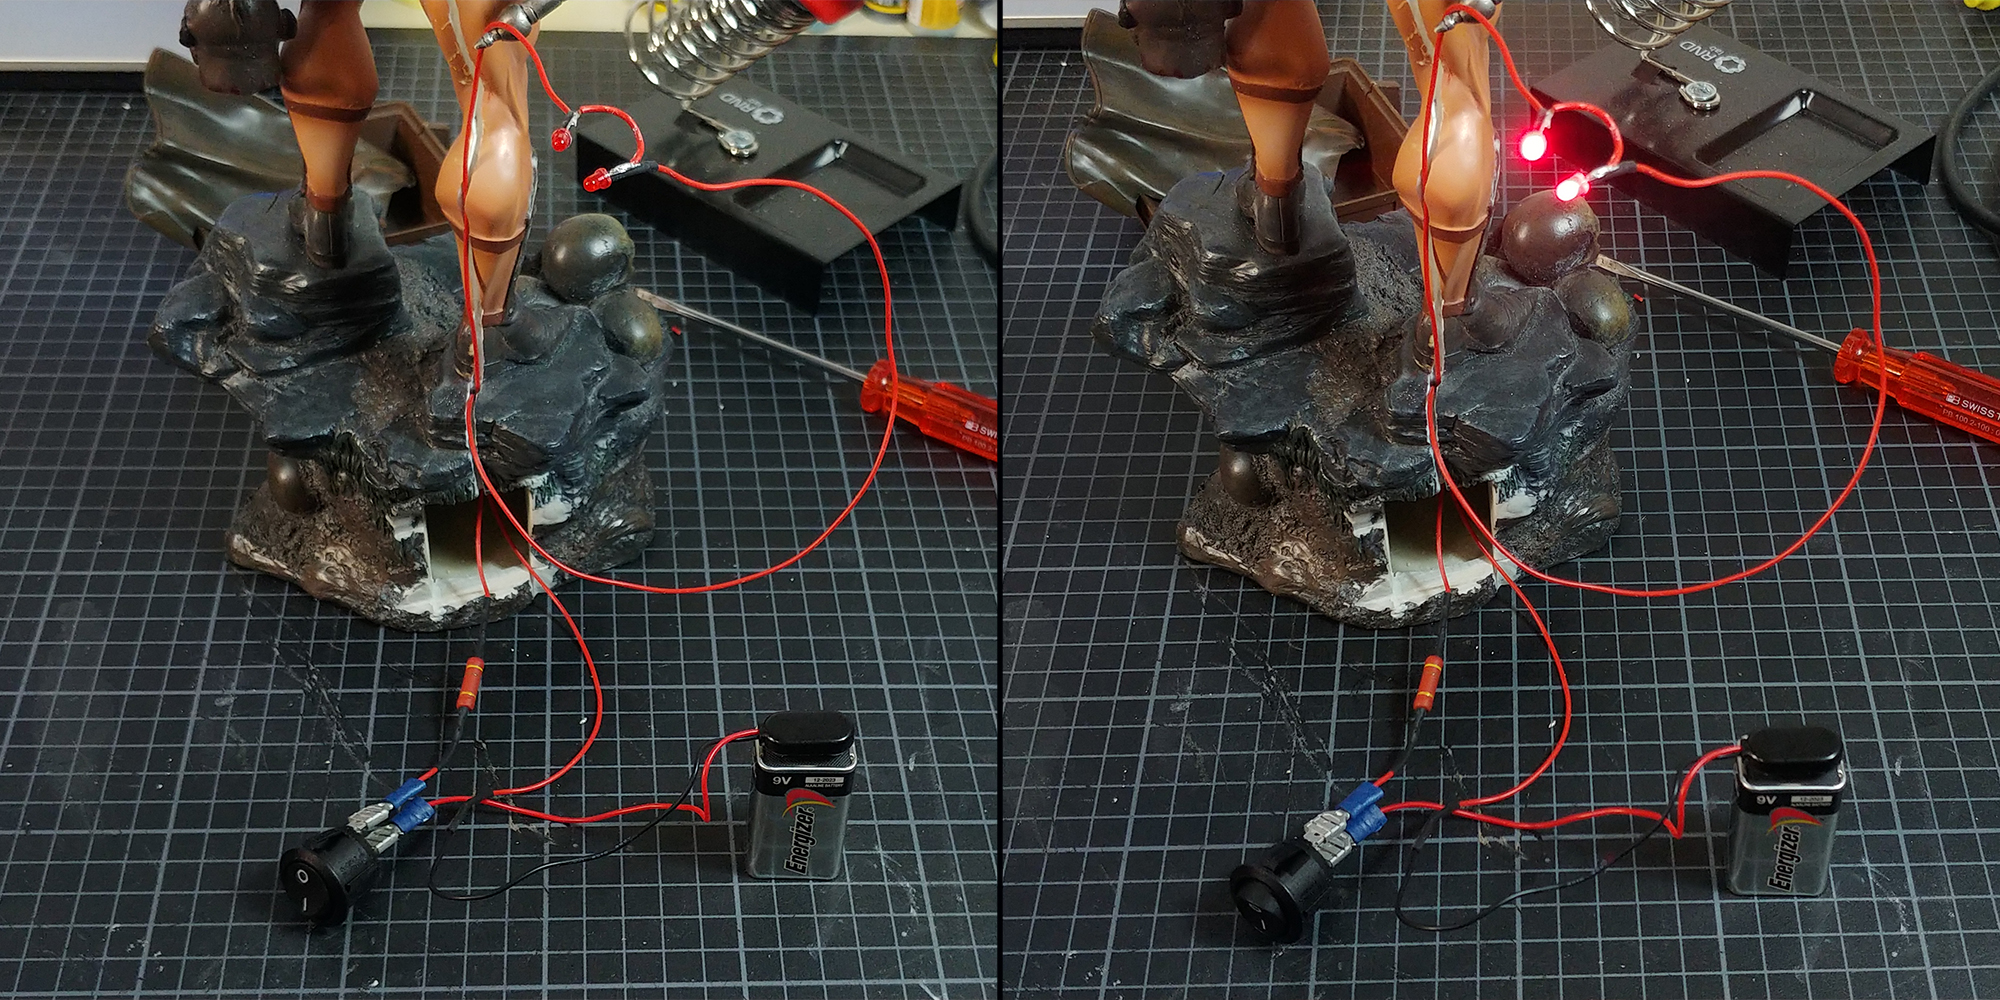
The death dealer was on a battlefield and just killed and beheaded the leader of the enemy army. He steps up the Rocks to show his victory to the ongoing battle. 

Resculpting the Head and horns
Resculpting beheaded

Remember when I glued in the LEDs before priming and painting the inside of the head? I had to rip and cut off the wires due to the very strong glue. I could already see me dremel the wire guide open because the wire was cut so short. 
But luckely I was able to fix it. It was just long enough the solder a new piece of wire to it. 

Time to paint!

Ripped off wires and primed Death Dealer
Ready to paint

I decided to go into frank frazettas direction of color scheme. That means more pale than the sideshow collectibles.

I got the first layer of skin down and wasn’t very happy about it. I was thinking about doing it again. Even though I like the look of the veins and blood vessels under the skin, I don’t like the spatters. And the top color is not exactly what I wanted. It’s better if I started new at this point instead of when I’m done with the skin. 

Skin V01
Skin V01 close

I redid the skin (3 times so far) and was pretty happy with it. I knew a lot of details would get lost, but some will shine through.

Skin 03 Work in Progress

I added a piece of cloth to the front, so he wouldn’t look like a gay gladiator anymore. 

More Details added

On a second look I wasnt happy with the texture of the cloth. The original sculpt is very smooth and has almost no texture at all, so it didn’t match.  So I smoothed out the cloth. 

Metal V1…Sometimes the image in your head doesn’t look that great in real life. The first metal was too copper/purple heavy. 

Metal V1

Whenever I advise somebody to do something again, I follow my own credo. If you are not happy with it, change it. This goes for everything. In Projects like this, a lot of people get scared of doing something again, because it means reinvesting a lot of time into something they already have „finished“. But better invest more time than being unhappy about it.

Back to the drawing board for the metal. For the second try, I decided to go with a more greyish version. There is still a little blue in it, but no longer as dominant.

New vs old metal

I was not happy with the bare legs and the quality of the orc head didn’t match the rest of the sculp, so I sculpted a new head, trophy teeth, chainmail, a sword and a cape and 3D printed it in resin. I used a Anycubic Photon (first version).

The left Head was the prototype. The final one is 4 cm tall (1.57″), the neck included. It is slightly bigger than the original Head because I assume orcs would be bigger than humans.

Orc Head sculpted in ZBrush
New Orc Head 1
New Orc Head 2
New Orc Head 3
3D printed accessoires
3D printed cape

I glued all original parts back on with 5 min epoxy and filled all the holes an gaps with Apoxie Sculpt and sanded them where needed. 

I knocked down the skin with a little grey, to move away from zombie skin more towards the original paintings and comics. I redid some details afterwards, because spraying over the entire skin will flatten the paint job.

Gaps filled

I had to to fix the axe (I broke it the 5th time…) and part of the cape. Other than that, He’s ready for weathering. After I toned down the skin with grey, I went over all cloth to do the same, to give it a more used look.

Even though the LEDs are not visible from the outside, I painted the inside of the eye sockets with „Black 2.0“. It’s mind-boggling how it doesnt reflect any light. It will enhance the illusion of a void. I used the same color for the eyes and nose of the skulls. 

Cloth toned down

Weathering done. For the mud, I used Vallejo thick mud, adding it with a brush. I thinned it down with water to get a wet spots around the boots and dirt splashes on the the rest. 

The plants are random pieces from diorama building brands. For the water I used Vallejo water texture mixed with a little burnt umber, to get the puddle look. It takes long to fully dry (3-4 days) but it’s worth it. 

Weathering done

The Orc head finally is painted. I didn’t take pictures of the process. This would be a complete „how to“ for its own. It took me around 10 hours. 

Orc Head painted

For the hair, I used hair from a costume shop. It’s very dense and thin hair. I added a drop of superglue to the head, to a some hairs and pressed them with a toothpick into the glue. For the hair in the front, I took only very few hairs at a time and just a little bit of glue. It’s better to go slow here. 

To style the hair, I used regual hair spray to fix it in place. 

Hair glued on

To attach the head to the hand, I pre drilled a hole to the head, so I could use a big screw. The Hole is not visible due to the hair…

I usually create blood with a blood color and 5 min epoxy, but I wanted to try the vallejo water texture with fake blood. Unfortunately, It wont dry full, when added so much blood color, so I went back with my usual method. But first a picture of the failed blood.

Blood with vallejo water texture and fake blood

And here the final Statue with the 5min epoxy and color blood. I used a toothpick for the little drops on the body. It’s best if you work in sections, since the epoxy drys pretty fast. So just mix a little bit, add it and like the name suggest, after 5 min its too dry already to move it around. 

For the droplets, I took a thin, black thread and glued it onto the axe and the bottom of the orc head. When dry, add the 5 min epoxy blood carefully. This way you’ll get a constant blood drip, that is pretty durable. 

Death Dealer finished

This website uses cookies to improve your experience. We'll assume you're ok with this, but you can opt-out if you wish. Accept